A Tiny Terminal For Your Serial Access Needs

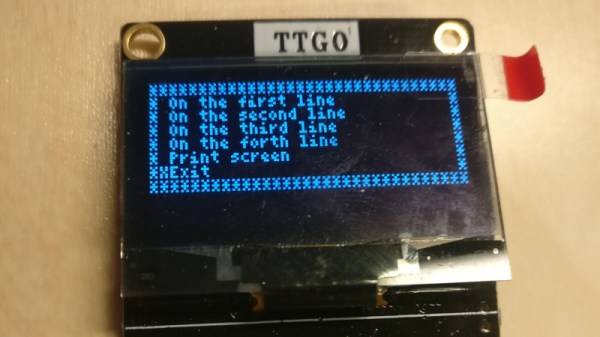
Some pieces of computing equipment have faded away without a trace, for example a modem is not a device that detains many hackers as they strive for that perfect emulation of a venerable Hayes on an Arduino. But there are some other devices that continue to hold a fascination, even years after they departed from the professional arena. A great example is the serial terminal. Once to be found on many a desk as it provided a way into a minicomputer, it has long ago been supplanted by terminal emulators or simply other portals into computing services such as the web. But in our community there are still plenty of serial terminals to be found, for example [RedHog]’s little emulated VT220 on an ESP8266 platform.

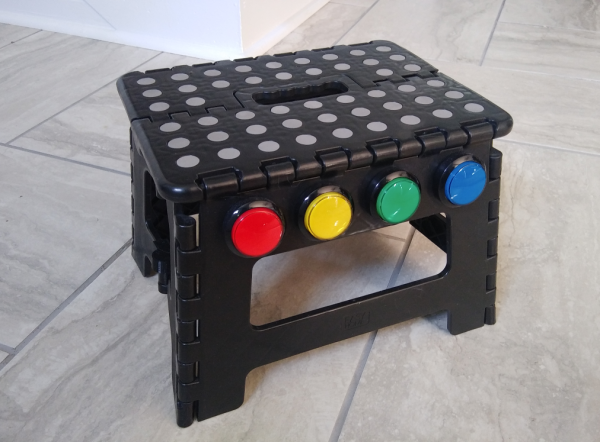
If you were hoping for a full-green screen and keyboard to plug into a hefty D-connector serial port then you’ll be a bit disappointed, as with a tiny screen and only a few buttons on a dev board or an Arduboy it’s not going to allow any 1337 vi mastery even with its on-screen keyboard. Take a look, we’ve placed a video below the  break. But despite all that it shows promise, with ability to use either the logic-level serial port or the USB serial interface. We can see that it might find a use as a serial display though, but it would fascinate us to see what could be done were it to use the 8266’s on-board WiFi in some form. If you’d like to experiment you can do so with the code on GitHub.

This isn’t the first such terminal we’ve seen here before of course, some of them have been extremely practical, while others we just want to own because they’re cool.

Continue reading “A Tiny Terminal For Your Serial Access Needs” →

Print From The ESP8266, Courtesy Of Google

The ESP8266 has become the hacker’s microcontroller of choice because it’s exceptionally easy to get the chip connected to the network and talking to other devices. The fact that it’s also absurdly cheap is just a bonus. Since nearly every piece of electronics you buy today is “smart” enough to include some form of Internet control, that means there’s no shortage of gadgets these MCUs can potentially poke and prod.

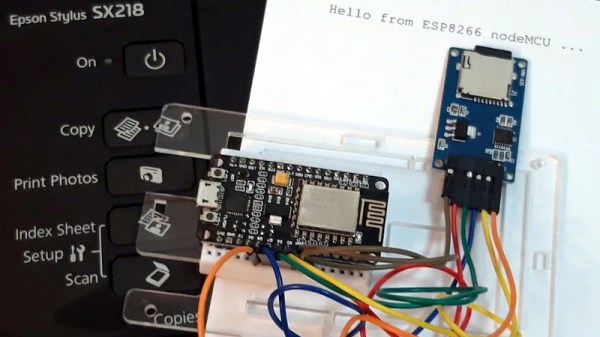
In their latest tip, [TecnoProfesor] shows how you can interface the ESP8266 with Google’s Cloud Print, a service that enables simple remote printing over the web without having to worry about having the proper device drivers. Remote printing from the ESP8266 might seem like little more than a gag at first glance, but if you’re the kind of person who likes to have hard copies of data, adding the capability to generate a daily printed report to your weather station could be a nice weekend project.

[TecnoProfesor] provides explanations and source code for printing documents of various sizes from both the ESP8266’s internal flash storage and an SPI-attached SD card. Towards the end of the write-up, there’s even some explanation of how the setPrintDocument() function of the Cloud Print API can be used in more advanced scenarios, such as printing web pages or documents stored in Google Drive.

When we see microcontrollers connected to printers, they’re usually of the small thermal kind. Being able to access “real” printers with such a simple technique offers some interesting possibilities, though like most technology, there’s potential for it to be misused.

[Thanks to Andrew for the tip.]

If You Can’t Buy The Keyboard You Want, Build It Instead

The great thing about being a maker is that when the market fails to meet your needs, you can strike out on your own. [GuzziGuy] did just that, building a bespoke mechanical keyboard that’s stylish to boot.

The aim was to create a keyboard well suited to working without a mouse, and with a keypad on the opposite side to suit a left-hander’s predilections. The case consists of an aluminium top plate with an attractive walnut base, both cut on a Workbee CNC machine. Keycaps are sourced from YDMK and Amazon, with the parts chosen giving the build a striking early 1980s workstation look.

The keys are handwired to a series of DuPont connectors for easy disassembly. These hook up to an Elite-C controller, a USB-C remix of the popular Arduino Pro Micro. Based on the ATmega32U4, it’s got native USB HID functionality, making it perfect for keyboard builds.

The fit and finish is what really makes this project, going to show that a few hours well spent on the CNC can turn you out a beautiful project. As far as mechanical keyboards go, your imagination really is the limit!

Optical Keyboards Have Us Examining Typing At Light Speed-ish

There’s a newish development in the world of keyboards; the optical switch. It’s been around for a couple years in desktop keyboards, and recently became available on a laptop keyboard as well. These are not replacements for your standard $7 keyboard with rubber membrane switches intended for puttering around on your raspberry pi. Their goal is the gamer market.

The question, though, is are these the equivalent of Monster Cables for audiophiles: overpriced status symbols? Betteridge would be proud; the short answer is that no, there is a legitimate advantage, and for certain types of use, it makes a lot of sense.

Continue reading “Optical Keyboards Have Us Examining Typing At Light Speed-ish” →

Upgrade Board Turns Typewriter Into A Teletype

It may come as little surprise to find that Hackaday does not often play host to typewriter projects. While these iconic machines have their own particular charm, they generally don’t allow for much in the way of hardware modification. But then the IBM Wheelwriter 1000 isn’t exactly a traditional typewriter, which made its recent conversion to a fully functional computer terminal possible.

A product of the Computer History Museum’s [IBM 1620 Jr. Team], this modification takes the form of a serial interface board that can be built at home and installed into the Wheelwriter. The board allows the vintage electronic typewriter to speak RS-232 and USB, so it can be connected to whatever vintage (or not so vintage) computer you can imagine. The documentation for the project gives a rough cost of $150, though that does assume you’ve already got a Wheelwriter 1000 kicking around.

The GitHub repository includes everything you need to create your own board, and there’s even a highly detailed installation guide that goes over the case modifications necessary to get the new hardware installed. It also explains that you’ll want to get a new keycap set for your Wheelwriter if you perform this modification, as the original board doesn’t have all of the ASCII characters.

So why adapt an old electric typewriter to function as a teletype? As explained by the [IBM 1620 Jr. Team], there are projects out there looking to recreate authentic 1960s-era computing experiences that need a (relatively) affordable paper terminal. The originals are too rare to use in modern recreations, but with their adapter board, these slightly less archaic input devices can be used in their place.

Once you’ve built your new teletype, or in the somewhat unlikely event you already have one at the ready, we’ve seen a couple of projects that you might be interested in to put it to use.

Break The Caps Lock Habit With This Annoying Buzzer

The much-maligned Caps Lock key has been causing problems for decades, and its continued existence is controversial enough that Google decided to drop it all together in their Chromebooks. Until the rest of the industry decides to follow their lead, they’ll likely be no shortage of awkward emails or overly aggressive comments that are the direct result of this treacherous key.

But [Glen Akins] thinks he has the solution. His creation is a tiny little USB notification device that has only one purpose: to make a terrible noise as long as the Caps Lock key is engaged. Think of it like the little indicator LED on your keyboard, but one that makes a terrible screeching noise that you simply can’t ignore. This is made possible by the fact that the Caps Lock status is handled at the OS level rather than the local input device.

The notifier is built around the PIC16F1459, as it allowed him to implement USB 2.0 while keeping the part count low. Beyond the PIC, the board uses a handful of passives and a transistor to drive the buzzer from a PWM signal. To avoid duplicated effort, everything was designed to fit inside the enclosure he already developed for his single-key keyboard that we covered last year. [Glen] and a fellow coworker from Keysight put together an excellent video on the creation and use of the buzzer that you can see after the break.

On the other end of the spectrum, and even smaller, is the “USB Capslocker” which is designed to weaponize this already troublesome feature of your keyboard.

Continue reading “Break The Caps Lock Habit With This Annoying Buzzer” →

USB Power Delivery For All The Things

The promise of USB Power Delivery (USB-PD) is that we’ll eventually be able to power all our gadgets, at least the ones that draw less than 100 watts anyway, with just one adapter. Considering most of us are the proud owners of a box filled with assorted AC/DC adapters in all shapes and sizes, it’s certainly a very appealing prospect. But [Mansour Behabadi] hasn’t exactly been thrilled with the rate at which his sundry electronic devices have been jumping on the USB-PD bandwagon, so he decided to do something about it.

[Mansour] wanted a simple way to charge his laptop (and anything else he could think of) with USB-PD over USB-C, but none of the existing options on the market was quite what he wanted. He looked around and eventually discovered the STUSB4500, a a USB power delivery controller chip that can be configured over I2C.

With a bit of nonvolatile memory onboard, it can retain its settings so he didn’t have to include a microcontroller in his design: just program it once and it can be used stand-alone to negotiate the appropriate voltage and current requirements when its plugged in.

The board that [Mansour] came up with is a handy way of powering your projects via USB-C without having to reinvent the wheel. Using the PC configuration tool and an Arduino to talk to the STUSB4500 over I2C, the board can be configured to deliver from 5 to 20 VDC to whatever device you connect to it. The chip is even capable of storing three seperate Power Delivery Output (PDO) configurations at once, so you can give it multiple voltage and current ranges to try and negotiate for.

In the past we’ve seen a somewhat similar project that used USB-PD to charge lithium polymer batteries. It certainly isn’t happening overnight, but it looks like we’re finally starting to see some real movement towards making USB-C the standard.