We are fans of macro pads and especially homebrew ones. The Apna Dost project by [np_vishwakarma] ticks most of our boxes. In addition to a few buttons, there’s an encoder, an OLED display, and it runs QMK firmware. Plus, it looks good, too.
We like that the system uses an RP2040. It is possible you have everything you need to put one of these together right now. We would wish for a few more keys, but it wouldn’t be hard to add them, either.
A common complaint about the rise of commercial AI services is that they are power-hungry and thus damage the environment. If this concerns you then [Squeezlabs] has the solution, in the form of an AI powered by a handcrank.
The guts of the system is a Raspberry Pi 5 running llama.cpp and appropriate speech conversions, but it and the Large Language Model (LLM) side are not the most interesting part of this system. The power comes from a hand crank charger of the type you’ll see for sale on the likes of AliExpress, designed for USB charging. That in itself is not enough to power the Pi though, as upticks in the processing can cause brownouts that crash the machine. Thus there’s a custom-made capacitor board to take up the strain, and even with that the handle resistance varies significantly depending on the computing load.
We can see that this is not the ideal way to experience an LLM, but maybe that’s not the point. It does however point towards a future in which the power demands of processing decrease and less effort is required. Meanwhile, this is by no means the first hand cranked project we’ve seen.
If you’re into airplanes, you’ve probably had the experience of hearing an unusual aircraft and rushing outside to try and catch a glimpse of it, all while fumbling with a smartphone to open a flight-tracking app. If your home was equipped with [cpaczek]’s Skylight project, which combines ADS-B data with a short throw projector, that little dance would have been totally unnecessary.
ADS-B or the “Automatic Dependent Surveillance-Broadcast”, is the standard by which aircraft broadcast their position and other flight information from onboard transponders. In most of the world, every commercial aircraft has an ADS-B transmitter, and they’re slowly creeping into general aviation as well. The signals aren’t hard to pick up with software-defined radio — like perhaps this RP2040 based unit we featured — or the RTL-SDR v4 this project calls for.
Using data from ADS-B, the Skylight software runs on Raspberry Pi 5 and renders icons of the aircraft exactly where they would appear above you, if that pesky ceiling wasn’t in the way. You get the flight’s code, destination and flightplan with a nice icon representing what type of airplane it is. Thanks to specifying a Pi 5, the projection is a smooth 60 FPS at 1080p. Airplanes aren’t the only things plotted, though — this is also a planetarium, giving you a full view of the stars and any satellites passing overhead. That’s obviously via an API, not SDR, and if you like you can configure it to track aircraft that way to — allowing you to set your Skylight for anywhere in the world, if you aren’t near an interesting airport.
ADS-B isn’t just for pilots and plane nerds — if you’re flying drones, you probably should keep an eye on it, too. In that case, though, you probably won’t be looking at your ceiling.
[Chris Doble] has high ambitions: he’s making his own scanning-electron microscope, and as the first step he’s built a high-vacuum system. This required its own controller to manage the various electronics involved in the system, which he’s documented and open-sourced.
The vacuum system itself starts with a rotary-vane roughing pump, which can bring a chamber down from atmospheric pressure to about 10-3 millibar. This is still too high a pressure, so the second stage is a turbomolecular high-vacuum pump, which can operate from 18 millibar down to 10-7 millibar. To protect the turbomolecular pump in case the roughing pump suddenly stops, it includes an anti-suckback valve. Connected to these pumps is a pressure gauge which uses a pair of sensors to sense the entire pressure range. All this setup worked well, but the turbomolecular pump and the pressure sensor each used their own interfaces, while [Chris] wanted a single interface for the eventual microscope.
[Chris] therefore designed his own controller based on the Raspberry Pi Pico 2, with firmware written in Rust. The pressure gauge uses an RS-232 interface, which he connected to the Pico’s UART pins using an RS-232 level shifter, with a null modem to swap over the transmitting and receiving pins. The turbomolecular pump used an RS-485 interface, which required a converter circuit and some level-shifting resistors. A custom PCB and 3D-printed case hold the final circuit, which provides a host computer with a single USB interface. When [Chris] tested the controller, the vacuum chamber reached a pressure of 10-6 millibar, and was still slowly falling when he ended the test.
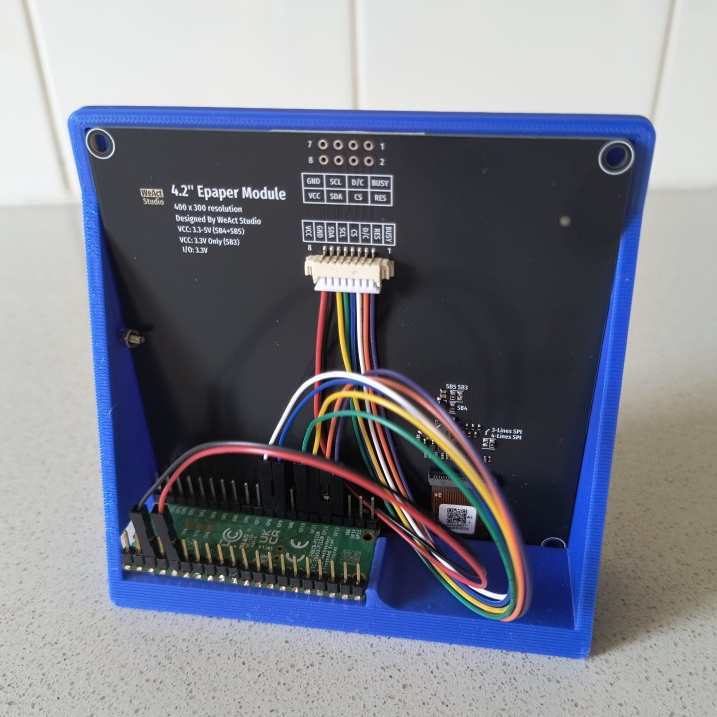
[Bob] recently completed LanguageLearner, a desktop device that increases his exposure to a second language by offering up bite-sized news items in Italian, with a complementary English translation. Even better, it’s a project made almost entirely from inexpensive parts he had on hand; it consists of little more than a Raspberry Pi Pico W, a 4.2″ E-paper display, and a 3D-printed stand.
Here’s how it works: once every few hours, the system wakes up and uses its WiFi connection to fetch news from an Italian RSS feed. Having chosen a slice of current events, it translates to English with an API call then displays both versions on the display: original Italian up top, translated English below.
Consisting of little more than a Raspberry Pi Pico W, an E-paper display, and a 3D-printed stand, it’s a great use of spare parts.
E-paper is ideal for a semi-passive project like this because once data is written to the display, there it remains without needing power or upkeep of any kind. Perfect for a device that only wakes up every few hours for an update before going right back to sleep.
Due to the limited RAM of the Raspberry Pi Pico [Bob] has to be purposeful about fetching data, so he relies on text from a simple RSS feed to avoid running out of memory while making web requests. The other minor quibble is that the driver for the display only handles plain ASCII; characters that cannot be rendered are displayed as grey boxes, which you can see in the image up top. Still, it gets the job done.
Increasing exposure to a language one is learning is beneficial, and people like to experiment. From trying to optimize human wait times by inserting language micro-lessons to a calculator that works in Toki Pona, technology offers new ways for folks to experiment with how we learn and play with language.
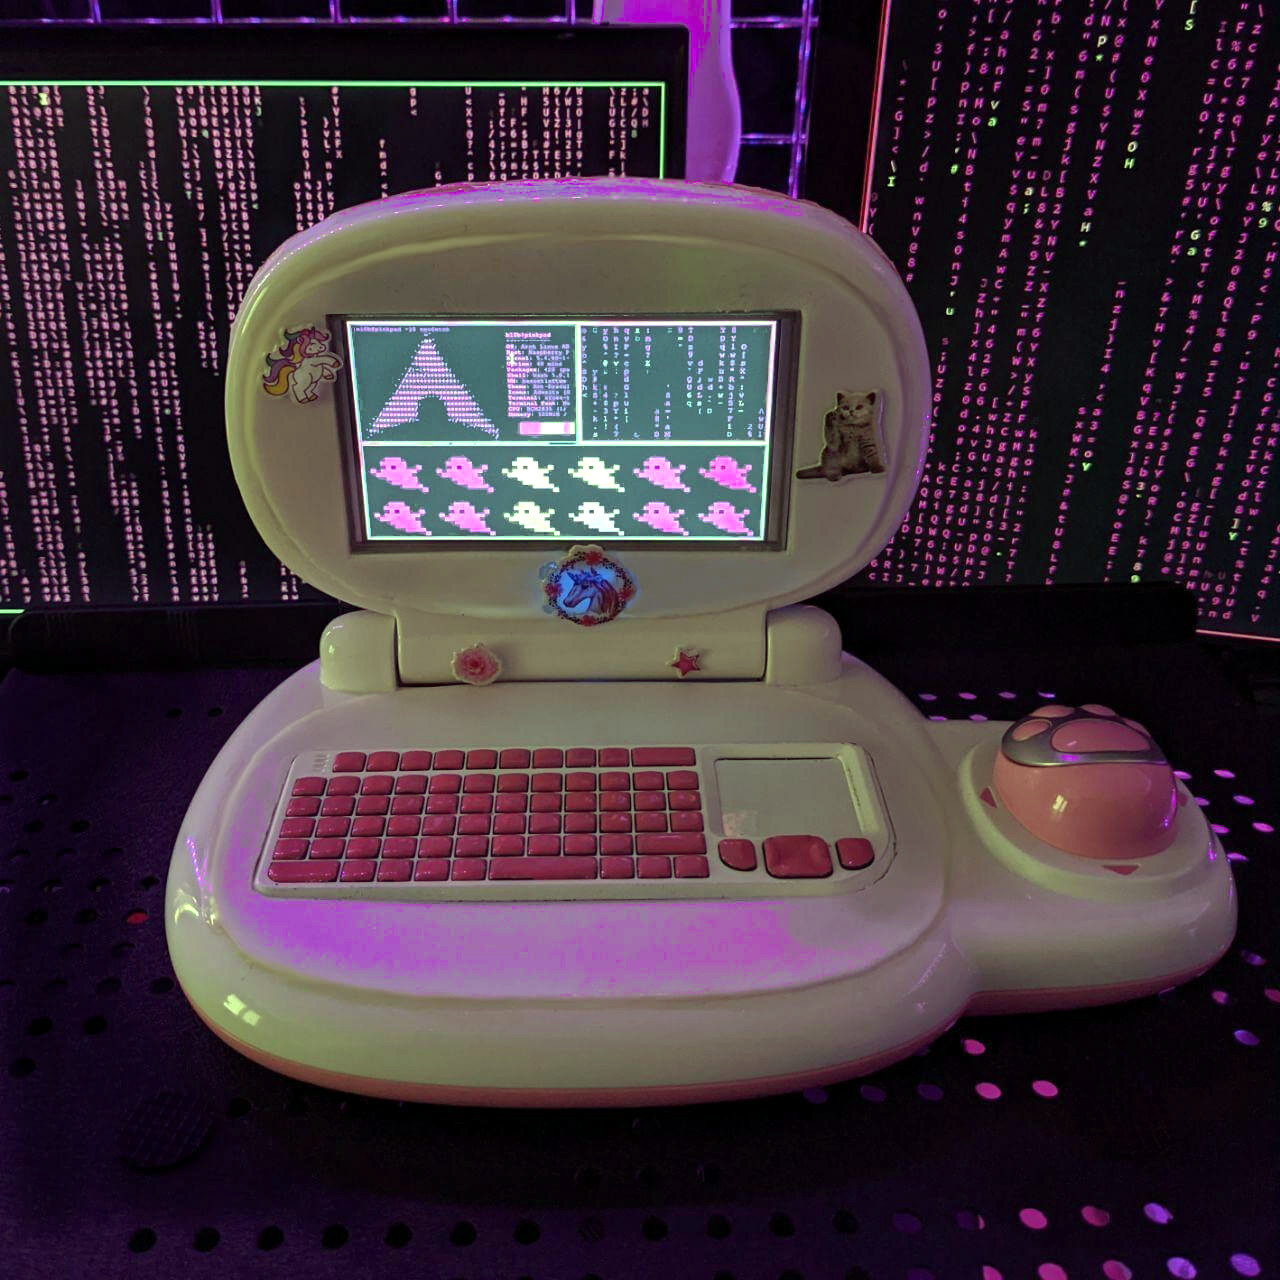
Originally envisioned as a simple DIY laptop project, [kati]’s PinkPad V1 ended up being considerably more involved than expected. But the end result is a perfectly usable, stunningly pink, and remarkably sturdy portable laptop that looks nothing like a hack job.
Originally a VTech toy, the PinkPad is a perfectly functional DIY laptop.
The PinkPad V1 started as a toy laptop for toddlers, repurposed into a DIY laptop running Linux while keeping the original clamshell design and cute aesthetic. As [kati] herself points out, while it may not seem particularly difficult to yank out a toy’s insides and stuff it with a Raspberry Pi, most of the real challenges were related to actually getting all the necessary parts and connectors and wiring to actually fit in a useful way. As anyone with experience in building something knows, working around existing enclosures or hardware almost always brings unexpected challenges.
In the end, [kati]’s PinkPad ended up sporting a mini keyboard (whose black keys were turned pink with a little nail polish) and a 5 inch touchscreen LCD. Combined with a rechargeable power supply, it provides all the comforts of an Arch Linux ARM mini laptop.
Usually, when you want to make glitchy images with lots of colors and things, you have to poke around inside a camera and successfully circuit-bend the thing without bricking it. But [sharkbiscuit101] proves that this isn’t necessary, provided you have a Raspberry Pi 4 and a few other components.
Now we don’t have a lot of detail here, but [sharkbiscuit101] is being heavily encouraged to share the relevant files and a component list. What we do know is that the there’s a screen for previewing images, a portable battery, a shutter button, a rotary encoder to dial in the weirdness, and a game pad for controls. Using the script and a slider, you can tweak different aspects of the image to basically break it down in real time. If you find a nifty combination, you can use the rotary encoder to save and then recall presets.
If you’re wondering about the grip, that’s a Sharge battery from the Bezos Barn. Per [sharkbiscuit101], it is a good size, and since Pi 4 doesn’t have a power button, it can be turned on and off at the battery.