For the average consumer, repairing relatively low-cost home devices such as microwaves and TVs just isn’t economically viable. You can hardly blame them when the repair bill could easily be higher than the cost of just buying a new model. Luckily for folks like us, that means you can often find cheap or even free appliances on the second hand market that can be brought back online with a bit of troubleshooting and some spare parts.
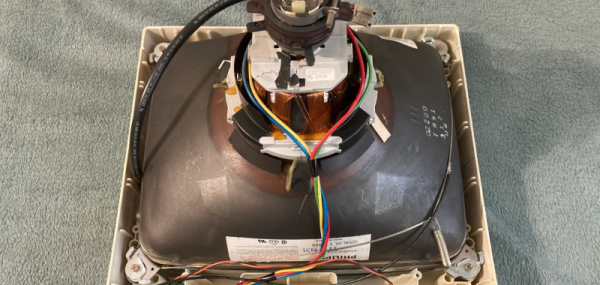
Take for example the non-functional dehumidifier [HowToLou] recently came across. You probably couldn’t find a professional repair shop that would be willing to bother with one of these things if you tried, but as he shows in the video below, that doesn’t mean the DIY’er can’t run through some probable failure modes and get the unit back up and running. As a bonus, he also walks viewers through how your typical compressor-based dehumidifier operates.
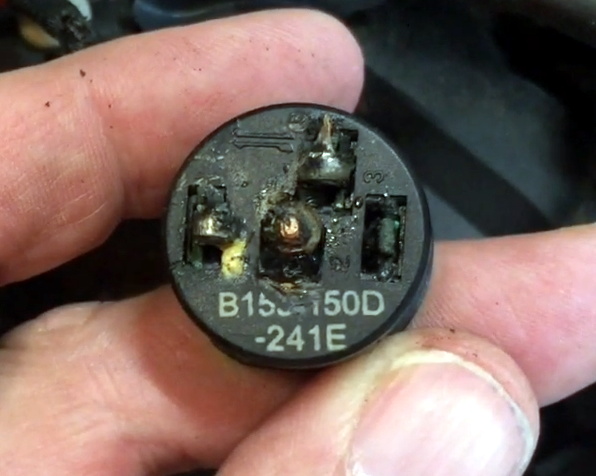
Beyond the lack of water in the collection compartment, the first sign that something was wrong with this dehumidifier was that the compressor wasn’t running. Upon closer inspection, [HowToLou] determined that the thermal cut-off switch had failed and was stuck open. Luckily it had a visible part number so he could order a replacement, and in the meantime, all he had to do was cut the switch out of the circuit and wire up the compressor’s power directly.
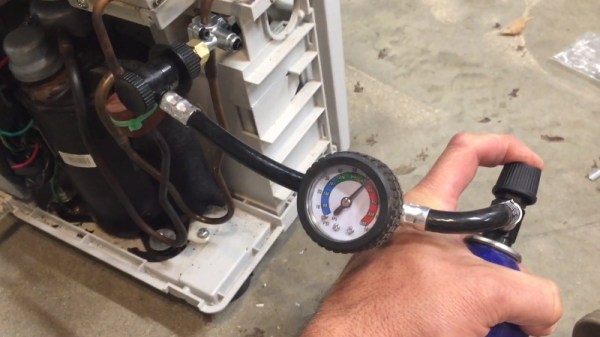
Unfortunately, even with the compressor running, no water was being collected. Noticing that the evaporator coils weren’t getting very cold, [HowToLou] thought the unit might be low on refrigerant. Usually these systems aren’t meant to be recharged, but with a clever piercing tap valve, you can add a quick-connect port to the low pressure side. This particular dehumidifier happened to be filled with the same R134a used in automotive A/C systems, so a quick trip to the auto parts store got him a can of refrigerant complete with a handy pressure gauge.
After getting juiced up, [HowToLou] shows ice forming on the coils and plenty of water getting dumped into the tank. Automotive A/C refill cans usually include some substance to stop or reduce leaks in the system, so hopefully this will end up being a long-term fix. It might not be the most elaborate dehumidifier repair we’ve ever seen, but it’s certainly the most approachable. If you ever see one of these things laying on the side of the road, maybe you should pick it up and see what ails it.
Continue reading “Recharged Dehumidifier Put Back Into Service”