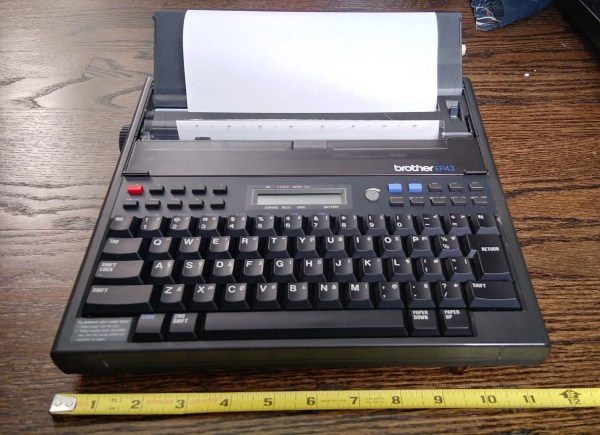
A few months ago, I fell down the internet rabbit hole known as Ted Munk’s typewriter site. I don’t remember if I just saw this Brother EP43 typewriter for sale and searched for information about them, or went looking for one after reading about them. Either way, the result is the same — I gained a typewriter.
Now I’m not really a typewriter collector or anything, and this is my first word processor typewriter. When it arrived from Goodwill, I anxiously popped four ‘C’ cells in and hoped for the best. It made a print head noise, so that was a good sign. But almost immediately after that, there was a BANG! and then a puff of smoke wafted out from the innards. My tiny typewriter was toast. Continue reading “Clacker Hacker: Popping A Cap In A Brother EP43 Thermal Typewriter”→
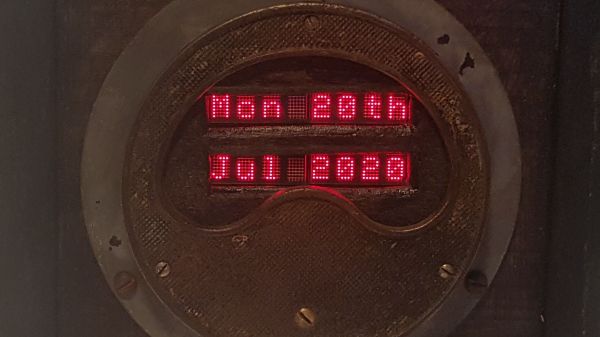
One time-proven method to make a lesson memorable is to make it a story, but that is not easy if your core material is the repair log of a rotted out analog ammeter. Most folks don’t need a 300A meter on their drill press, so [Build Comics] converted it to a text display and describes the procedure like they are writing a comic book. He is using HDLO-3416 LED cluster arrays for that dated-but-legible industrial feel, and everything looks right at home in a box made from oak and steel. Even the USB cord even gets a facelift by running it inside a fabric shoelace. In our own lives, covering charging cables is a hack on its own because we don’t want to fumble with the wrong charger when it is time to sleep or drive. Glow-in-the-dark cord upgrades, anyone?
We don’t have a pre-operation picture of the subject, but the innards suggest that it comes from the bottom of an industrial scrap pile. There is a cross-hatch pattern on the front plate, which hinted at 3D printing, but if you look closely at the early images, you can see that it is original. There is a nodeMCU board to fetch the date information and control the four alphanumeric displays. Except for the red lights, all the new hardware hides behind wood or steel, so this old workhorse’s aesthetic lives on and has a story to share that is a delight to read.
It’s a common enough situation, that when an older piece of equipment dies, and nobody wants to spend the money to repair it. Why fix the old one, when the newer version with all the latest bells and whistles isn’t much more expensive? We all understand the decision from a business standpoint, but as hackers, it always feels a bit wrong.
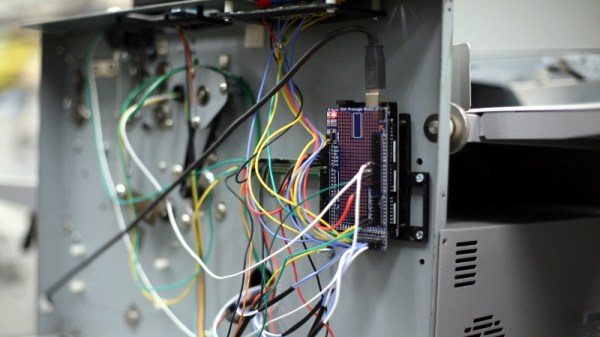
Which is exactly why [tommycoolman] decided to rebuild the office’s recently deceased Duplo CC-330 heavy duty business card cutter. It sounds like nobody really knows what happened to the machine in the first place, but since the majority of the internals were cooked, some kind of power surge seems likely. Whatever the reason, almost none of the original electronics were reused. From the buttons on the front panel to the motor drivers, everything has been implemented from scratch.
An Arduino Mega 2560 clone is used to control four TB6600 stepper motor drivers, with a common OLED display module installed where the original display went. The keypad next to the screen has been replaced with 10 arcade-style buttons soldered to a scrap of perfboard, though in the end [tommycoolman] covers them with a very professional looking printed vinyl sheet. There’s also a 24 V power supply onboard, with the expected assortment of step up and step down converters necessary to feed the various electronics their intended voltages.
In the end, [tommycoolman] estimates it took about $200 and 30 hours of work to get the card cutter up and running again. The argument could be made that the value of his time needs to be factored into the repair bill as well, but even still, it sounds like a bargain to us; these machines have a four-figure price tag on them when new.
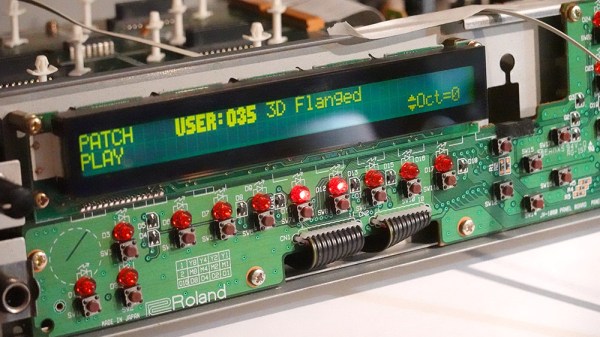
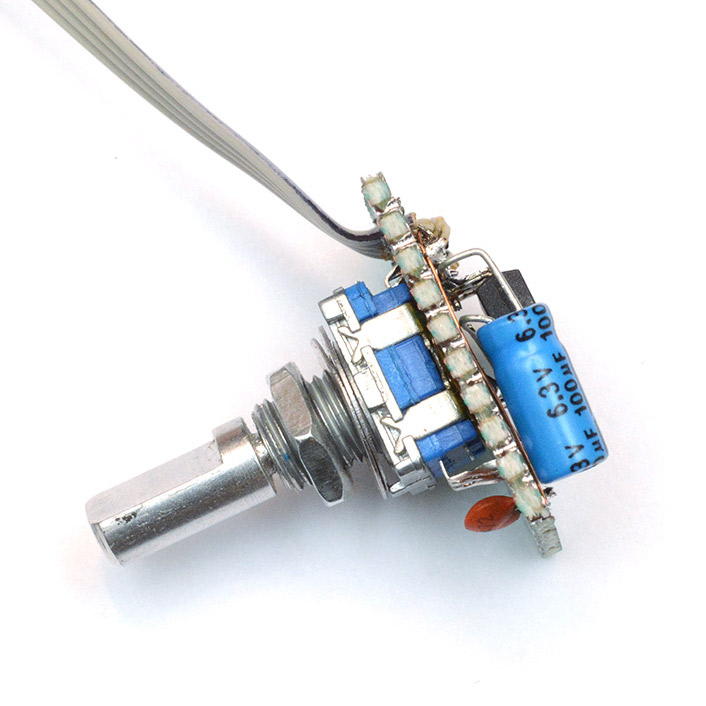
[Mitxela]’s repair of a Roland JV-1080 (a rack-mounted 90s-era synthesizer) sounds simple: replace a broken rotary encoder on the front panel. It turned out to be anything but simple, since the part in question is not today’s idea of a standard rotary encoder at all. The JV-1080 uses some kind of rotary pulse switch, which has three outputs (one for each direction, and one for pushing the knob in like a button.) Turn the knob in one direction, and one of the output wires is briefly shorted to ground with every detent. Turn it the other way, and the same happens on the other output wire. This is the part that needed a replacement.
The finished unit uses a modern rotary encoder and microcontroller in place of the original part, and implements a few tricks to power it.
Rather than track down a source for the broken part, [Mitxela] opted to replace it with a modern rotary encoder combined with an ATtiny85 microcontroller to make it act like something the JV-1080 understands and expects. There was an additional wrinkle, however. The original rotary pulse switch is an entirely passive device, and lives at the end of a four-conductor cable with no power provided on it. How could the ATtiny85 be powered without resorting to running a wire to a DC voltage supply somewhere? Success was had, but it did take some finessing.
For the power, it turns out that the signal wires are weakly pulled up to +5 V and [Mitxela] used that for a power supply to the microcontroller. Still, by itself that wasn’t enough, because the ATtiny85 can easily consume more current than the weak pullups can source. We really recommend reading all the details in [Mitxela]’s writeup, but the short version is that the ATtiny85 does two things.
First, it minimizes its power usage by spending most of its time in sleep mode (consuming barely any power at all) and uses an interrupt to wake up just long enough to handle knob activity. Second, the trickle of power from the weak pullups doesn’t feed the ATtiny directly. It charges a 100 uF capacitor through a diode, and that is what keeps the microcontroller from browning out during its brief spurts of activity. Even better, after browsing the datasheet for the ATtiny, [Mitxela] saw it was possible to use the built-in ESD protection diodes for this purpose instead of adding a separate component.
It’s a neat trick and makes for a very compact package. Visit the project’s GitHub repository to dive into the nitty gritty. In the end, a single assembly at the end of a 4-wire connector acts just like the original passive component, no extra wires or hardware modifications needed.
When opening older hardware it’s never quite certain what will be found on the inside. But at least [Mitxela]’s repair duties on this synth didn’t end up with him tripping out on LSD.
One of the best parts about Hackaday is how much you learn from the projects that people tackle, especially when they are repairs on old gear with unknown failure modes and potentially multiple problems. By the same token, the worst part about Hackaday is seeing what other people are capable of and knowing that you’ve got a long way to go to catch up to them.
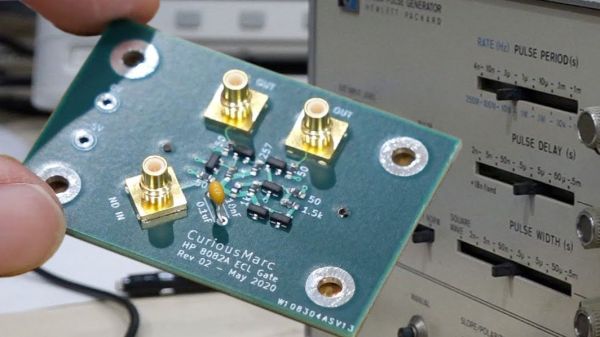
A case in point is [Curious Marc]’s recent repair of an old pulse generator. The instrument in question is an H-P 8082A, a device from a time when H-P was a place where “good engineers managed by even better engineers [wanted] to help other engineers,” as [Marc] so eloquently puts it. The instrument was capable of 250 MHz output with complete control over the amplitude, frequency, duty cycle, and rising and falling edge geometry of the pulses, in addition to being able to output double pulses. For an all-analog instrument made in 1974, it was in decent shape, and it still powered up and produced at least the square wave output. But [Marc]’s exploration revealed a few problems, which are detailed and partially addressed in the first video below.
In part two [Marc] goes after the problem behind the pulse delay function. He traced it to a bad IC, which was bad news since it was a custom H-P part using emitter-coupled logic (ECL) to achieve the needed performance that can no longer be sourced. So naturally, [Marc] decided to replace the chip with a custom circuit. The design and simulation of the circuit are detailed in part two, while the non-trivial details of designing a PCB to handle the high-speed signals take up most of part three. We found the details on getting the trace impedance just right fascinating.
In the end, [Marc]’s pulse generator was salvaged. It’ll go into service helping him probe the mysteries of vintage electronics from the Apollo era, so we’re looking forward to seeing more about this great old instrument.
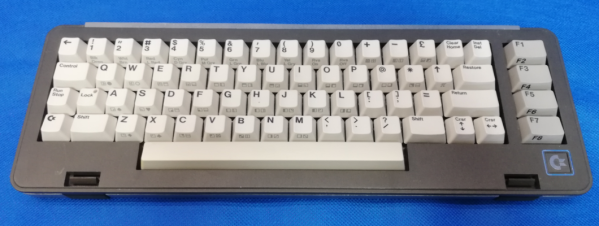
Released in 1984, the Commodore SX-64 Executive Computer was one of the first portable luggable color computers. It cost twice as much as a Commodore 64, had a tiny 5″ diagonal screen, and couldn’t actually support both 5¼” drives as advertised. On the upside, people say it had a slightly better keyboard than its classic cousin.
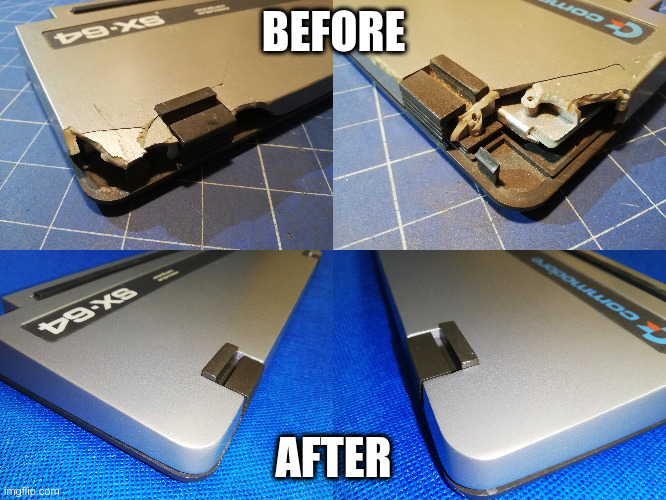
Plenty of the other vintage computer restorations [Drygol] has done required plastic welding, which uses heat or a lot of friction to smooth over cracks. Some of those have not stood the test of time, so he’s now in the habit of stabilizing cracks with brass mesh before filling them with fiberglass putty.
The best part is how [Drygol] managed to rebuild the corners using the same methods, soldering the brass mesh at the 90° joins, and reinforcing them with thick copper wire before beginning the painstaking putty/sand/putty process. The use of blank copper clad boards as straight edges and thickness gauges is genius.
There’s a whole lot to learn here, and the adventure beings with something that probably keeps a lot of people from trying stuff like this in the first place: how do you safely remove the badges?
You’re right, plastic welding is awesome. There even used to be a toy plastic welder. But there’s no need to troll the electronic auction bay to give it a try — just use a cheap soldering iron.
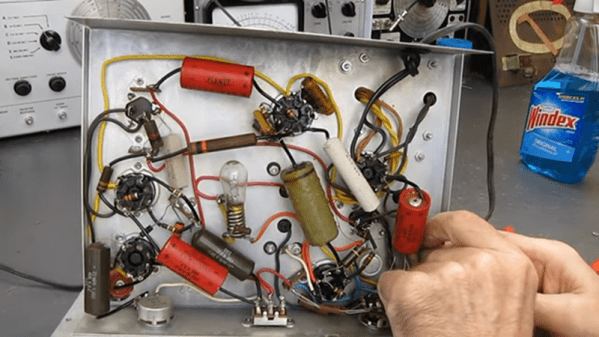
The Eico model 377 was a pretty common audio signal generator. [The Radio Mechanic] picked one up from 1956 that was in reasonably good shape, and shares a teardown and repair of the unit that you can see in the video below. The device could produce sine and square waves using a few tubes.
The unit was a bit different inside than expected because there were several versions made that shared the same model number. The bottom of the case had some goo in it, which is never a good sign. Unsurprisingly, the culprit was an old capacitor.