Before there were home computers, among the hottest pieces of consumer technology to own was a pocket calculator. In the early 1970s a series of exciting new chips appeared which allowed the impossible to become the affordable, and suddenly anyone with a bit of cash could have one.
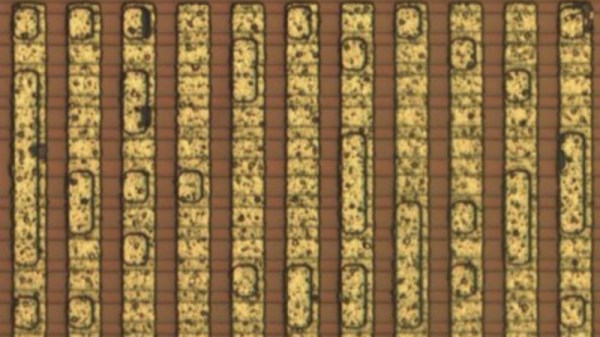
Perhaps one of the more common series of chips came from Texas instruments, and it’s one of these from which [Veniamin Ilmer] has retrieved the ROM contents. In a way there’s nothing new here as the code is well known, it’s the way it was done which is of interest. A photo of the die was analysed, and with a bit of detective work the code could be deduced merely from the picture.
These chips were dedicated calculators, but under the hood they were simple pre-programmed microcontrollers. Identifying the ROM area of the chip was thus relatively straightforward, but some more detective work lay in getting to the bottom of how it could be decoded before the code could be verified. So yes, it’s possible to read code from an early 1970s chip by looking at a photograph.
A very similar chip to this one was famously reprogrammed with scientific functions to form the heart of the inexpensive Sinclair Cambridge Scientific.