This week we’ve seen a tsunami of news stories about a vulnerability in Intel processors. We’re certain that by now you’ve heard of (and are maybe tired of hearing about) Meltdown and Spectre. However, as a Hackaday reader, you are likely the person who others turn to when they need to get the gist of news like this. Since this has bubbled up in watered-down versions to the highest levels of mass media, let’s take a look at what Meltdown and Spectre are, and also see what’s happening in the other two rings of this three-ring circus.
Meltdown and Spectre in a Nutshell
These two attacks are similar. Meltdown is specific to Intel processors and kernel fixes (basically workarounds implemented by operating systems) will result in a 5%-30% speed penalty depending on how the CPU is being used. Spectre is not limited to Intel, but also affects AMD and ARM processors and kernel fixes are not expected to come with a speed penalty.
Friend of Hackaday and security researcher extraordinaire Joe Fitz has written a superb layman’s explanation of these types of attacks. His use of the term “layman” may be a little more high level than normal — this is something you need to read.
The attack exploits something called branch prediction. To boost speed, these processors keep a cache of past branch behavior in memory and use that to predict future branching operations. Branch predictors load data into memory before checking to see if you have permissions to access that data. Obviously you don’t, so that memory will not be made available for you to read. The exploit uses a clever guessing game to look at other files also returned by the predictor to which you do have access. If you’re clever enough, you can reconstruct the restricted data by iterating on this trick many many times.
For the most comprehensive info, you can read the PDF whitepapers on Meltdown and Spectre.
Update: Check Alan Hightower’s explanation of the Meltdown exploit left as a comment below. Quite good for helping deliver better understanding of how this works.
Frustration from Kernel Developers
These vulnerabilities are in silicon — they can’t be easily fixed with a microcode update which is how CPU manufacturers usually workaround silicon errata (although this appears to be an architectural flaw and not errata per se). An Intel “fix” would amount to a product recall. They’ve already said they won’t be doing a recall, but how would that work anyway? What’s the lead time on spinning up the fabs to replace all the Intel chips in use — yikes!
So the fixes fall on the operating systems at the kernel level. Intel should be (and probably is behind the scenes) bowing down to the kernel developers who are saving their bacon. It is understandably frustrating to have to spend time and resources patching these vulnerabilities, which displaces planned feature updates and improvements. Linus Torvalds has been throwing shade at Intel — anecdotal evidence of this frustration:
“I think somebody inside of Intel needs to really take a long hard look at their CPU’s, and actually admit that they have issues instead of writing PR blurbs that say that everything works as designed.”
That’s the tamest part of his message posted on the Linux Kernel Mailing List.
Stock Sales Kerfuffle is Just a Distraction
The first thing I did on hearing about these vulnerabilities on Tuesday was to check Intel’s stock price and I was surprised it hadn’t fallen much. In fact, peak to peak it’s only seen about an 8% drop this week and has recovered some from that low.
Of course, it came out that back in November Intel’s CEO Bryan Krzanich sold off his Intel stock to the tune of $24 Million, bringing him down to his contractual minimum of shares. He likely knew about Meltdown when arranging that sale. Resist the urge to flame on this decision. Whether it’s legal or not, hating on this guy is just a distraction.
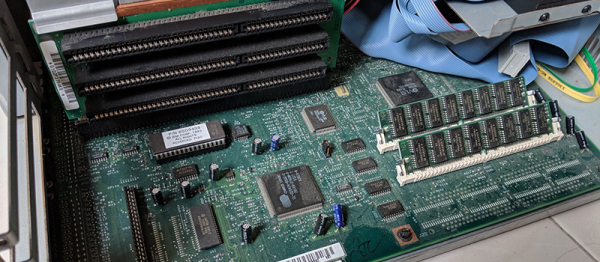
What’s more interesting to me is this: Intel is too big to fail. What are we all going to do, stop using Intel and start using something else? You can’t just pull the chip and put a new one in, in the case of desktop computers you need a new motherboard plus all the supporting stuff like memory. For servers, laptops, and mobile devices you need to replace the entire piece of equipment. Intel has a huge market share, and silicon has a long production cycle. Branch prediction has been commonplace in consumer CPUs going back to 1995 when the Pentium Pro brought it to the x86 architecture. This is a piece of the foundation that will be yanked out and replaced with new designs that provide the same speed benefits without the same risks — but that will take time to make it into the real world.
CPUs are infrastructure and this is the loudest bell to date tolling to signal how important their design is to society. It’s time to take a hard look at what open silicon design would bring to the table. You can’t say this would have been prevented with Open design. You can say that the path to new processors without these issues would be a shorter one if there were more than two companies producing all of the world’s processors — both of which have been affected by these vulnerabilities.