Arbitrary Waveforms On The Cheap

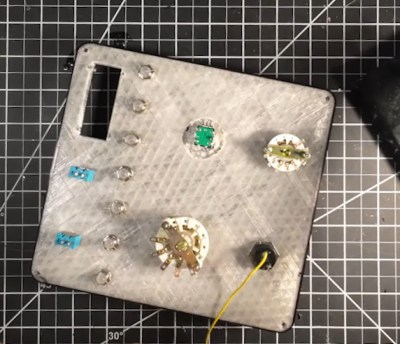
A signal generator that can produce the usual sine, square, and triangle waves is handy and has been a staple of electronic benches for decades. Being able to craft custom signals opens up new horizons, but historically, these instruments were expensive. The price has come down, though, and [Rishin Goswami] made a 5 MHz 8-bit signal generator with 131K data points of arbitrary waveform for a low price: about $20. If you want to spend a bit more, you can improve the output DAC and op amps, but even that should cost well under $100, all in.

This is one of those projects that seems easy until you start digging into it. For example, storing some points and generating signals using any microcontroller isn’t a big deal. But minimizing jitter and maximizing speed with a conventional processor is difficult. That’s why [Rishin] uses a Raspberry Pi Pico. The programmable I/O units are perfect for generating waveform data fast and reliably. You can see the project go through its paces in the video below.

The Pi streams data to an 8-bit DAC. However, it would be easy to improve resolution with a different converter. The DAC0808 also limits the instrument’s sample rate. The processor could likely go much faster if it had a DAC accommodating higher speeds.

This is just a proof-of-concept, so don’t expect fancy GUIs or the ability to import spreadsheets. You control the device from a command-line-like interface. Still, a good example of how to take advantage of the Pi’s hardware. We took a shot at a similar device nearly a decade ago. Those programmable I/O blocks are finding uses in some surprising applications.

Continue reading “Arbitrary Waveforms On The Cheap”

Hackaday Prize 2023: Circuit Scout Lends A Hand (Or Two) For Troubleshooting

Troubleshooting a circuit is easy, right? All you need is a couple of hands to hold the probes, another hand to twiddle the knobs, a pair of eyes to look at the schematic, another pair to look at the circuit board, and, for fancy work, X-ray vision to see through the board so you know what pads to probe. It’s child’s play!

In the real world, most of us don’t have all the extra parts needed to do the job right, which is where something like CircuitScout would come in mighty handy. [Fangzheng Liu] and [Thomas Juldo]’s design is a little like a small pick-and-place machine, except that instead of placing components, the dual gantries place probes on whatever test points you need to look at. The stepper-controlled gantries move independently over a fixture to hold the PCB in a known position so that the servo-controlled Z-axes can drive the probes down to the right place on the board.

As cool as the hardware is, the real treat is the software. A web-based GUI parses the PCB’s KiCAD files, allowing you to pick a test point on the schematic and have the machine move a probe to the right spot on the board. The video below shows CircuitScout moving probes from a Saleae logic analyzer around, which lets you both control the test setup and see the results without ever looking away from the screen.

CircuitScout seems like a brilliant idea that has a lot of potential both for ad hoc troubleshooting and for more formal production testing. It’s just exactly what we’re looking for in an entry for the Gearing Up round of the 2023 Hackaday Prize.

Continue reading “Hackaday Prize 2023: Circuit Scout Lends A Hand (Or Two) For Troubleshooting”

USB-C Cable Tester Is Compact And Affordable

We’ve all been bitten before by USB cables which were flaky, built for only charging, or just plain broken. With the increased conductor count and complexity of USB Type C, there are many more ways your cable can disappoint you. Over in Austria, [Peter Traunmüller] aka [petl] has designed the C2C caberQU USB C cable tester. This small PCB tester checks every wire on the cable, including the shield, and both connector orientations. He also makes a version for testing USB A to C cables (see video below the break).

Automatic cable testers are often associated with factory production, where you want to test a large quantity of cables quickly and automatically, and are priced accordingly. But this project makes it affordable and easy for anyone to test single cables in a home lab or small office.

The tester only checks for basic continuity, but that should solve a majority of USB-C cable problems. All the documentation for this tester is available on the project’s GitHub repository, including Gerbers, schematics, and mechanical details. Or if you’d rather buy one pre-made, [petl] has put them up for sale on Tindie. Continue reading “USB-C Cable Tester Is Compact And Affordable”

STM32 Oscilloscope Uses All The Features

[jgpeiro] is no slouch when it comes to building small, affordable oscilloscopes out of common microcontrollers. His most recent, based on an RP2040 with two channels that ran at 100 MSps, put it on the order of plenty of commercially-available oscilloscopes at this sample rate but at a fraction of the price. He wanted to improve on the design though, making a smaller unit with a greatly reduced bill-of-materials and with a more streamlined design, so he came up with this STM32-based oscilloscope.

The goal of this project was to base as many of the functions around the built-in capabilities of the STM32 as possible, so in addition to the four input channels and two output channels running at 1 MHz, the microcontroller also drives a TFT display which has been limited to 20 frames per second to save processor power for other tasks. The microcontroller also has a number of built-in operational amplifiers which are used as programmable gain amplifiers, further reducing the amount of support circuitry needed on the PCB while at the same time greatly improving the scope’s capabilities.

In fact, the only parts of consequence outside of the STM32, the power supply, and the screen are the inclusion of two operational amplifiers included to protect the input channels from overvoltage events. It’s an impressive build in a small form factor, and we’d say the design goal of keeping the parts count low has been met as well. If you do need something a little faster though, his RP2040-based oscilloscope is definitely worth checking out.

Continue reading “STM32 Oscilloscope Uses All The Features”

No Need To Buy A Woodchipper – Build One!

Polish YouTuber WorkshopFromScratch finally got fed up with tripping over piles of garden detritus and decided to have a go at building a woodchipper (Video, embedded below). Since they had a ‘small’ 1.5kW gearmotor just lying idle (as you do) it was an obvious fit for a machine that needs torque rather than supersonic speed. The video is a fabulous 20-minute journey through the workshop showing just about every conceivable metalworking tool being used at some point.

Checkout out the thickness of my blades!

One interesting point is the bottom roller, which sits between a pair of removable guides, which should help the thing self-feed without jamming. Whether that was necessary is not for us to judge, but it can’t hurt. The frame looks like it was constructed from at least 1/4″ thick steel, which is expensive if you don’t happen to have a supply to hand. There’s lots to see, everything from thin sheet metalworking, which was plasma cut, constructing the feed and exhaust guides, to box sections being skilfully welded at some interesting angles to make a cart to move the thing. They tell us the blades were constructed from some seriously thick slabs of C45 grade steel, but currently are not hardened. This is planned for the future, but we suspect not something that is easily achieved in the home workshop!

If this channel is familiar, then you might remember the earlier stump grinder they built. If you are drowning in sawdust, but have a log burner, then you’ll appreciate this sawdust briquette machine.

Continue reading “No Need To Buy A Woodchipper – Build One!”

Hackaday Prize 2023: Machining Metals With Sparks

Working with metals can present a lot of unique challenges even for those with a fairly well-equipped shop. Metals like aluminum and some types of steel can be cut readily with grinders and saws, but for thick materials or some hardened steels, or when more complex cuts need to be made, mechanical cutting needs to be reconsidered in favor of something electric like electrical discharge machining (EDM) or a plasma cutter. [Norbert] has been on the path of building his own EDM machine and walks us through the process of generating a spark and its effects on some test materials.

Armed with a microscope, a homemade high-voltage generator, drill bit, and a razor blade to act as the workpiece, [Norbert] begins by experimenting with electrical discharges by bringing the energized drill bit close to the razor to determine the distance needed for effective electrical machining. Eventually the voltage is turned up a bit to dive into the effects of higher voltage discharges on the workpiece. He also develops a flushing system using de-ionized water, and then finally a system to automate the discharges and the movement of the tool.

While not a complete system yet, the videos [Norbert] has created so far show a thorough investigation of this metalworking method as well as some of the tricks for getting a setup like this working. EDM can be a challenging method for cutting metal as we’ve seen before with this similar machine which uses wire as the cutting tool, but some other builds we’ve seen with more robust electrodes have shown some more promise.

Continue reading “Hackaday Prize 2023: Machining Metals With Sparks”

Prepare To Brake: Quick Intro To Metal Bending

If you want to bend metal to make shapes, you might use equipment like a brake. But if you don’t have one, no worries. You can still do a lot with common tools like a vise and torches. [Bwrussell] shows you how. He welds together a die to use as a bending jig and makes a set of table legs.

You might think that putting metal in a vise and bending it isn’t exactly brain surgery. It isn’t, but there is more to it than that. Starting with a bending plan and the creation of the jigs, clamping and bending is only part of it. You can see a little bit of the action in the video below.

Speaking of planning, the design was in Fusion 360’s sheet metal workflow. To facilitate the bends, the build uses two torches. A MAPP torch gets very hot, and a propane torch makes sure that a larger area stays hot. There are quite a few tips you can pick up in this post, even if you aren’t making table legs.

Fusion 360 does a lot of the design work, but if you want a quick lesson on what happens when you bend metal, we can help. Want to make your own metal brake?

Continue reading “Prepare To Brake: Quick Intro To Metal Bending”