[darNES] Stores Cached Netflix On NES Cartridge

Let’s play a quick word association game: Peanut butter…jelly. Arches…golden. NES…Netflix?  That last one sounds like a stretch, but the [darNES] development team had a Hack Day and a dream.  They started with cached Netflix data and ended up playing it on an ordinary NES. (YouTube link)

The data was pre-converted so that the video frames were stored as tilesets and stored in the ROM image. [Guy] used the NES memory mapper (MMC3) to swap the frames. [darNES] had originally planned to use a Raspberry Pi in the cartridge to handle the video conversion and networking, but had to change gears and make a static ROM image due to time constraints and resource availability.

Accessing the Netflix data is just like the days of yore – load the cartridge into an unmodified NES and hit the power button (they didn’t even need to blow on it!). A bare-bones Netflix gallery appears. You can move the white cursor on the screen with the NES controller’s D-pad. House of Cards was the choice, and true to form, the next screen shows you a synopsis with a still image and gives you the option to Play. Recommend is also there, but obviously won’t work in this setup. Still, it got a chuckle out of us. [darNES] admits that due to time issues they did not optimize the color palette for the tilesets. They plan to release more of the technical info this week, but have already given us some hints on their Hacker News thread.

Check out the videos after the break to see the video they fit onto a 256K NES cartridge.

Continue reading “[darNES] Stores Cached Netflix On NES Cartridge”

Quantel

Retrotechtacular: The Early Days Of CGI

We all know what Computer-Generated Imagery (CGI) is nowadays. It’s almost impossible to get away from it in any television show or movie. It’s gotten so good, that sometimes it can be difficult to tell the difference between the real world and the computer generated world when they are mixed together on-screen. Of course, it wasn’t always like this. This 1982 clip from BBC’s Tomorrow’s World shows what the wonders of CGI were capable of in a simpler time.

In the earliest days of CGI, digital computers weren’t even really a thing. [John Whitney] was an American animator and is widely considered to be the father of computer animation. In the 1940’s, he and his brother [James] started to experiment with what they called “abstract animation”. They pieced together old analog computers and servos to make their own devices that were capable of controlling the motion of lights and lit objects. While this process may be a far cry from the CGI of today, it is still animation performed by a computer. One of [Whitney’s] best known works is the opening title sequence to [Alfred Hitchcock’s] 1958 film, Vertigo.

Later, in 1973, Westworld become the very first feature film to feature CGI. The film was a science fiction western-thriller about amusement park robots that become evil. The studio wanted footage of the robot’s “computer vision” but they would need an expert to get the job done right. They ultimately hired [John Whitney’s] son, [John Whitney Jr] to lead the project. The process first required color separating each frame of the 70mm film because [John Jr] did not have a color scanner. He then used a computer to digitally modify each image to create what we would now recognize as a “pixelated” effect. The computer processing took approximately eight hours for every ten seconds of footage. Continue reading “Retrotechtacular: The Early Days Of CGI”

Beating Super Hexagon With OpenCV And DLL Injection

Every few months a game comes along which is so addictive, players can’t seem to put it down – no matter how frustrating it may get. Last year one of those games was Super Hexagon. After fighting his way through several levels, [Val] decided that designing a bot to beat the game would be more efficient than doing it himself. Having played a few rounds of Super Hexagon ourselves, we can’t fault him on that front!

At its core, Super Hexagon is a simple game. Walls move from the screen edges toward a ship located near the center of the screen. The player uses the arrow keys to “orbit” the ship around a central shape. Avoid getting crushed by the walls, and you’re golden. However, the entire game board is constantly spinning, expanding, contracting, flashing, and generally doing things to disorient the player while ever more complex wall patterns move in to kill you. In short, Super Hexagaon makes Touhou bullet hell games look like a cakewalk.

The first step in beating the game is to capture the screen. [Val] tried Fraps and VLC, but lags of 2 seconds or more were not going to work. Then [Val] turned to DLL Injection. Super Hexagon calls the OpenGL function glutSwapBuffers() to implement double buffering. Every frame of the game is rendered in the background. Once rendering is complete glutSwapBuffers() is called to swap the buffers, and the process starts over again. [Val] changed the game code such that his own frame capture function would be called instead of glutSwapBuffers(). Once he was done capturing the game’s video buffer, [Val] then called the real glutSwapBuffers() function. It worked perfectly.

Now that he had an image, [Val] used OpenCV to process it. Although game is graphically very noisy, there are only a few colors used at any one time. It didn’t take much work to come up with an algorithm which would create a binary image of the walls and the ship itself.

step5[Val] cast rays from the center of each wall through the center of the screen. The ray which was longest before intersecting another wall would be the best escape route. This simple solution worked, but only for about 40 seconds. At that point, Super Hexagon would start throwing more complex patterns, and the AI would fail. The final solution was to create an accessibility condition which also took into account how much space was available between the various approaching walls. This new version of the AI was able to beat the game.

So was this a more efficient method than grinding through Super Hexagon manually? Since [Val] now knows all about DLL injection and OpenCV, we sure think it was!

Click past the break to see the [Val’s] bot in action!

Continue reading “Beating Super Hexagon With OpenCV And DLL Injection”

ATtiny85 Does Over The Air NTSC

[CNLohr] has made a habit of using ATtiny microcontrollers for everything, and one of his most popular projects is using an ATTiny85 to generate NTSC video. With a $2 microcontroller and eight pins, [CNLohr] can put text and simple graphics on any TV. He’s back at it again, only this time the microcontroller isn’t plugged into the TV.

The ATtiny in this project is overclocked to 30MHz or so using the on-chip PLL. That, plus a few wires of sufficient length means this chip can generate and broadcast NTSC video.

[CNLohr] mentions that it should be possible to use this board to transmit closed captioning directly to a TV. If you’re looking for the simplest way to display text on a monitor with an AVR, there ‘ya go: a microcontroller and two wires. He’s unable to actually test this, as he lost the remote for his tiny TV from the turn of the millennium. Because there’s no way for [CNLohr] to enable closed captioning on his TV, he can’t build the obvious application for this circuit – a closed caption Twitter bot. That doesn’t mean you can’t.

Video below.

Continue reading “ATtiny85 Does Over The Air NTSC”

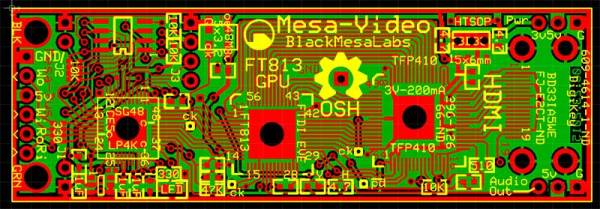
HDMI Audio And Video For Neo Geo MVS

[Charlie] was killing some time hacking on some cheap FPGA dev boards he bought from eBay. Initially, he intended to use them to create HDMI ports for a different project before new inspiration hit him. Instead, he added an HDMI port to Neo Geo MVS games. The Neo Geo MVS was a 90’s arcade machine that played gems like the Metal Slug and Samurai Showdown series. [Charlie] has a special knack for mods, being featured on Hackaday before for implementing Zork on hardware and making a mini supergun PCB. What’s especially nice about his newest mod is that the HDMI outputs both audio and video.

[Charlie] obtained the best possible video and audio signal by tapping the digital inputs to the Neo Geo’s DACs (digital-to-analog converter). The FPGA was then used to convert the signals to HDMI, maintaining a digital signal path from video generation to display. While this sounds simple enough, there was a lot that had to be done. The JAMMA video standard’s lower resolution was incompatible with the various resolutions offered by the HDMI protocol. [Charlie] solved this problem by implementing scan doubling using the RAM on the Cyclone II dev board. He then had to downsample the audio to 32kHz (from 55.6kHz) in order to meet the HDMI specs. Getting the sound over HDMI required adding data islands to the signal, a feat [Charlie] admits was a frustrating one.

When he tested the HDMI with his monitor, it was out of spec but still worked. His TV, on the other hand, refused to play it at all. This was due to the Neo Geo outputting 59.1 fps – not the standard 60 fps. Using the FPGA, [Charlie] overclocked the NeoGeo by approximately 1% and used the 27Mhz pixel clock to change the FPGA output to a 720 x 480p signal.

For those that love the scan lines of yore, they can be enabled with the push of a button. [Charlie] notes that there are some slight differences in the shadow effects of some graphics, but he has done his best to minimize them. He also admits that the FPGA code contributes only 100 microseconds of delay compared to analog output, which is fast enough for even the most hardcore gamers.

Check out the video after the break to see how the Neo Geo looks in HDMI along with a side-by-side comparison to a CRT TV.

Continue reading “HDMI Audio And Video For Neo Geo MVS”

hologram

Dead Simple Hologram Effect

We’ve all seen holograms in movies, and occasionally we see various versions of the effect in real life. The idea of having a fully three-dimensional image projected magically into space is appealing, but we haven’t quite mastered it yet. [Steven] hasn’t let that stop him, though. He’s built himself a very simple device to display a sort of hologram.

His display relies on reflections. The core of the unit is a normal flat screen LCD monitor laid on its back. The other component looks like a four-sided pyramid with the top cut off. The pyramid is made from clear plastic transparency sheets, held together with scotch tape. It’s placed on top of the LCD with the narrow end facing down.

[Steven] then used the open source Blender program to design a few 3D animations. Examples include a pterodactyl flying and an approximation of the classic Princess Leia hologram from Star Wars Episode 4. The LCD screen displays the animation from four different angles at once. The images are displayed up and onto the transparency sheet, which then get reflected to your eyes. The result is an image that looks almost as if it’s floating in space if viewed from the proper angle. If you move around the screen you can see the image from all four sides, which helps to sell the effect. Not bad for a few dollars worth of parts. Continue reading “Dead Simple Hologram Effect”

GreenScreen

How Green Screen Worked Before Computers

If you know anything about how films are made then you have probably heard about the “green screen” before. The technique is also known as chroma key compositing, and it’s generally used to merge two images or videos together based on color hues. Usually you see an actor filmed in front of a green background. Using video editing software, the editor can then replace that specific green color with another video clip. This makes it look like the actor is in a completely different environment.

It’s no surprise that with computers, this is a very simple task. Any basic video editing software will include a chroma key function, but have you ever wondered how this was accomplished before computers made it so simple? [Tom Scott] posted a video to explain exactly that.

In the early days of film, the studio could film the actor against an entirely black background. Then, they would copy the film over and over using higher and higher contrasts until they end up with a black background, and a white silhouette of the actor. This film could be used as a matte. Working with an optical printer, the studio could then perform a double exposure to combine film of a background with the film of the actor. You can imagine that this was a much more cumbersome process than making a few mouse clicks.

For the green screen effect, studios could actually use specialized optical filters. They could apply one filter that would ignore a specific wavelength of the color green. Then they could film the actor using that filter. The resulting matte could then be combined with the footage of the actor and the background film using the optical printer. It’s very similar to the older style with the black background.

Electronic analog video has some other interesting tricks to perform the same basic effect. [Tom] explains that the analog signal contained information about the various colors that needed to be displayed on the screen. Electronic circuits were built that could watch for a specific color (green) and replace the signal with one from the background video. Studios even went so far as to record both the actor and a model simultaneously, using two cameras that were mechanically linked together to make the same movements. The signals could then be run through this special circuit and the combined image recorded all simultaneously.

There are a few other examples in the video, and the effects that [Tom] uses to describe these old techniques go a long way to help understand the concepts. It’s crazy to think of how complicated this process can be, when nowadays we can do it in minutes with the computers we already have in our homes. Continue reading “How Green Screen Worked Before Computers”