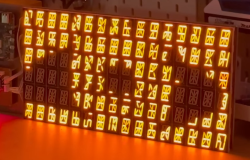
Over the years, artists have been creating art depicting weapons of mass destruction, war and human conflict. But the weapons of war, and the theatres of operation are changing in the 21st century. The outcome of many future conflicts will surely depend on digital warriors, huddled over their computer screens, punching on their keyboards and maneuvering joysticks, or using devious methods to infect computers to disable or destroy infrastructure. How does an artist give physical form to an unseen, virtual digital weapon? That is the question which inspired [Mac Pierce] to create his latest Portrait of a Digital Weapon.
[Mac]’s art piece is a physical depiction of a virtual digital weapon, a nation-state cyber attack. When activated, this piece displays the full code of the Stuxnet virus, a worm that partially disabled Iran’s nuclear fuel production facility at Natanz around 2008. Continue reading “Portrait Of A Digital Weapon”→
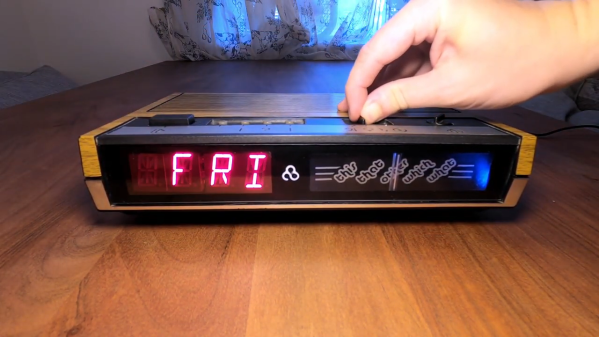
Just like everything else in 2020, the four-day, multi-stage festival of music and art known as Bonnaroo has been cancelled. This would have been [Guy Dupont]’s fifth year making the journey to Tennessee with his friend. Since they couldn’t go, [Guy] decided to build an interactive Bonnaroo mix tape into an 80s clock radio as a birthday present.
[Guy] was able to re-purpose all the original buttons and dials to navigate through the schedule of acts that would have performed across four days and five stages. The conveniently four-way function slider is used to choose the day, and the radio tuning dial selects the stage, complete with delightful static between the positions. The rest of the buttons move back and forth through the scheduled set times, and one will scroll the track and artist name across the 16-segment displays. The snooze button has the honor of being the play/pause button.
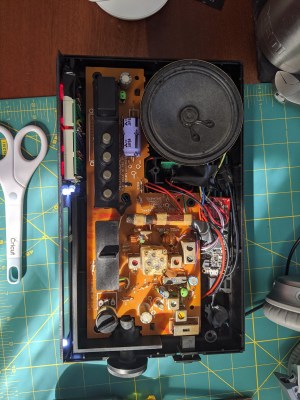
All the inputs are controlled with a Feather M4 express, and the music comes through a DFPlayer Mini. We love that [Guy] was able to repurpose the analog tuning dial by coupling it to a slide potentiometer that fit perfectly in a slot on the underside of the plastic. Stay tuned for a great video that starts with an explanation and demo and then goes into the build.
Though the utility of the clock radio may have been supplanted by cell phone alarms and doomscrolling, that just means that there are theoretically more of them to gut and turn into other things, like this Fallout-inspired luggable Pip-Boy.
Sometimes it feels as though all the good physical interactions with machines have disappeared. Given our current germ warfare situation, that is probably a good thing. But if fewer than ten people ever will be touching something, it’s probably okay to have a little fun and make your own interfaces for things.
The console is centered around a Yubikey, which is type of hardware dongle for 2FA. Flipping the guarded toggle switch will initiate the launch sequence, and then it’s time to insert the Yubikey into the 3D-printed lock cylinder and wait for authorization. If the Raspberry Pi decides all systems are go, then the key can be turned ninety degrees and the mushroom button mashed. You have our permission to peek at the declassified demo after the break. Stick around for a CAD view inside the lock cylinder.
As this clock’s creator admits, it took far more than five minutes to put together, but it does display the time in five minute increments.
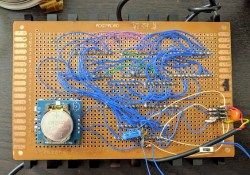
After acquiring five 4-character, 16 segment display modules that were too good to pass up, they were promptly deposited in the parts pile until [JF] was cajoled into building something by a friend. Given that each display’s pins were in parallel, there was a lot of soldering to connect these displays to the clock’s ATMega328P brain. On the back of the clock’s perfboard skeleton, a DS1307 real-time clock and coin cell keep things ticking along smoothly. The case is laser cut out of acrylic with an added red filter to up the contrast of the display, presenting a crisp, crimson glow.
Troubleshooting — as well as procrastination — proved to be the major stumbling block here. Each of the displays required extensive troubleshooting because — like Christmas lights of yore — one bad connection would cause all the other displays to fail. Furthermore, there isn’t any easy way to change the time, so the clock needs to be reprogrammed once in a while
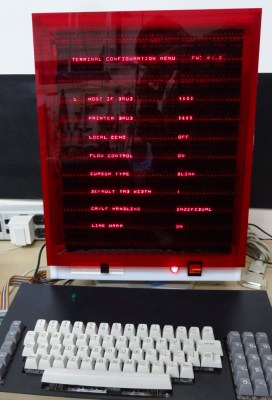
When we think of an old-style computer terminal, it has a CRT screen: either one of the big 1970s VDUs with integrated keyboard, or maybe one from a later decade with more svelte styling. You would have found other displays in use in previous decades though, and one of them came our way that we think it worthy of sharing.
[Dan Julio] was given several tubes of Siemens DL1416B 4-digit 17-segment LED displays by a friend, and decided to use them as an unusual retro display for his terminal project. These devices are an alphanumeric display with a parallel interface that can show a subset of the ASCII character set as well as a cursor. He had 213 of them, so made plans for a 64 character by 16 line display, however on discovering a quantity of the parts were non-functional he had to scale back to 12 lines of 48 characters.
The displays are mounted on PCBs in groups of four, controlled by a PIC16F1459 and some shift registers. These boards are then daisy-chained via a TTL serial line. The whole display shares one of the three serial ports on a Teensy 3.1 with his retro keyboard that has its own PIC controller, the others serving a serial printer port and the terminal serial port. The Teensy software has two modes: serial terminal or a Tiny Basic interpreter, and the relevant repositories are linked from the project page.
Since each set of DL1416Bs takes 250 mA, the whole display consumes about 9 A at 5 volts. On top of that the keyboard uses another 500 mA, so a sufficiently powerful supply had to be incorporated. This is mounted along with the Teensy in a very well-made enclosure, and the whole is mounted on what looks like a surplus monitor stand for a very professional finish.
To take us through the terminal’s features he’s posted a YouTube video that we’ve placed below the break. It comes across as a surprisingly usable machine, as he logs into a Raspberry Pi and edits a file, and takes us through some features of the BASIC interpreter.
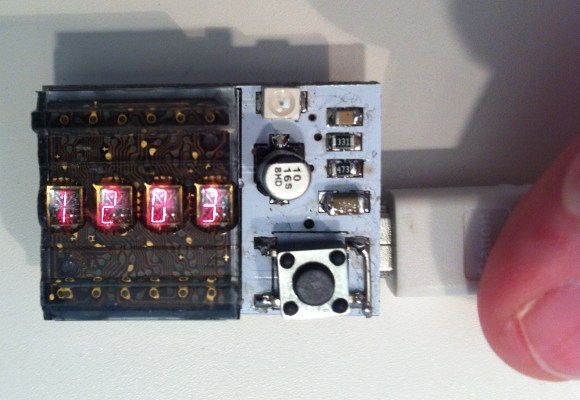
After having ported Contiki to his TI Launchpad platform, [Marcus] was eager to do something with it. He therefore built a simple clock with a vintage HPDL-1414 “smart four-character 16-segment alphanumeric display” and a msp430g2553.
The result that you can see above is powered over USB, includes a 3.3V LDO linear voltage regulator as well as a button, a LED, a crystal, and several passive components. Fortunately enough, the 5V-powered HPDL-1414 display accepts 3.3V logic at its inputs, avoiding the need for level translators.
The clock program is running on the ported Contiki 2.6 that you can find on his Github repository. [Marcus] is considering using a vibration motor to buzz every 20 minutes during work hours as a reminder for the 20-20-20 rule to battle eye fatigue: every 20 minutes, look at something 20 feet away for 20 seconds. A video of the system in action is embedded after the break.