IKEA Table 3D Printer

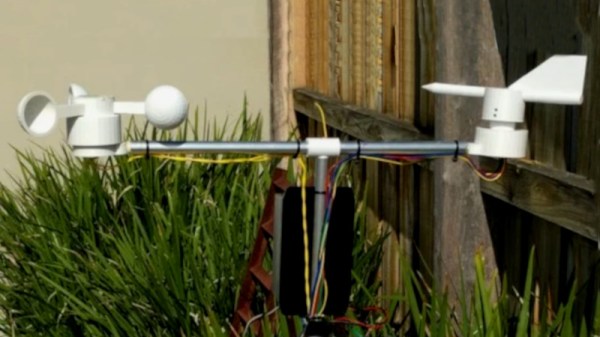
In this Instructable, [Wayne Mason-Drust] shares the step by step guide on how to make a cool, good-looking, 3D printer based on the Ikea LACK table. From an Ikea lantern weather station to a fully printed CNC based on an Ikea table, it’s almost safe to say that a 3D printer Ikea hack was overdue.

The idea to use a Ikea table as a base for a 3D printer first came to [Wayne] as he used this table to support other 3D printer he had working in his business. He realized that, even after five years of use, the table showed no signs of wear or distortion. So he decided to start to work on a 3D printer based on this precise table, the one that used to hold the printer.

[Wayne] stacked two together and named it Printtable (pun intended?). This open source, cartesian rep-rap 3D printer looks pretty slick. With a build area of 340mm X 320mm and 300mm on the Z axis and a price tag for the parts starting as low as $395, seems like a pretty decent 3D printer. With some work sourcing the parts, maybe it can be even lower.

Or we can just wait until Ikea starts selling them.

Continue reading “IKEA Table 3D Printer”

Sintering Sand WIth A Laser Cutter

We are all used to Fused Deposition Modeling, or FDM, 3D printers. A nozzle squirts molten material under the control of a computer to make 3D objects. And even if they’re usually rather expensive we’re used to seeing printers that use Stereolithography (SLA), in which a light-catalysed liquid monomer is exposed layer-by layer to allow a 3D object to be drawn out. The real objects of desire though are unlikely to grace the average hackspace. Selective Laser Sintering 3D printers use a laser on a bed of powder to solidify a 3D object layer by layer.

The laser creating a ring.

While an SLS printer may be a little beyond most budgets, it turns out that it’s not impossible to experiment with the technology. [William Osman] has an 80 W laser cutter, and he’s been experimenting with it sintering beach sand to create 2D objects. His write-up gives a basic introduction to glassmaking and shows the difference between using sand alone, and using sodium carbonate to reduce the melting point. He produces a few brittle barely sintered tests without it, then an array of shapes including a Flying Spaghetti Monster with it.

The results are more decorative than useful at the moment, however it is entirely possible that the technique could be refined. After all, this is beach sand rather than a carefully selected material, and it is quite possible that a finer and more uniform sand could give better results. He says that he’ll be investigating its use for 3D work in the future.

We’ve put his video of the whole process below the break, complete with worrying faults in home-made laser wiring. It’s worth a watch.

Continue reading “Sintering Sand WIth A Laser Cutter”

My DIY BB-8 interior

My DIY BB-8: Problems, Solutions, Lessons Learned

Imagine trying to make a ball-shaped robot that rolls in any direction but with a head that stays on. When I saw the BB-8 droid doing just that in the first Star Wars: The Force Awakens trailer, it was an interesting engineering challenge that I couldn’t resist. All the details for how I made it would fill a book, so here are the highlights: the problems I ran into, how I solved them and what I learned.

Continue reading “My DIY BB-8: Problems, Solutions, Lessons Learned”

Tony The Pinball Wizard 3D Prints Full Sized Pinball Machine

[Tony] has designed and 3D printed a full-sized pinball machine and it’s absolutely incredible. And by 3D-printed, we mean 3D-printed! Even the spring for the plunger printed plastic.

The bumper design is particularly interesting. The magic happens with two rings of conductive filament. the bottom one is stationary while the top one is a multi material print with a flexible filament. When the ball runs into the bumper the top filament flexes and the lower rings contact. Awesome. Who wants to copy this over to a joystick or bump sensor for a robot first? Send us a tip!

The whole document can be read as a primer on pinball design. [Tony] starts by describing the history of pinball from the French courts to the modern day. He then works up from the play styles, rules, and common elements to the rationale for his design. It’s fascinating.

Then his guide gets to the technical details. The whole machine was designed in OpenSCAD. It took over 8.5 km of eighty different filaments fed through 1200+ hours of 3D printing time (not including failed prints) to complete. The electronics were hand laid out in a notebook, based around custom boards, parts, and two Arduinos that handle all the solenoids, scoring, and actuators. The theme is based around a favorite bowling alley and other landmarks.

It’s a labor of love for sure, and an inspiring build. You can catch a video of it in operation after the break.

Struggling Robot Made With DIY Soft Limbs

[Jonathan Grizou] is experimenting with robot designs, and recently stumbled upon a neat method for making soft robots. While his first prototype, a starfish like robot, doesn’t exactly “whelm” a person with it’s grace and agility, it proves the concept. Video after the break.

In this robot the frame is soft and the motor provides most of the rigidity for the structure. The soft parts of the frame have hardpoints embedded into them for mounting the motors or joining sections together. The sections are made with 3D printed molds. The molds hold the 3D printed hard points in place. Silicone is poured into the mold and left to cure overnight. The part is then demolded and is ready for use.

Continue reading “Struggling Robot Made With DIY Soft Limbs”

Fail Of The Week: How NOT To Smooth A 3D Print

Many of the Fail Of The Week stories we feature here are pretty minor in the grand scheme of things. At worse, gears are ground, bits are broken, or the Magic Blue Smoke is released. This attempt to smooth a 3D print released far more than a puff of blue smoke, and was nearly a disaster of insurance adjuster or medical examiner proportions.

Luckily, [Maxloader] and his wife escaped serious injury, and their house came out mostly unscathed. The misadventure started with a 3D printed Mario statue. [Maxloader] had read acetone vapor can smooth a 3D print, and that warming the acetone speeds the process. Fortunately, his wife saw the looming danger and wisely suggested keeping a fire blanket handy, because [Max] decided to speed the process even more by putting a lid on the pot. It’s not clear exactly what happened in the pot – did the trapped acetone vapors burp the lid off and find a path to the cooktop burner? Whatever it was, the results were pretty spectacular and were captured on a security camera. The action starts at 1:13 in the video below. The fire blanket came in handy, buying [Max] a few seconds to open the window and send the whole flaming mess outside. Crisis averted, except for nearly setting the yard on fire.

What are we to learn from [Maxloader]’s nearly epic fail? First, acetone and open flame do not mix. If you want to heat acetone, do it outside and use an electric heat source. Second, a fire extinguisher is standard household equipment. Every house needs at least one, and doubly so when there’s a 3D printer present. And third, it’s best to know your filaments – the dearly departed Mario print was in PLA, which is best smoothed with tetrahydrofuran, not acetone.

Anything else? Feel free to flame away in the comments.

Continue reading “Fail Of The Week: How NOT To Smooth A 3D Print”

3D Printed Electric Unicycle

Actually riding around at 30 km/h on a 3D printed means of transportation is pretty gnarly, if not foolhardy. So we were actually pleased when we dug deeper and discovered that [E-Mat]’s unicycle build is actually just a very nice cover and battery holder.

We say “just”, but a 3D-printed design takes a couple of cheap parts (the wheel and pedals) from the Far East and turns them into a very finished-looking finished product. Custom bits like this fulfill the 3D printing dream — nobody’s making it, so you make it yourself. And make it look pro.

It turns out that other people have noticed this motor/controller/pedal combo as well. Here’s some documentation to get you started.

It’s funny. Just four years ago, self-balancing powered unicycles were the realm of the insane hacker. Then came some hacker improvements, and now we’re at the point where you can mail-order all the parts and 3D print yourself a fancy enclosure.

Continue reading “3D Printed Electric Unicycle”