A weather station with an E-ink display

Low Power Challenge: Weather Station Runs For Months Thanks To E-Ink Display

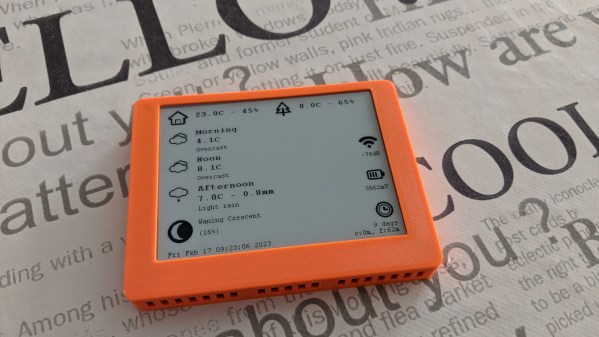
Having a device in your living room that shows weather information is convenient, and building one of those is a great project if you enjoy tinkering with microcontrollers and environmental sensors. It’s also a great way to learn about low-power design, as [x-labz] demonstrated with their e-ink weather station which works for no less than 60 days on a single battery charge. It has a clear display that shows the local temperature and humidity, as well as the weather forecast for the day.

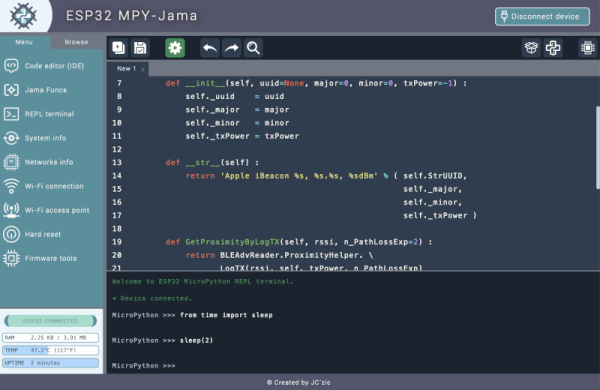
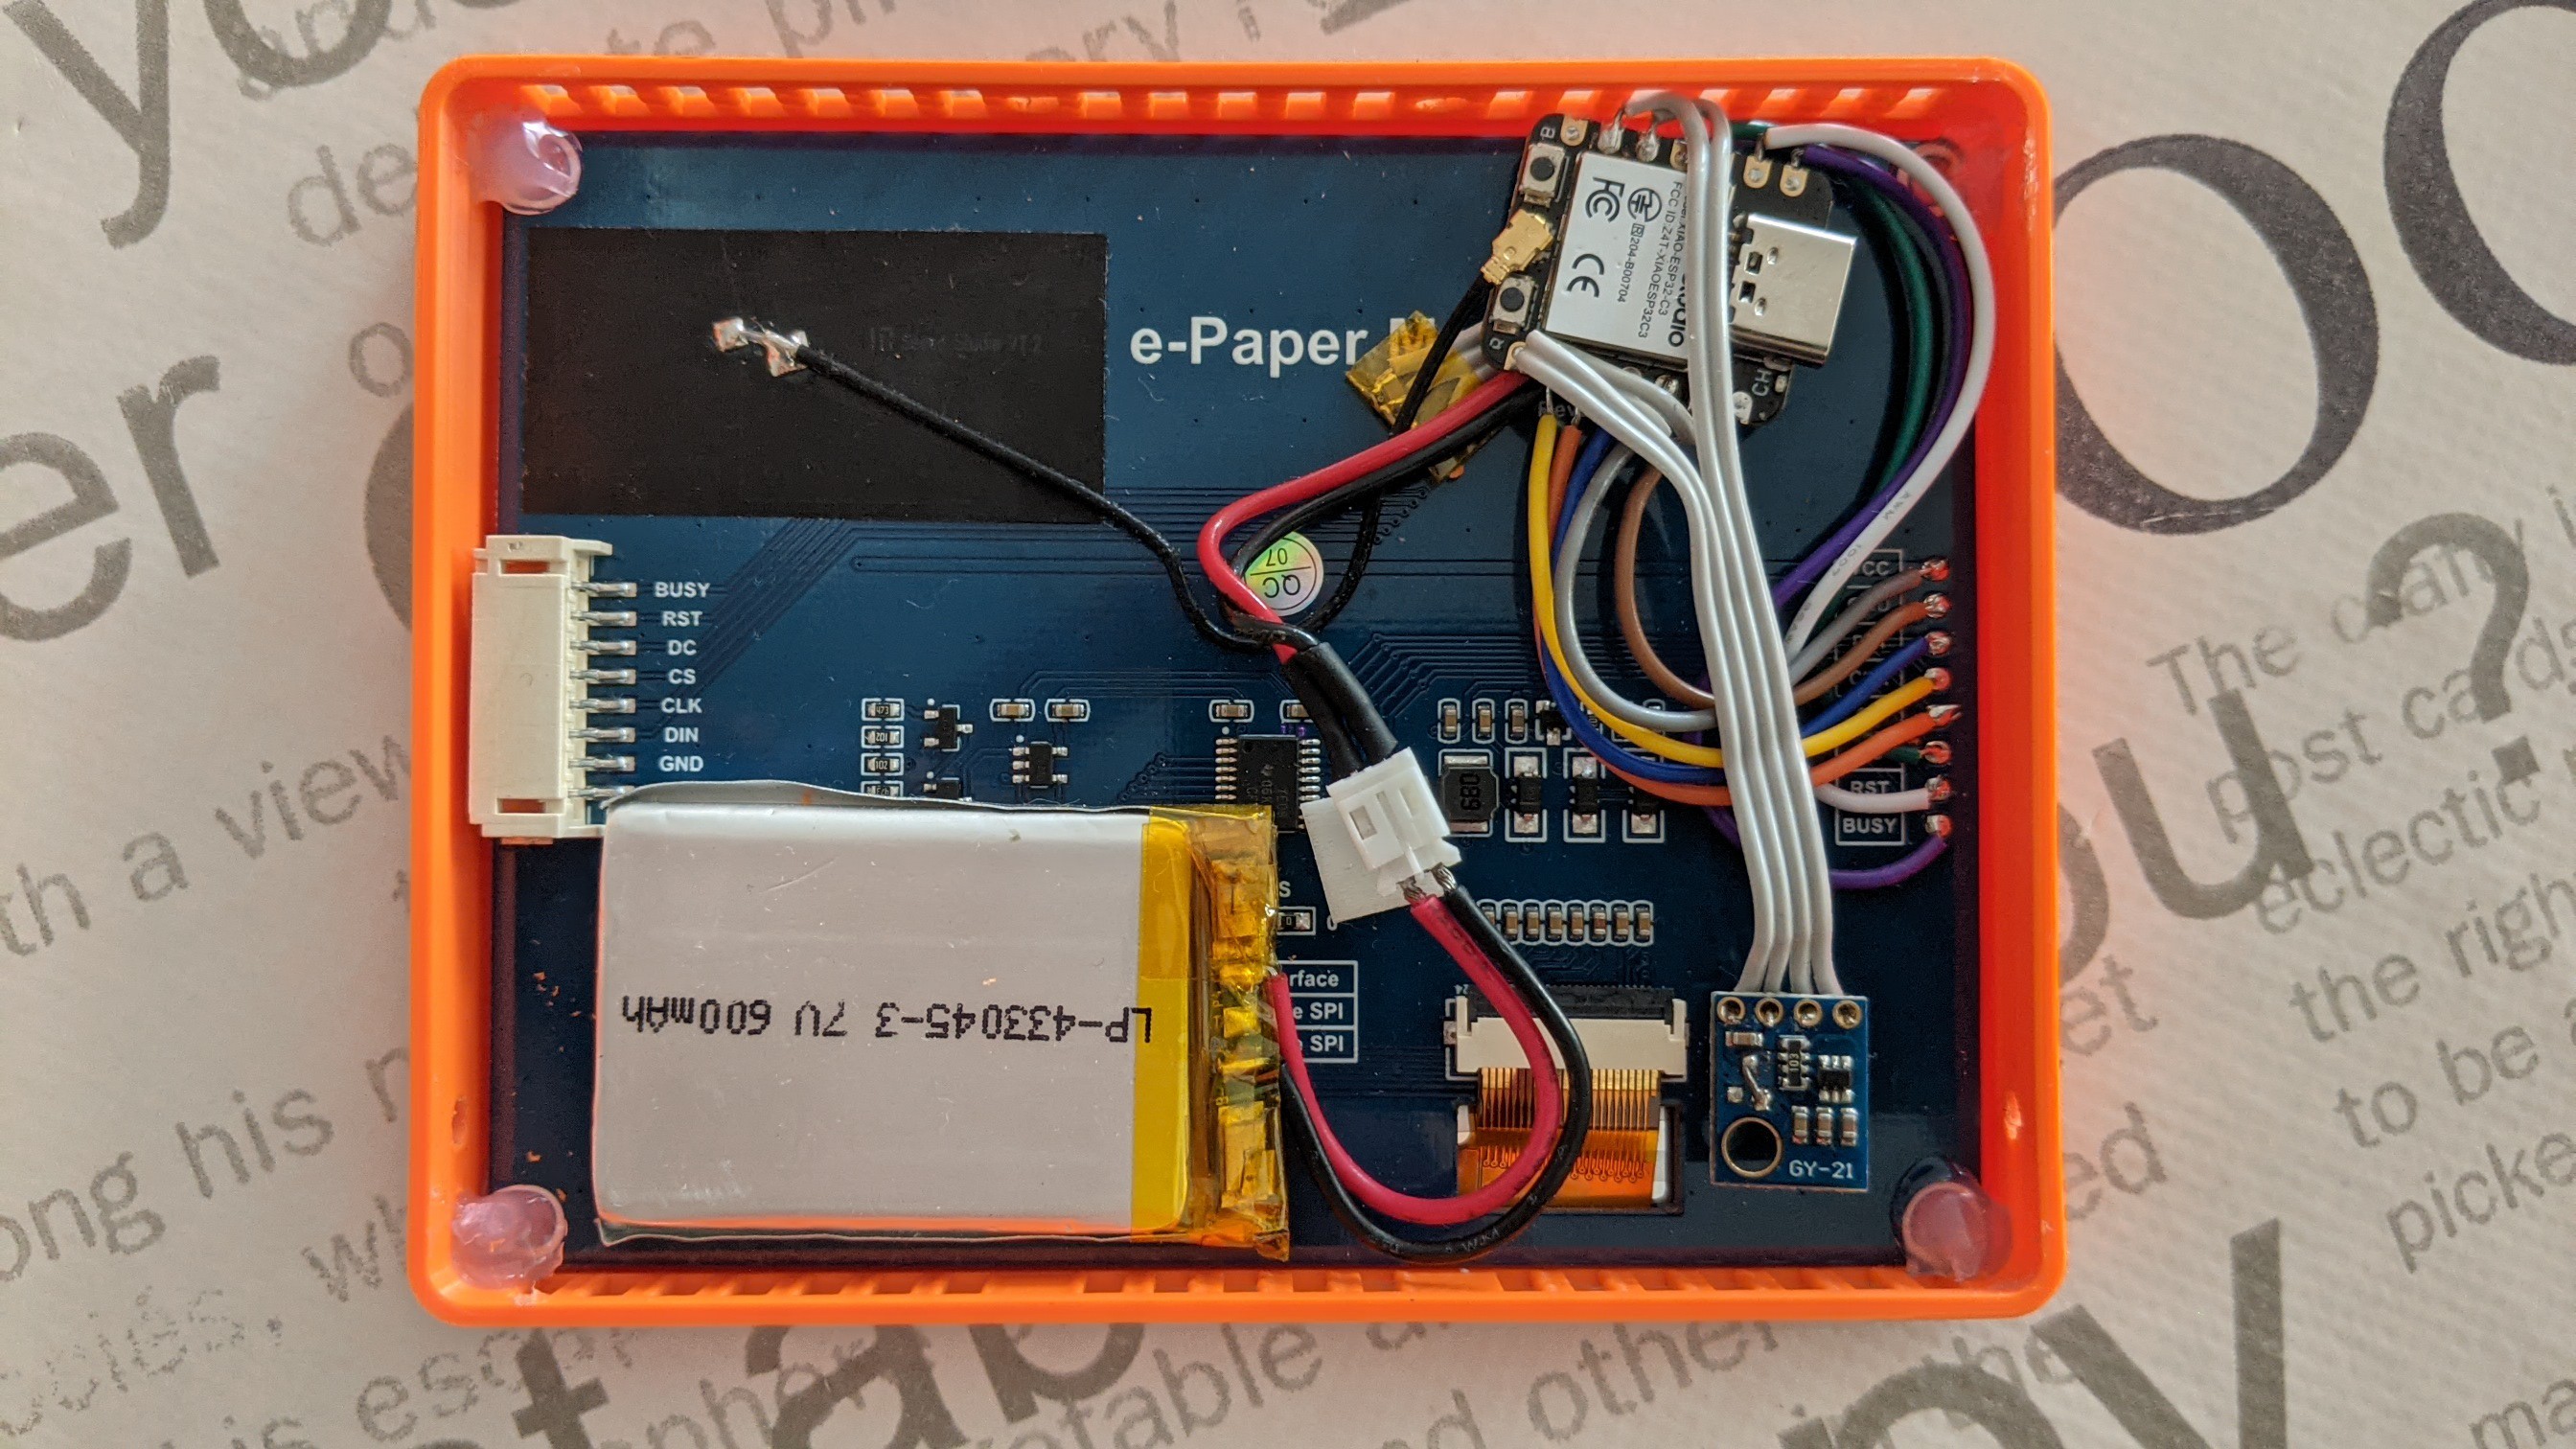
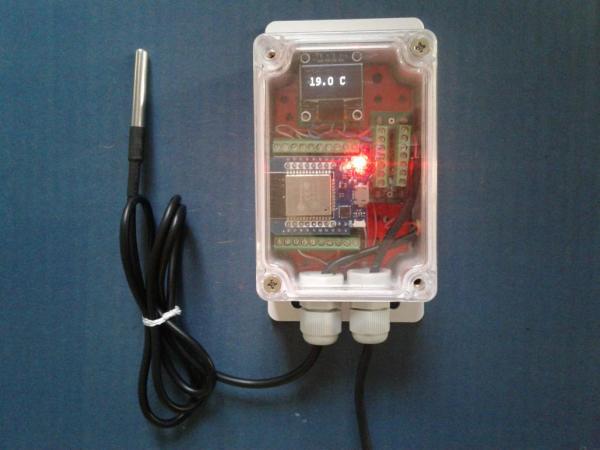
The display is a 4.2″ e-paper module with a resolution of 400 x 300 pixels. It uses just 26 mW of power for a few seconds while it updates its image, and basically zero watts when showing a static picture. It’s driven by a tiny ESP32C3 processor board, which downloads the weather forecast from weatherapi.com every two hours. The indoor climate is measured by an SHT-21 temperature and humidity sensor mounted behind the display, while the outdoor data is gathered by a WiFi-connected sensor installed on [x-labz]’s balcony.

The inside of an e-ink powered weather stationThe key to achieving low power usage here is to keep the ESP32 in sleep mode as much as possible. The CPU briefly wakes up once every five minutes to read out the indoor sensor and once every fifteen minutes to gather data from outside, using the relatively power-hungry WiFi module.

To further reduce power consumption, the CPU core is driven at the lowest possible clock speed at all times: 10 MHz when reading the indoor sensor, and 80 MHz when using the WiFi connection. All of this helps ensure that just one 600 mAh lithium battery can keep everything running for those 60 days.

E-ink displays are perfect for text and simple graphics that don’t change too often, which is why they’re very popular in weather stations. With a bit of tweaking though, LCDs can also be optimized for low power.

Wi-Fi Sensor For Rapid Prototyping

There might seem like a wide gulf between the rapid prototyping of a project and learning a completely new electronics platform, but with the right set of tools, these two tasks can go hand-in-hand. That was at least the goal with this particular build, which seeks to use a no-soldering method of assembling electronics projects and keeping code to a minimum, while still maintaining a platform that is useful for a wide variety of projects.

As a demonstration, this specific project is a simple Wi-Fi connected temperature monitoring station. Based around an ESP32 and using a DS18B20 digital temperature sensor, the components all attach to a back plate installed in a waterproof enclosure and are wired together with screw-type terminal breakout boards to avoid the need for soldering. The software suite is similarly easy to set up, revolving around the use of Tasmota and ESPHome, which means no direct programming — although there will need to be some configuration of these tools.

With the included small display, this build makes a very capable, simple, and quick temperature monitor. But this isn’t so much a build about monitoring temperature but about building and prototyping quickly without the need for specialized tools and programming. There is something to be said for having access to a suite of rapid prototyping tools for projects as well, though.

Fail Of The Week: Epic 312 Weeks Of Fixing A Broken Project

If a hacker guardian angel exists, then we’re sure he or she was definitely AWOL for six long years from [Aaron Eiche]’s life as he worked on perfecting and making his Christmas Countdown clock. [Aaron] started this binary clock project in 2016, and only managed to make it work as expected in 2022 after a string of failures.

In case you’d like to check out his completed project first, then cut the chase and head over to his Github repository for his final, working version. The hardware is pretty straightforward, and not different from many similar projects that we’ve seen before. A microcontroller drives a set of LED’s to show the time remaining until Christmas Day in binary format. The LEDs show the number of days, hours, minutes and seconds until Christmas and it uses two buttons for adjustments and modes. An RTC section wasn’t included in the first version, but it appeared and disappeared along the six year journey, before finding a spot in the final version.

The value of this project doesn’t lie in the final version, but rather in the lessons other hackers, specially those still in the shallow end of the pool, can learn from [Aaron]’s mistakes. Thankfully, the clock ornament is not very expensive to build, so [Aaron] could persevere in improving it despite his annual facepalm moments.

Continue reading “Fail Of The Week: Epic 312 Weeks Of Fixing A Broken Project”

ESP32 Web Updater Allows File System Management And OTA Updates

Earlier versions of the Arduino IDE made uploading files to an ESP32’s SPIFFS filesystem easy via the ESP32FS plugin. Sadly, that’s no longer possible under the rewritten Arduino 2.0 IDE. Thankfully, [myhomethings] has stepped up to solve the problem with a new tool that also adds some new functionality.

The tool in question is the ESP32 Web Updater and SPIFFS File Manager. It features a web interface courtesy of the ESPAsyncWebServer library. Simply dialing into the ESP32’s IP address will grant one access to the interface. Once connected files can be uploaded to the ESP32, or deleted at will. Text files can be created and populated through the interface as well, and the SPIFFS file system can also be formatted if required. Plus, as a bonus, the interface allows for handy over-the-air firmware updates. One need only export a compiled binary from the Arduino IDE, and then load the resulting *.bin file into the ESP32 via the web interface. It does come with the caveat that if new firmware is uploaded that doesn’t include the ESP32 Web Updater itself, there will be no way to do further firmware updates in this manner.

For those working on projects that may need regular file system management, the tool may be very useful. Alternatively, if you just need to do OTA updates on an ESP32, we recently featured a way of doing them through GitHub.

Raspberry Pi Weather Station Features Wireless Sensor Nodes

Online weather services are great for providing generic area forecasts, but they don’t provide hyperlocal data specific to your location. [Harald Kreuzer] needed both and built a Raspberry Pi Weather Station that provides weather forecasts for the next 7 days as well as readings from local sensors. The project is completely open source and based on a Raspberry Pi base station which connects to ESP32 based sensor nodes and online services to nicely present the data on a 7″ touch screen display.

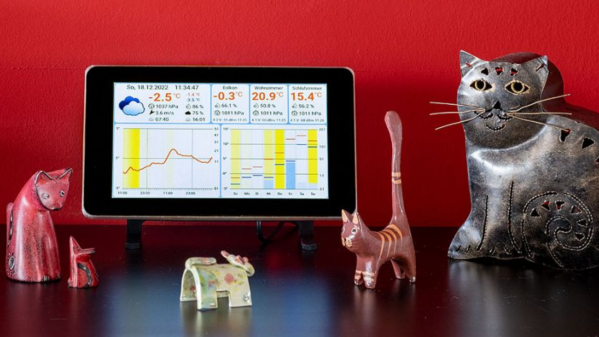
The architecture is quite straightforward. The ESP32 based sensor nodes publish their readings to an MQTT broker running on the Raspberry Pi. The Pi subscribes to these sensor node topics to pick up the relevant sensor data. This makes it easy to add additional sensor nodes in future. Weather forecast data is collected by connecting to the OpenWeatherMap API. All of the collected information is then displayed through an app built using the Kivy: open source Python app development framework. Continue reading “Raspberry Pi Weather Station Features Wireless Sensor Nodes”

An Instant Camera Using E-Paper As Film

The original Polaroid cameras were a huge hit not just for their instant delivery, but for the convenient size of the permanent images they delivered. It’s something that digital cameras haven’t been able to replicate, which drew [Cameron] to produce a modern alternative. In the place of the chemical film of the original, it uses a removable e-paper display in a frame. The image is stored in the pixels of the e-paper, which can be kept as a digital version of the photograph until reattached and replaced with another freshly taken picture.

At its heart is an ESP32 with a camera, and the “film” is a Waveshare NFC e-paper module. The device is 3D printed, and manages a very creditable early-1970s aesthetic redolent of the more upmarket Polaroids of the day. Using it is as simple as pressing the button and deciding whether you like what’s on the screen. You can see it in action in the video below the break.

We like his project for its aesthetics, as well as for the very idea of using e-paper as a medium. There’s also something to be said for not having to put a Polaroid print in a clip under your armpit while it develops. Meanwhile if you do hanker for the real thing, it’s a subject we’ve looked at in the past.

Continue reading “An Instant Camera Using E-Paper As Film”

MicroPython ESP32 IDE Makes Life Simpler

In theory, using MicroPython on the ESP32 is easy —  just flash an image and connect using a serial port. But that leaves a lot of things you still have to do. You need to move files between the two platforms. You’ll want to manage network configurations. You might want better editing and assistance, too. So there are a number of IDEs made to help you and one we recently noticed was MPY-Jama.

The IDE provides source code editing, of course. But it also allows you to do things like pull information about the network using a dashboard or connect to a WiFi network easily. You can even create your own AP with a simple interface.

Although the front part of the README mentions it is for Windows or Mac, if you scroll down you’ll find instructions for installing under Linux. The IDE is extensible using “Jama Funcs” and can handle the flashing operation from inside the IDE.

Of course, there is an IDE from Arduino (but not the Arduino IDE) that handles MicroPython. You can also find a rundown of several similar alternatives online.  If you need some inspiration for a MicroPython project, perhaps you’d like to play a game?