Metal 3D Printing Gets Really Fast (and Really Ugly)

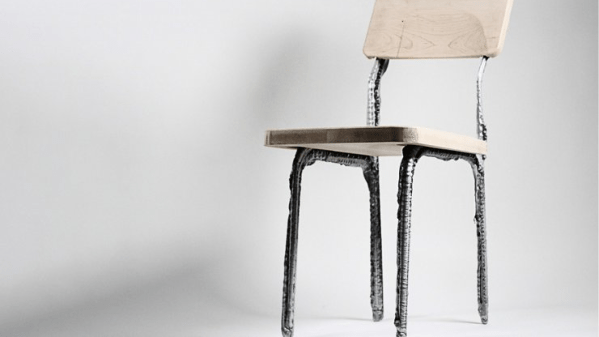
The secret to cranking out a furniture-sized metal frame in minutes is Liquid Metal Printing (LMP), demonstrated by researchers at the Massachusetts Institute of Technology. They’ve demonstrated printing aluminum frames for tables and chairs, which are perfectly solid and able to withstand post-processing like drilling and milling.

The system heats aluminum in a graphite crucible, and the molten metal is gravity-fed through a ceramic nozzle and deposited into a bed of tiny 100-micron glass beads. The beads act as both print bed and support structure, allowing the metal to cool quickly without really affecting the surface. Molten aluminum is a harsh material to work with, so both the ceramic nozzle material and the glass beads to fill the print bed were selected after a lot of testing.

This printing method is fast and scalable, but sacrifices resolution. Ideally, the team would love to make a system capable of melting down recycled aluminum to print parts with. That would really be something new and interesting when it comes to manufacturing.

The look of the printed metal honestly reminds us a little of CandyFab from [Windell Oskay] and [Lenore Edman] at Evil Mad Scientist, which was a 3D printer before hobbyist 3D printers or kits were really a thing. CandyFab worked differently — it used hot air to melt sugar together one layer at a time — but the end result has a similar sort of look to it. Might not be pretty, but hey, looks aren’t everything.

(Update: see it in action in this video, which is also embedded just below. Thanks [CityZen] for sharing in the comments!)

Continue reading “Metal 3D Printing Gets Really Fast (and Really Ugly)”

Hack A Soda Can Into Jewelry

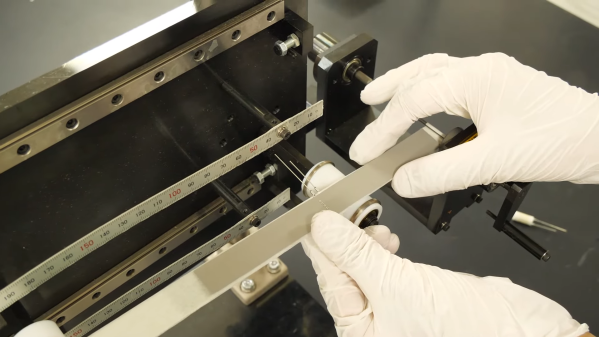
If you’ve ever needed some aluminum for a project, you might have noticed you have easy access to aluminum cans. If you need a cylinder, fine. But what if you don’t? [ThescientistformerlyknownasNaegeli] shows how to create an attractive necklace from two soda cans, and we think the techniques might be usable for other cases where you might need aluminum. If you care more about the necklace, it looks good. You only have to add a 3D-printed clasp or, if you prefer, you can buy a clasp and use that. For the Hackaday crowd, you can also use the resulting structure as an aluminum cable shield, which might better suit you.

The post gives more details and points to other posts for even deeper dives into many of the steps. But the basic idea is you strip the ink from the outside of the can and then cut the can into a strip. The mechanism for that looks a lot like a machine to cut plastic bottles into strips, but that method isn’t feasible without special blades.

Continue reading “Hack A Soda Can Into Jewelry”

Learning About Capacitors By Rolling Your Own Electrolytics

Ever wonder what’s inside an electrolytic capacitor? Many of us don’t, having had at least a partial glimpse inside after failure of the cap due to old age or crossed polarity. The rest of us will have to rely on this behind-the-scenes demo to find out what’s inside those little aluminum cans.

Perhaps unsurprisingly, it’s more aluminum, at least for the electrolytics [Denki Otaku] rolled himself at the Nippon Chemi-Con R&D labs. Interestingly, both the anode and cathode start as identical strips of aluminum foil preprocessed with proprietary solutions to remove any oils and existing oxide layers. The strips then undergo electrolytic acid etching to create pits to greatly increase their surface area. The anode strips then get anodized in a solution of ammonium adipate, an organic acid that creates a thin aluminum oxide layer on the strip. It’s this oxide layer that actually acts as the dielectric in electrolytic capacitors, not the paper separator between the anode and cathode strips.

Winding the foils together with the paper separator is pretty straightforward, but there are some neat tricks even at the non-production level demonstrated here. Attachment of lead wires to the foil is through a punch and crimp operation, and winding the paper-foil sandwich is actually quite fussy, at least when done manually. No details are given on the composition of the electrolyte other than it contains a solvent and an organic acid. [Denki] took this as an invitation to bring along his own electrolyte: a bottle of Coke. The little jelly rolls get impregnated with electrolyte under vacuum, put into aluminum cans, crimped closed, and covered with a heat-shrink sleeve. Under test, [Denki]’s hand-rolled caps performed very well. Even the Coke-filled caps more or less hit the spec on capacitance; sadly, their ESR was way out of whack compared to the conventional electrolyte.

There are plenty more details in the video below, although you’ll have to pardon the AI voiceover as it tries to decide how to say words like “anode” and “dielectric”; it’s a small price to pay for such an interesting video. It’s a much-appreciated look at an area of the industry that few of us get to see in detail.

Continue reading “Learning About Capacitors By Rolling Your Own Electrolytics”

Old Ham Wisdom Leads To Better Aluminum Painting

When [bdk6] tried painting aluminum for electronic projects, he found it didn’t tend to stay painted. It would easily scratch off or, eventually, even flake off. The problem is the paint doesn’t want to adhere to the aluminum oxide coating around the metal. Research ensued, and he found an article in an old ham radio magazine about a technique that he could adapt to get good results painting aluminum.

Actually, paint apparently adheres poorly, even to non-oxidized aluminum. So the plan is to clean and remove as much aluminum oxide as possible. Then the process will convert the aluminum surface to something the paint sticks to better. Of course, you also need the right kind of paint.

The key ingredients are phosphoric acid and zinc phosphate. Phosphoric acid is found in soft drinks, but is also sold as a concrete and metal prep for painting. The zinc phosphate is part of a special paint known as a self-etching primer.

Cleaning takes soap, elbow grease, and sandpaper. The next step is a long soak in the phosphoric acid. Then you apply a few coats of self-etching primer and sand. Once it is all set, you can paint with your normal paint. That’s usually epoxy-based paint for [bdk6].

Of course, you can also dye aluminum while anodizing it. Soldering aluminum also has its challenges.

High-Speed Sled Adds Bicycle Suspension

While you might have bought the best pair of skis in the 90s or 00s, as parts on boots and bindings start to fail and safety standards for ski equipment improve, even the highest-quality skis more than 15 or 20 years old will eventually become unsafe or otherwise obsolete. There are plenty of things that can be done with a pair of old skis, but if you already have a shot ski and an Adirondack chair made of old skis, you can put another pair to use building one of the fastest sleds we’ve ever seen.

[Josh Charles], the creator of this project, took inspiration from his father, who screwed an old pair of skis to the bottom of an traditional runner sled when he was a kid. This dramatically increased the speed of the sled, but eliminated its ability to steer. For this build [Josh] built a completely custom frame rather than re-use an existing sled, which allowed him to not only build a more effective steering mechanism for the skis, but also to use bicycle suspension components to give this sled better control at high speeds.

This build is part of a series that [Josh] did a few years ago, and you can find additional videos about it documenting his design process and his initial prototypes and testing. The amount of work he put into this build is evident when it’s seen finally traversing some roads that had been closed for winter; he easily gets the sled up in the 30 mph range several times. If you’re looking to go uphill in the snow, though, take a look at this powered snowboard instead.

Continue reading “High-Speed Sled Adds Bicycle Suspension”

Casting Metal With A Microwave And Vacuum Cleaner

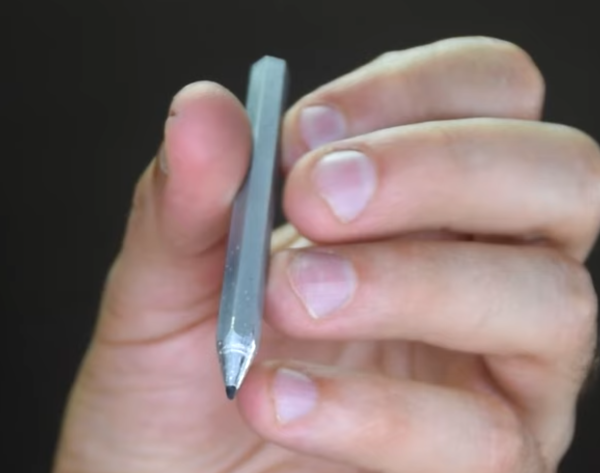
Metalworking might conjure images of large furnaces powered by coal, wood, or electricity, with molten metal sloshing around and visible in its crucible. But metalworking from home doesn’t need to use anything more fancy than a microwave, at least according to [Denny] a.k.a. [Shake the Future]. He has a number of metalworking tools designed to melt metal using a microwave, and in this video he uses them to make a usable aluminum pencil with a graphite core.

Before getting to the microwave kiln, the pencil mold needs to be prepared. A 3D-printed pencil is first created with the graphite core, and then [Denny] uses a plaster of Paris mixture to create the mold for the pencil. The 3D printed plastic is left inside the mold and placed in the first microwave kiln, which is turned on just enough to melt the plastic out of the mold, leaving behind the graphite core. From there a second kiln goes into the microwave to melt the aluminum.

Once the molten aluminum is ready, it is removed from the kiln and poured in the still-warm pencil mold. This is where [Denny] has another trick up his sleeve. He’s using a household vacuum cleaner to suck the metal into place before it cools, creating a rudimentary but effective vacuum forming machine. The result is a working pencil, at least after he wears down a few razor blades attempting to sharpen the metal pencil. For more information about how [Denny] makes these microwave kilns, take a look at some of his earlier projects.

Continue reading “Casting Metal With A Microwave And Vacuum Cleaner”

Robotic Platform Is Open Sourced And User Friendly

Having a 3D printer or a CNC machine available for projects is almost like magic. Designing parts in software and having them appear on the workbench is definitely a luxury. But for a lot of us, these tools aren’t easily available and projects that use them can be out-of-reach. That’s why one of the major design goals of this robotics platform was to use as many off-the-shelf components as possible.

The robot is called the OpenScout and, as its name implies, intends to be a fully open-source robotics platform for a wide range of use cases. It uses readily-available aluminum extrusion as a frame, which bolts together without any other specialized tools like welders. The body of the robot is articulating, helping it navigate uneven terrain outdoors. The specifications also call for using an Arduino to drive the robot, although there is plenty of space in the robot body to house any robotics platform you happen to have on hand.

For anyone looking to get right into the useful work of what robots can do, rather than spending time building up a platform from scratch, this is an excellent project. It’s straightforward and easy to build without many specialized tools. The unique articulating body design should make it effective in plenty of environments. If you do have a 3D printer, though, that opens up a lot of options for robotics platforms.