Everybody needs somebody sometimes, even if it’s just for when your back itches. But directing your itchy interlocutor to the correct spot can be a spatial relations challenge: “Right in the middle… no, down a bit… left… no, the other left! Harder! Wait, not that hard!” Why bother with all that messy interpersonal communication and human contact when you can build an automated, precision-guided back scratcher?
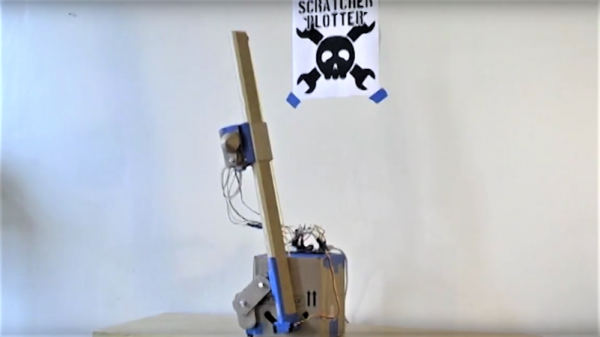
 [VijeMiller] has aluminum extrusion tastes on a cardboard budget, but don’t let that put you off this clever build. The idea is pretty simple: a two-axis plotter that moves a rotary-action business end to any point within a V-shaped work envelope. The Arduino in the base talks to a smartphone app that lets you point to exactly the spot in need of attention on what for most of us would be an incredibly optimistic photorealistic map of the dorsal aspect of the body (mildly NSFW photo in the link above dips below the posterior border). Point, click, sweet relief.
The video below shows the rig in action, along with the Thespian skills we’ve come to know and love from [VijeMiller] with such classics as the fake floating 19th green, the no-idling-while-texting alert, and the more recent ker-sploosh fighting foam filled toilet. It does seem like he changed his name from [TVMiller] somewhere along the line, but he can’t throw us off the trail that easily.
Continue reading “Anatomically Correct Plotter Avoids Back Scratch Fever”


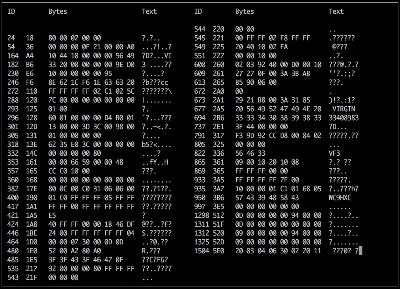 Adding the camera was the easiest part of the exercise when he found an after-market version specifically meant for his 207 model. The original non-graphical display had to make room for a new HDMI display and a fresh bezel, which cost him much more than the display. Besides displaying the camera image when reversing, the new display also needed to show all of the other entertainment system information. This couldn’t be obtained from the OBD-II port but the CAN bus looked promising, although he couldn’t find any details for his model initially. But with over 2.5 million of the 207’s on the road, it wasn’t long before [Alexandre] hit jackpot in a French University student project who used a 207 to study the CAN bus. The 207’s CAN bus system was sub-divided in to three separate buses and the “comfort” bus provided all the data he needed. To decode the CAN frames, he used an Arduino, a CAN bus shield and a python script to visualize the data, checking to see which frames changed when he performed certain functions — such as changing volume or putting the gear in reverse, for example.