Hackaday Prize Entry: Explore M3 ARM Cortex M3 Development Board

Even a cursory glance through a site such as this one will show you how many microcontroller boards there are on the market these days. It seems that every possible market segment has been covered, and then some, so why on earth would anyone want to bring another product into this crowded environment?

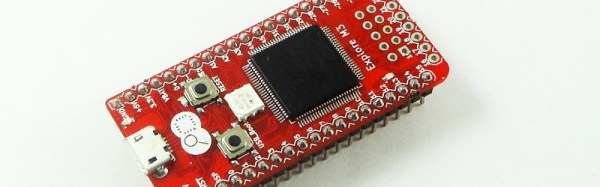
This is a question you might wish to ask of the team behind Explore M3, a new ARM Cortex M3 development board. It’s based around an LPC1768 ARM Cortex M3 with 64k of RAM and 512k of Flash running at 100MHz, and with the usual huge array of GPIOs and built-in peripherals.

The board’s designers originally aimed for it to be able to be used either as a bare-metal ARM or with the Arduino and Mbed tools. In the event the response to their enquiries with Mbed led them to abandon that support. They point to their comprehensive set of tutorials as what sets their board apart from its competition, and in turn they deny trying to produce merely another Arduino or Mbed. Their chosen physical format is a compact dual-in-line board for easy breadboarding, not unlike the Arduino Micro or the Teensy.

If you read the logs for the project, you’ll find a couple of videos explaining the project and taking you through a tutorial. They are however a little long to embed in a Hackaday piece, so we’ll leave you to head on over if you are interested.

We’ve covered a lot of microcontroller dev boards here in our time. If you want to see how far we’ve come over the years, take a look at our round up, and its second part, from back in 2011.

See A Cheap Smoker Get An Automation Power Up

[Jason] learned a lot by successfully automating this meat smoker. This is just the first step in [Jason’s] smoker project. He decided to begin by hacking a cheaper charcoal-fed unit first, before setting his sights on building his own automatic pellet-fed smoker. With a charcoal smoker it’s all about managing the airflow to that hot bed of coals.

automated-meat-smoker-air-valve
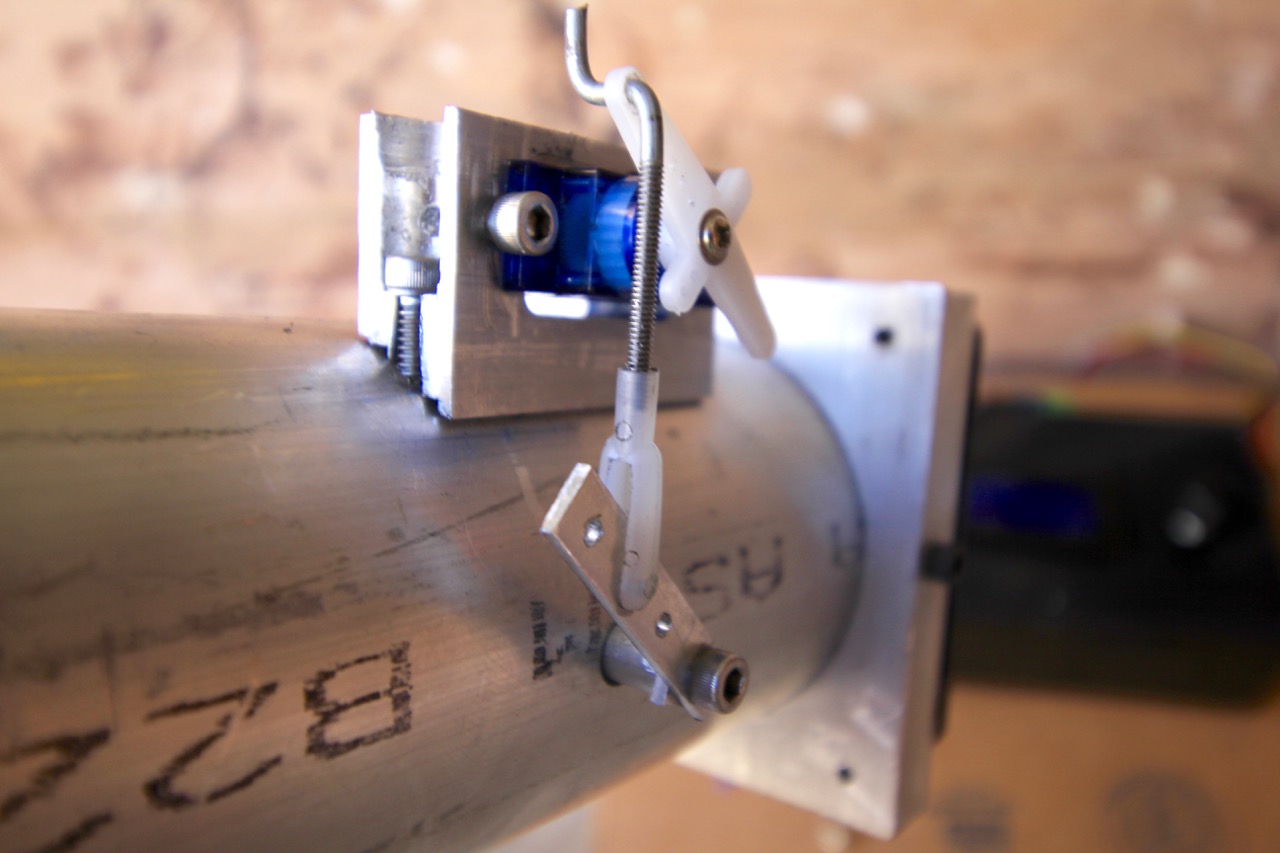
Custom mount for servo was actually one of the more challenging things to get just right.

[Jason] started by making sure the bottom was sealed off from stray airflow, then he cut a hole into the charcoal pan and attached a length of steel pipe. The opposite end of the pipe has a fan. Inside the pipe there is a baffle separating the fan from the charcoal pan. The servo motor shown here controls that valve.

The pipe is how air is introduced into the smoker, with the fan and valve to control the flow rate. The more air, the higher the temperature. The hunk of pipe was left uncut and works fine but is much longer than needed; [Jason says] the pipe is perfectly cool to the touch only a foot and a half away from the smoker.

With the actuators in place he needed a feedback loop. A thermocouple installed into the lid of the smoker is monitored by an Arduino running a PID control loop. This predicts the temperature change and adjusts the baffle and fan to avoid overshooting the target temp. The last piece of hardware is a temperature probe inside the meat itself. With the regulation of the smoker’s temperature taken care of and the meat’s internal temperature being monitored, the learning (and cooking) process is well underway.

There are many, many smoker automation projects out there. Some smokers are home-made electric ones using flower pots, and some focus more on modifying off the shelf units. In a way, every PID controlled smoker is the same, yet they end up with different problems to solve during their creation. There is no better way to learn PID than putting it into practice, and this way to you get a tasty treat for your efforts.

The Arduino Sleeps With The Fishes

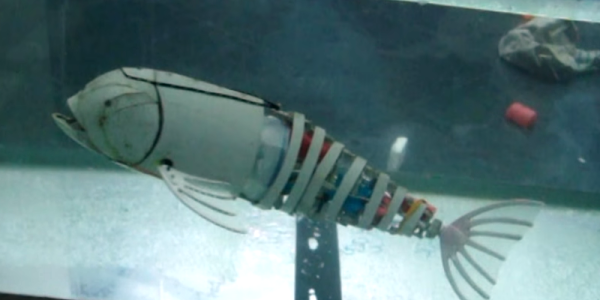
[Eric Dirgahayu] wanted to explore underwater with some sensors and cameras. First, he needed a platform to carry them. That led to his Arduino-controlled swimming fish. The fish is made from PVC and some waterproof servos. From the video (see below) it isn’t clear how much control the fish has, but it does swim with an undulating motion like a real fish.

Continue reading “The Arduino Sleeps With The Fishes”

HAL 9000 useless machine

World’s Biggest, Most Useless AI Machine

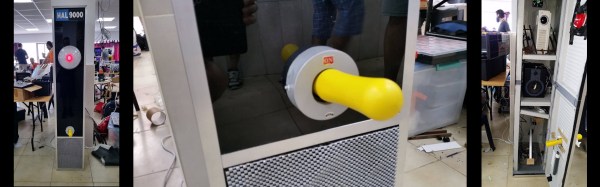
In a time when we’re inundated with talk of an impending AI apocalypse it’s nice to see an AI that’s intentionally useless. That AI is HAL 9000. No, not the conflicted HAL from the movie 2001: A Space Odyssey but the World’s Biggest AI Useless Machine HAL built by [Rafael], [Mickey] and [Eyal] for GeekCon 2016 in Israel.

Standing tall, shiny and black, the box it’s housed in reminds us a bit of the monolith from the movie. But, in a watchful position near the top is HAL’s red eye. As we approach, HAL’s voice from the movie speaks to us asking “Just what do you think you’re doing, Dave?” as the eye changes diameter in keeping with the speech’s amplitude. And at the bottom is a bright, yellow lever marked ON, which of course we just have to turn off. When we do, a panel opens up below it and a rod extends upward to turn the lever back to the ON position.

Behind the scenes are two Arduinos. One Arduino manages servos for the panel and rod as well as playing random clips of HAL from the movie. The other Arduino uses the Arduino TVout library to output to a projector that sits behind the red diffuser that is the eye. That Arduino also takes input from a microphone and based on the amplitude, has the projector project a white circle of corresponding diameter, making the eye’s appearance change. You can see all this in action in the video after the break.

Continue reading “World’s Biggest, Most Useless AI Machine”

Arduino Sketch: The Next Generation

What was your first Arduino program? Probably an LED blinker — that seems to be the “hello world” of microcontrolllers. You probably moved on to things a little more complicated pretty quickly. At some point, things get harder because the Arduino lacks an operating system.

There are operating systems that will run on the Arduino. They aren’t full-featured like Windows or Linux, but they allow you to run multiple tasks that are both isolated from each other (to some degree) and have a way to cooperate (that is, synchronize, share data and resources, and so on). One such operating system is ChibiOS. It will run on AVR- and ARM-based devices. You can find documentation about the entire project on the home page along with other ports.

The problem with adopting a new operating system is always getting started. [ItKindaWorks] has started a video series on using ChibiOS and has posted three installments so far (see below; one is about getting started, the other two cover messaging, mutexes, and priorities).

Continue reading “Arduino Sketch: The Next Generation”

Arduino Detects Pants On Fire

Hard as it is to imagine, lie detectors have been sold as children’s toys for a number of years. A simple battery-operated device clipped to your fingers and would show the conductivity of your skin. The concept — which is probably not very reliable — observers that lying causes you to imperceptibly sweat which causes a sudden increase in your skin’s conductivity. These cheap toys would have a meter and you’d note the meter deflection to determine if the subject was lying.

You can debate the amusement value of interrogating your friends, perhaps, but they were pretty common and still exist (including some that shock you if they detect you are lying). Seventeen-year-old [BuildIt] has his own modern take on this classic device using — what else? — an Arduino. You can see a video of the device below.

Continue reading “Arduino Detects Pants On Fire”

Staring At The Sun: Erasing An EPROM

Flash memory is the king today. Our microcontrollers have it embedded on the die. Phones, tablets, and computers run from flash. If you need re-writable long term storage, flash is the way to go. It hasn’t always been this way though. Only a few years ago EPROM was the only show in town. EPROM typically is burned out-of-circuit in a programming fixture. When the time comes to erase the EPROM, just pop it under an ultraviolet (UV) bulb for 30 minutes, and you’re ready to go again. The EPROM’s quartz window allows UV light to strike the silicon die, erasing the memory.

The problem arises when you want to use an EPROM for long term storage. EPROM erasers weren’t the only way to blank a chip. The sun will do it in a matter of weeks. Even flourescent light will do it — though it could take years.

Continue reading “Staring At The Sun: Erasing An EPROM”