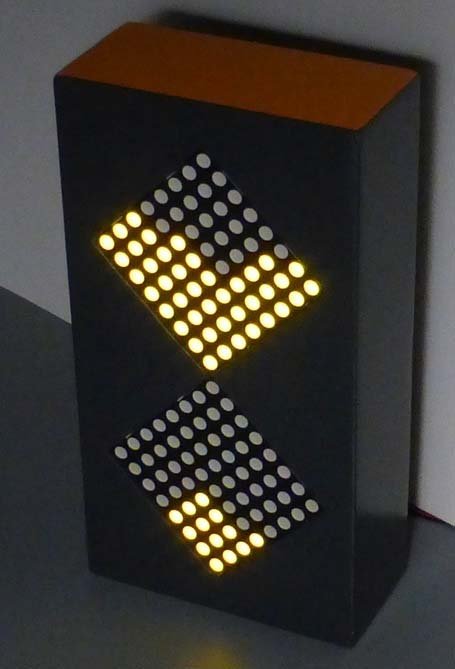
The hourglass dramatically depicts the flow of time; gravity pulling grains of sand inevitably downward. So it is with the Bits of Time project by [Frank Andre]. The pixels drop, stopping only when the battery dies. Or, when your eggs are ready. (Pssst, it’s also on Hackaday.io.)
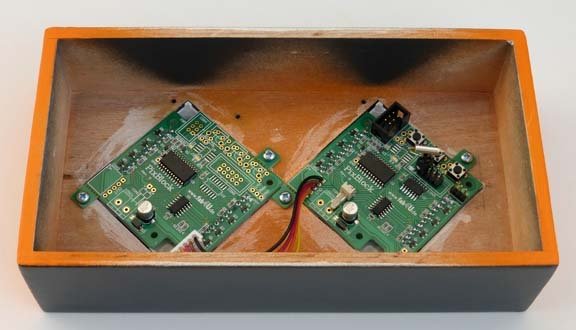
The project starts with a couple of [Frank’s] PixBlocks. A processor is added to one PixBlock to serve as the controller for both after they are connected via the serial bus. A tilt switch, with a debouncing circuit, is connected to an IO pin. This tells the processor the orientation of the box and therefore which way the pixels should flow.
Two switches set the duration of the timer in 15 second increments. A third starts the timer. When the box is rotated the pixels start flowing in the opposite direction. With code available on GitHub the system can be programmed for other effects such as changing colors, flickering, or even text display.
You’ll agree this is a bit less intimidating than the MacGyver-ish kitchen timer we covered last year.
Continue reading “The Flowing Pixels Of Time Wait For No Man”