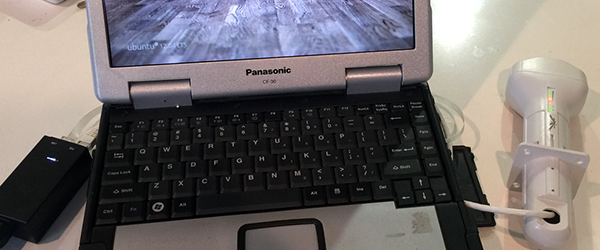
Robotic hacker [Andrea Trufini] apparently likes choices. Not only does his robotic arm have six degrees of freedom, but it has a variety of ways he can control it. The arm’s software can accept commands through a programming language, via potentiometers, an infrared remote, or–the really interesting part–through spoken commands.
The videos don’t show too much of the build detail, but the arm is mainly constructed of laser cut plywood and uses an Arduino. Hopefully, we’ll see more particulars about the build soon but for now have a look at a similar project.
The software (myrobotlab) is on github and looks very impressive. The Java-based framework has a service-oriented architecture, with modules that support common processors (like the Arduino, Raspberry Pi, and Beagle Board) along with I/O devices (like motors, sound devices, and that Leap Motion controller you just had to buy). As you might expect from the demonstration found below, there are speech to text and text to speech services, too. Like a lot of open source projects, some of these services are more ready for prime time than others but that just means you can contribute your hacks back to the project.
With all of the cool features on the Raspberry Pi, it is somewhat notable that it lacks a power button. In a simple setup, the only way to cut power to the tiny computer is to physically remove the power cord. [Dalton63841] found that this was below his wife’s tolerance level for electronics, and built a simple remote control for his Raspberry Pi.
[Dalton63841] started this project by trying to use the UART TX pin, but this turned out to be a dead-end. He decided instead to use an Arduino to monitor the 3.3V power rail on the Pi. When the Pi is shut down in software, the Arduino can sense that the Pi isn’t on any more and disconnect the power. The remote control is used to turn the Pi on. The Arduino reads the IR code from a remote and simply powers up the Pi. This is a very simple and elegant solution that requires absolutely no software to be installed on the Raspberry Pi.
We know that this isn’t the most technically complex project we’ve ever featured, but it is a good beginner project for anyone just getting started with a Pi, Arduino, or using IR. Plus, this could be the perfect thing to pair up with a battery-backup Raspberry Pi shutdown device that allows it to power itself down in a controlled way when a power outage is sensed.
Last weekend saw the announcement of ProxyHam, a device that anonymizes Internet activity by jumping on WiFi from public libraries and cafes over a 900MHz radio link. The project mysteriously disappeared and was stricken from the DEFCON schedule. No one knows why, but we spent some time speculating on that and on what hardware was actually used in the undisclosed build.
[Samy Kamkar] has just improved on the ProxyHam concept with ProxyGambit, a device that decouples your location from your IP address. But [Samy]’s build isn’t limited to ProxyHam’s claimed two-mile range. ProxyGambit can work anywhere on the planet over a 2G connection, or up to 10km (6 miles) away through a line-of-sight point to point wireless link.
The more GSM version of ProxyGambit uses two Adafruit FONA GSM breakout boards, two Arduinos, and two Raspberry Pis. The FONA board produces an outbound TCP connection over 2G. The Arduino serves as a serial connection over a reverse TCP tunnel and connects directly to the UART of a Raspberry Pi. The Pi is simply a network bridge at either end of the connection. By reverse tunneling a TCP connection through the ‘throwaway’ part of the build, [Samy] can get an Internet connection anywhere that has 2G service.
Although it’s just a proof of concept and should not be used by anyone who actually needs anonymity, the ProxyGambit does have a few advantages over the ProxyHam. It’s usable just about everywhere on the planet, and not just within two miles of the public WiFi access point. The source for ProxyGambit is also available, something that will never be said of the ProxyHam.
Not everyone can agree on what good music is, but in some cases you’ll find that just about everyone can agree on what is awful. That’s what the people over at Neo-Pangea discovered when they were listening to Internet radio. When one of those terrible songs hits their collective eardrums, the group’s rage increases and they just need to skip the track.
This is how Engineers act if the song is super-awful
Rather than use a web app or simple push button to do the trick, they turned the “skip” button into a NERF target. They call their creation the Boom Box Blaster and made a fantastic demo film video about it which is found after the break.
Inspired by a painting in the office, the target takes the form of a small hot air balloon. The target obviously needed some kind of sensor that can detect when it is hit by a NERF dart. The group tried several different sensor types, but eventually settled on a medium vibration sensor. This sensor is connected to an Arduino, which then communicates with a Raspberry Pi over a Serial connection. The Pi uses a Python script to monitor the Arduino’s vibration sensor. The system also includes some orange LEDs to simulate flames and a servo attached to the string which suspends the balloon from the ceiling. Whenever a hit is registered, the flames light up and the balloon raises into the air to indicate that the shot was on target.
Speak with those who consider themselves hardcore engineers and you might hear “Arduinos are for noobs” or some other similar nonsense. These naysayers see the platform as a simplified, overpriced, and over-hyped tool that lets you blink a few LEDs or maybe even read a sensor or two. They might say that Arduino is great for high school projects and EE wannabes tinkering in their garage, but REAL engineering is done with ARM, x86 or PICs. Guess what? There are Arduino compatible boards built around all three of those architectures. Below you can see but three examples in the DUE, Galileo, and Fubarino SD boards.
Arduino DUE uses Atmel ARM
Arduino Galileo uses Intel x86
Fubarino SD uses PIC32
This attitude towards Arduino exists mainly out of ignorance. So let’s break down a few myths and preconceived biases that might still be lurking amongst some EEs and then talk about Arduino’s ability to move past the makers.
Arduino is NOT the Uno
When some hear “Arduino”, they think of that little blue board that you can plug a 9v battery into and start making stuff. While this is technically true, there’s a lot more to it than that.
An Arduino Uno is just an AVR development board. AVRs are similar to PICs. When someones says “I used a PIC as the main processor”, does that mean they stuck the entire PIC development board into their project? Of course not. It’s the same with Arduino (in most cases), and design is done the same way as with any other microcontroller –
Use the development board to make, create and debug.
When ready, move the processor to your dedicated board.
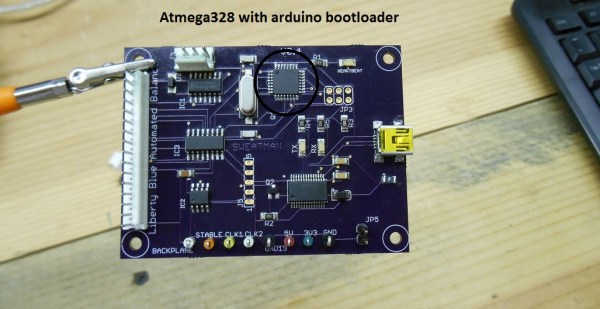
What makes an Arduino an “Arduino” and not just an AVR is the bootloader. Thus:
An Atmega328P is an AVR processor.
An Atmega328P with the Arduino bootloader is an Arduino.
The bootloader allows you to program the AVR with the Arduino IDE. If you remove the bootloader from the AVR, you now have an AVR development board that can be programmed with AVR Studio using your preferred language.
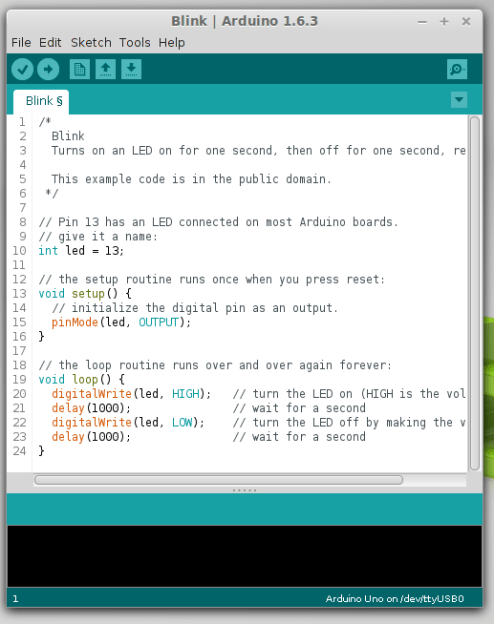
There Is No Special Arduino Language
Arduino “blink” sketch should run on any Arduino compatible board.
Yes, I know they call them sketches, which is silly. But the fact is it’s just c++. The same c++ you’d use to program your PIC. The bootloader allows the IDE to call functions, making it easy to code and giving Arduino its reputation of being easy to work with. But don’t let the “easy” fool you. They’re real c/c++ functions that get passed to a real c/c++ compiler. In fact, any c/c++ construct will work in the Arduino IDE. With that said – if there is any negative attribute to Arduino, it is the IDE. It’s simple and there is no debugger.
The strength comes in the standardization of the platform. You can adapt the Arduino standard to a board you have made and that adaptation should allow the myriad of libraries for Arduino to work with your new piece of hardware. This is a powerful benefit of the ecosystem. At the same time, this easy of getting things up and running has resulted in a lot of the negative associations discussed previously.
So there you have it. Arduino is no different from any other microcontroller, and is fully capable of being used in consumer products along side PICs, ARMs etc. To say otherwise is foolish.
What is the Virtue of Arduino in Consumer Products?
This is Ask Hackaday so you know there’s a question in the works. What is the virtue of Arduino in consumer products? Most electronics these days have a Device Firmware Upgrade (DFU) mode that allows the end user to upgrade the code, so Arduino doesn’t have a leg up there. One might argue that using Arduino means the code is Open Source and therefore ripe for community improvements but closed-source binaries can still be distributed for the platform. Yet there are many products out there that have managed to unlock the “community multiplier” that comes from releasing the code and inviting improvements.
What do you think the benefits of building consumer goods around Arduino are, what will the future look like, and how will we get there? Leave your thoughts below!
After the release of Mortal Kombat X, [Zachery’s] gaming group wanted to branch out into the fighter genre. They quickly learned that in order to maximize their experience, they would need a better controller than a standard gamepad. A keyboard wasn’t going to cut it either. They wanted a fight stick. These are large controllers that look very much like arcade fighting controls and include a joystick and large buttons. [Zachery’s] group decided to build their own fight stick for use with a PC.
[Zachery] based his build around the TeensyLC, which is a 32 bit development board with an ARM processor. It’s also compatible with Arduino. The original version of his project setup the controller as a HID, essentially emulating a keyboard. This worked for a while until they ran into compatibility issues with some games. [Zachery] learned that his controller was compatible with DirectInput, which has been deprecated. The new thing is Xinput, and it was going to require more work.
Using Xinput meant that [Zachery] could no longer use the generic Microsoft HID driver. Rather than write his own drivers, he decided to emulate the XBOX 360 controller. When the fight stick is plugged into the computer, it shows up as an XBOX 360 controller and Windows easily installs the pre-built driver. To perform the emulation, [Zachery] first had to set the VID and PID of the device to be identical to the XBOX controller. This is what allows the Microsoft driver to recognize the device.
Next, the device descriptor and configuration descriptor had to be added to the Teensy’s firmware. The device descriptor includes information such as USB version, device class, protocol, etc. The configuration descriptor includes additional information about the device configuration. [Zachery] used Microsoft Message Analyzer to pull the configuration descriptor from a real XBOX 360 controller, then used the same data in his own custom controller.
[Zachery] programmed the TeensyLC using the Arduino IDE. He ran into some trouble here because the IDE did not include the correct device type for an Xinput device. [Zachery] had to edit the boards.txt file and add three lines of code in order to add a new hardware device to the IDE’s menu. Several other files also had to be modified to make sure the compiler knew what an Xinput device type was. With all of that out of the way, [Zachery] was finally able to write the code for his controller.
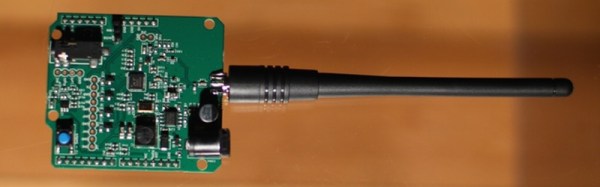
Anybody can grab a USB TV tuner card and start monitoring the airwaves, but to get into the real meat of radio you’ll need your amateur radio license. Once you have that, the bandwidth really opens up… if you can afford the equipment. However, [spaceneedle] and friends have dramatically lowered the costs while increasing the possibilities of owning a radio by creating this ham radio shield for the Arduino.
The HamShield, is a versatile shield for any standard Arduino that allows it to function like an off-the-shelf radio would, but with a virtually unlimited number of functions. Anything that could be imagined can be programmed into the Arduino for use over the air, including voice and packet applications. The project’s sandbox already includes things like setting up mesh networks, communicating over APRS, setting up repeaters or beacons, monitoring weather stations, and a whole host of other ham radio applications.
HamShield operates on a wide range of frequencies and only uses a 250 mW amplifier. The power draw is small enough that the HamShield team operated it from a small solar panel, making it ideal for people in remote areas. The project is currently gathering funding and has surpassed their goal on Kickstarter, branding itself appropriately as the swiss army of amateur radio. The transceiver seems to be very robust, meaning that the only thing standing in the way of using this tool is simply writing the Arduino code for whatever project you want to do, whether that’s as a police scanner or even just a frequency counter. And if you want to follow along on hackaday.io, the project can be found here.