Art is something that is always hard to classify, but by and large is most celebrated when it stimulates an emotional response for the intended audience. We’d say [Alexander Miller] achieved that in spades, with his elegant piece The Emergence and Decay of Computation.
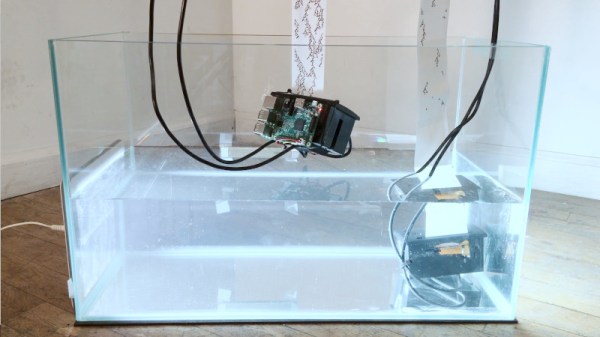
An installation piece done for The School for Poetic Computation’s 2019 spring showcase, it consists of a series of receipt printers suspended from a height by their own paper. The thermal printers output a pattern from a cellular automata — a mathematical simulation that generates patterns that emerge from initial conditions, of which Conway’s Game of Life is perhaps the most popular. Fed data by an attached Raspberry Pi, as printing continues, the printers gradually lower themselves into a tank of water, permanently killing the hardware.
Watching a proud, brave printer slowly work itself into a watery grave is a sobering experience to any lover of stout commercial hardware, and one we won’t soon forget. What a shame to see them sacrificed so. We love a good art piece around these parts, after all. Especially when the hardware can be used in another project once the excitement of this one has waned. Video after the break. Continue reading “Receipt Printers End It All In Moving Art Piece”