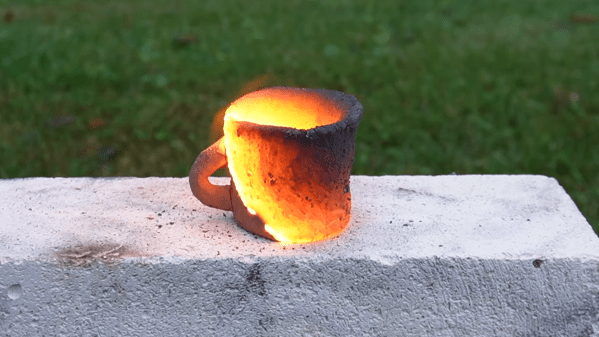
Finely powdered aluminium can make almost anything more pyrotechnically interesting, from fireworks to machine shop cleanups – even ceramics, as [Degree of Freedom] discovered. He was experimenting with mixing aluminium powder with various other substances to see whether they could make a thermite-like combination, and found that he could shape a paste of aluminium powder and clay into a form, dry it, and ignite it. After burning, it left behind a hard ceramic material.
[Degree of Freedom] was naturally interested in the possibilities of self-firing clay, so he ran a series of experiments to optimize the composition, and found that a mixture of three parts of aluminium to five parts clay by volume worked best. However, he noticed that bubbles of hydrogen were forming under the surface of the clay, which could cause cracks during the firing. The aluminium was reacting with water to form the bubbles, somewhat like a unwanted form of aerated concrete, and for some reason the kaolinite in clay seemed to accelerate the reaction. Trying to passivate the aluminium by heating it in air or water didn’t prevent the reaction, but [Degree of Freedom] did find that clay extracted from the dirt in his back yard didn’t accelerate it as kaolinite did, and the mixture could dry out without forming bubbles.
This mixture wasn’t totally reliable, so to make it a bit more consistent [Degree of Freedom] added some iron oxide to accelerate the burn through an actual thermite reaction – some mixtures burned hot enough to start to melt the clay. After many tests, he found that sixteen parts clay, seven parts aluminium, and five parts iron oxide gave the best results. He fired two cups made of the mixture, a thin rod, and a cube, with mixed results. The clay expanded a bit during firing, which sometimes produced a rough finish, cracking, and fragility, but in some cases it was surprisingly strong.
The actual chemistry at work in the clay-aluminium mixtures is a bit obscure, but not all thermite reactions need to involve iron oxide, so there might have been some thermite component even in the earlier mixtures. If you need heat rather than ceramic, we’ve also seen a moldable thermite paste extruded from a 3D printer.
ceramic35 Articles
Coping With Disappearing Capacitance In A Buck Converter
Designing a circuit is a lot easier on paper, where components have well-defined values, or lacking that, at least well-defined tolerances. Unfortunately, even keeping percentage tolerances in mind isn’t always enough to make sure that circuits work correctly in the real world, as [Tahmid] demonstrates by diagnosing a buck converter with an oddly strong voltage ripple in the output.
Some voltage ripple is an inherent feature of the buck converter design, but it’s inversely proportional to output capacitance, so most designs include a few smoothing capacitors on the output side. However, at 10 V and a 50% duty cycle, [Tahmit]’s converter had a ripple of 0.75 V, significantly above the predicted variation of 0.45 V. The discrepancy was even greater at 20 V.
The culprit was the effect of higher voltages on the ceramic smoothing capacitors: as the voltage increases, the dielectric barrier in the capacitors becomes less permittive, reducing their capacitance. Fortunately, unlike in the case of electrolytic capacitors, the degradation of ceramic capacitors performance with increasing voltage is usually described in specification sheets, and doesn’t have to be manually measured. After finding the reduced capacitance of his capacitors at 10 V, [Tahmid] calculated a new voltage ripple that was only 14.5% off from the true value.
Anyone who’s had much experience with electronics will have already learned that passive components – particularly capacitors – aren’t as simple as the diagrams make them seem. On the bright side, they are constantly improving.
Microwave Forge Casts The Sinking-est Benchy Ever
As a test artifact, 3DBenchy does a pretty good job of making sure your 3D printer is up to scratch. As an exemplar of naval architecture, though — well, let’s just say that if it weren’t for the trapped air in the infilled areas, most Benchy prints wouldn’t float at all. About the only way to make Benchy less seaworthy would be to make it out of cast iron. Challenge accepted.
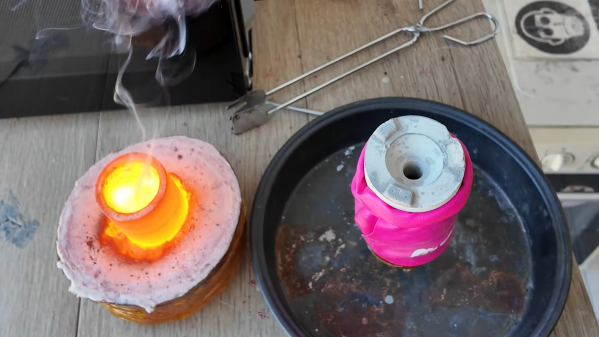
We’ve grown accustomed to seeing [Denny] over at “Shake the Future” on YouTube using his microwave-powered kilns to cast all sorts of metal, but this time he puts his skill and experience to melting iron. For those not in the know, he uses standard consumer-grade microwave ovens to heat kilns made from ceramic fiber and lots of Kapton tape, which hold silicon carbide crucibles that get really, really hot under the RF onslaught. It works surprisingly well, especially considering he does it all on an apartment balcony.
For this casting job, he printed a Benchy model from PLA and made a casting mold from finely ground silicon carbide blasting medium mixed with a little sodium silicate, or water glass. His raw material was a busted-up barbell weight, which melted remarkably well in the kiln. The first pour appeared to go well, but the metal didn’t quite make it all the way to the tip of Benchy’s funnel. Round two was a little more exciting, with a cracked crucible and spilled molten metal. The third time was a charm, though, with a nice pour and complete mold filling thanks to the vibrations of a reciprocating saw.
After a little fettling and a saltwater bath to achieve the appropriate patina, [Denny] built a neat little Benchy tableau using microwave-melted blue glass as a stand-in for water. It highlights the versatility of his method, which really seems like a game-changer for anyone who wants to get into home forging without the overhead of a proper propane or oil-fired furnace. Continue reading “Microwave Forge Casts The Sinking-est Benchy Ever”
More Microwave Metal Casting
If you think you can’t do investment casting because you don’t have a safe place to melt metal, think again. Metal casting in the kitchen is possible, as demonstrated by this over-the-top bathroom hook repair using a microwave forge.
Now, just because it’s possible doesn’t mean it’s advisable. There are a lot better ways to fix something as mundane as a broken bathroom hook, as [Denny] readily admits in the video below. But he’s been at the whole kitchen forging thing since building his microwave oven forge, which uses a special but easily constructed ceramic heat chamber to hold a silicon carbide crucible. So casting a replacement hook from brass seemed like a nice exercise.
The casting process starts with a 3D-printed model of the missing peg, which gets accessories such as a pouring sprue and a thread-forming screw attached to it with cheese wax. This goes into a 3D-printed mold which is filled with a refractory investment mix of plaster and sand. The green mold is put in an air fryer to dry, then wrapped in aluminum foil to protect it while the PLA is baked out in the microwave. Scrap brass gets its turn in the microwave before being poured into the mold, which is sitting in [Denny]’s vacuum casting rig.
The whole thing is over in seconds, and the results are pretty impressive. The vacuum rig ensures metal fills the mold evenly without voids or gaps. The brass even fills in around the screw, leaving a perfect internal thread. A little polishing and the peg is ready for bathroom duty. Overly complicated? Perhaps, but [Denny] clearly benefits from the practice jobs like this offer, and the look is pretty cool too. Still, we’d probably want to do this in the garage rather than the kitchen.
Continue reading “More Microwave Metal Casting”
Slab Casting – A New Way To Combine 3D Printing And Ceramics
Slip casting can be messy both in processing and in making the original plaster mold. What if there was a better way, thanks to 3D printing?
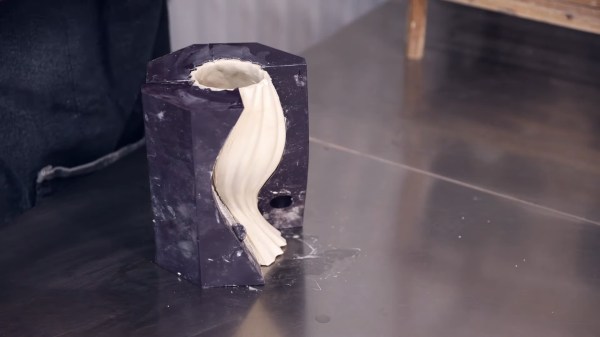
[Allie Katz] has developed a new technique using 3D printed slab molds to make ceramics. By combining the ability of 3D printing to make intricate designs and the formability of clay, they have found a way to make reproducible clay objects without all that tedious mucking about with liquid clay.
[Katz] takes us through a quick “Mould Making 101” before showing how the slab casting press molds were made. Starting with a positive CAD design, the molds were designed to eliminate undercuts and allow for air infiltration since a plastic mold can’t suck the water out of the clay like a plaster one would. Some cookie clay cutters were also designed to help with the trickier bits of geometry. Once everything was printed, the molds were coated with cornstarch and clay was pressed in. After removal, any final details like handles can be added and the pieces are then fired as normal.
If you’d like to see some more 3D printing mixed up with ceramics, check out 3D printing glass with a laser, reliable ceramic slurry printing, or this TPU-based approach.
Continue reading “Slab Casting – A New Way To Combine 3D Printing And Ceramics”
Cerabyte: One Terabyte Per Square Centimeter
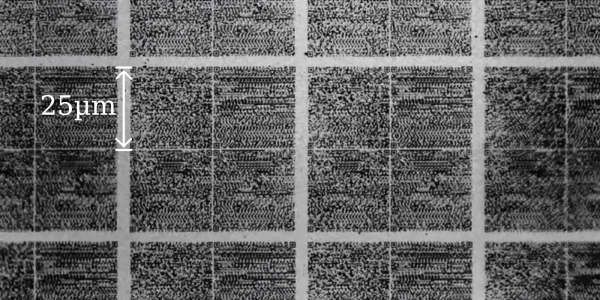
Most of us will at one point have run out of storage and either had to buy a larger driver or delete some of those precious files. This problem can happen to data centers, too, with the ever-increasing amount of data stored on servers across the world. [Cerabyte] aims to fix this, with their ceramic-based media promising 1 TB/cm² of areal density.
To put into perspective just how much better this density is, we can compare it against SSDs and hard drives. At the time of writing, the densest SSD (NAND flash storage) is claimed to be 0.1825 TB/cm² and the densest hard drive is claimed to be 0.1705 TB/cm², which means 5.48 times and 5.87 times more dense respectively. The density improvement doesn’t end there — both an SSD and a single HDD platter might be a couple millimeters tall, while a [Cerabyte] layer claims to be merely 50 atoms tall.
[Cerabyte] aims to create 10 PB (10,000 TB) and later 1 EB (1,000,000 TB) racks with their technology, a feat difficult to achieve with mere hard drives. The ceramic-based media is written to using lasers and read from with a microscope, though throughput is limited to a “mere” 1 GB/s, which means filling that one rack could take as long as 110 days. Despite the relatively slow access times, we think this new storage technology is impressive, assuming [Cerabyte] succeeds.
Do you need so much storage that even [Cerabyte] can’t satisfy your needs? Simply use YouTube as infinite storage!
Reliable 3D Printing With Ceramic Slurry
3D printing is at its most accessible (and most affordable) when printing in various plastics or resin. Printers of this sort are available for less than the cost of plenty of common power tools. Printing in materials other than plastic, though, can be a bit more involved. There are printers now for various metals and even concrete, but these can be orders of magnitude more expensive than their plastic cousins. And then there are materials which haven’t really materialized into a viable 3D printing system. Ceramic is one of those, and while there are some printers that can print in ceramic, this latest printer makes some excellent strides in the technology.
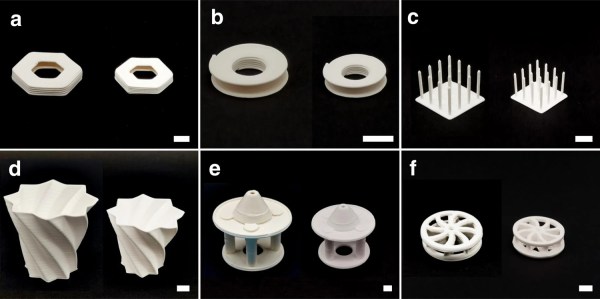
Existing technology for printing in ceramic uses a type of ceramic slurry as the print medium, and then curing it with ultraviolet light to solidify the material. The problem with ultraviolet light is that it doesn’t penetrate particularly far into the slurry, only meaningfully curing the outside portions. This can lead to problems, especially around support structures, with the viability of the prints. The key improvement that the team at Jiangnan University made was using near-infrared light to cure the prints instead, allowing the energy to penetrate much further into the material for better curing. This also greatly reduces or eliminates the need for supports in the print.
The paper about the method is available in full at Nature, documenting all of the details surrounding this new system. It may be a while until this method is available to a wider audience, though. If you can get by with a print material that’s a little less exotic, it’s not too hard to get a metal 3D printer, as long as you are familiar with a bit of electrochemistry.

