Hacking Hackaday.io From CircuitPython

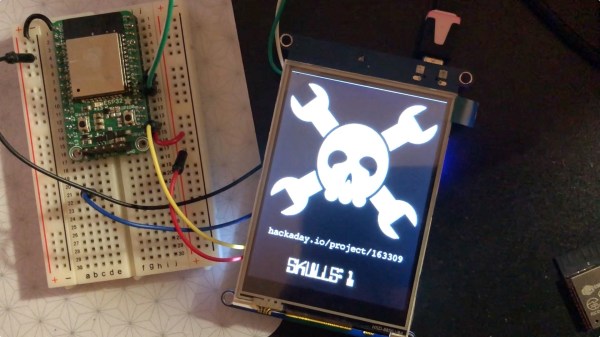
If you’ve ever engaged in social media, you’re familiar with the little thrill you receive when your post, tweet, or project gets a like. But, if logging in feels like too much overhead to obtain your dopamine reward, [pt’s] CircuitPython Hackaday portal may be just what you’re looking for. This project creates a stand-alone counter to display the number of “skulls” (aka likes) received by a project on hackaday.io, and of course, it’s currently counting its own.

The code is running on a SAMD51 (Cortex M4) microcontroller and serving up the skulls on 240×320 TFT display. For WiFi connectivity, the project uses an ESP-32 controlled through the usual AT command set. All the gory details of this interaction are abstracted away by a CircuitPython library, which is great because that code really isn’t something you want to write for every project. The program accesses the hackaday.io API to retrieve the number of skulls for the project, but could be easily modified to interface with any service that returned a JSON result.

We’ve been seeing a lot of CircuitPython code lately. Just in case you’re not familiar with it, CircuitPython is Adafruit’s version of Micropython, a python language targeted at embedded processors. While it sounds like something concocted purely to make old-school embedded-C programmers grumble, it’s actually powerful and convenient for embedded prototyping and development. Fueled by the speed of the latest inexpensive microcontrollers and a rapidly growing set of libraries that take the sting out of using integrated peripherals and common hacker-friendly parts, it offers a solid alternative to older embedded frameworks. There are lots of examples around if you want to get started, and we’re maintaining our own list of CircuitPython projects over on hackaday.io that you can check out.

You can see a video of the display after the break. It’s not a live stream, so you won’t see your like appear on the display, but rest assured, [pt] will!

Continue reading “Hacking Hackaday.io From CircuitPython”

Code On Your Phone With CircuitPython Editor

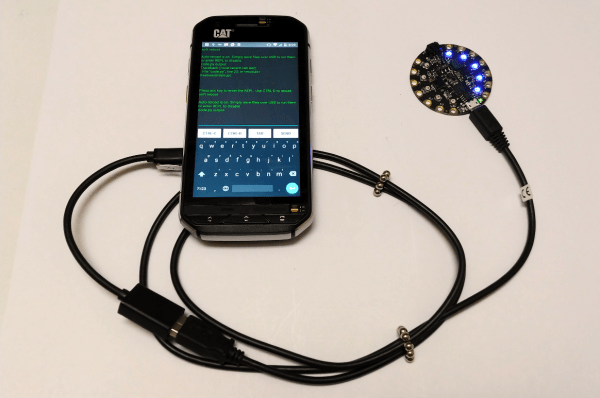
[foamyguy] loves Python and messing around with electronics. Boards such as Adafruit’s Circuit Playground Express make it easy for him to take both anywhere. He recently found himself wanting to program Circuit Python boards in the field, but doesn’t always have a laptop on him. So he created an Android app to make on-the-go programming fast and easy.

Using CircuitPython Editor and one or two USB cables, you can program Circuit Python boards with most Android device, including Tinkerboards. It features serial communication, a basic code editor, and a REPL sandbox for code-based castle building. [foamyguy]’s most recent addition to this work in progress is a macro creation tool that lets you edit and store modular, repeatable tasks, like turning all the NeoPixels blue, or lighting them up in a smiley face pattern. The Circuit Python board will draw its power from the Android device, so keep that in mind before you program some crazy light show.

You can get the app in the Play store or download it directly from the ‘hub. If you have any trouble setting it up, check out [foamyguy]’s Adafruit guide.

Hackaday Links Column Banner

Hackaday Links: December 2, 2018

CircuitPython is becoming a thing! CircuitPython was originally developed from MicroPython and ported to various ARM boards by Adafruit. Now, SparkFun is shipping their own CircuitPython board based on the nRF52840, giving this board an ARM Cortex-M4 and a Bluetooth radio.

You like contests, right? You like circuit boards too, right? Hackster.io now has a BadgeLove contest going on to create the Blinkiest Badge on Earth. Yes, this is a #badgelife contest, with the goal of demonstrating how much you can do in a single circuit badge. Prizes include a trip to San Francisco, a badass drone, a skateboard, a t-shirt, or socks. YES, THERE ARE SOCKS.

We have a date for the Vintage Computer Festival Pacific Northwest 2019. It’s going down March 23 and 24 at the Living Computers Museum in Seattle. The call for exhibitors is now open so head over and check it out. So far the tentative list of exhibits and presenters include Attack of the SPARC Clones, and I must mention that SPARC systems are showing up on eBay with much higher frequency lately. I have no idea why.

Need another con? How about a KiCAD con? The inaugural conference for KiCAD users is happening next April in Chicago and the call for talk proposals just opened up. The con focuses on topics like using KiCAD in a manufacturing setting, what’s going on ‘under the hood’ of KiCAD, and how to use KiCAD to make an advanced product.

Spanish police have stopped a homemade scooter. Someone, apparently, was tearing around a public road in Galacia on a homemade scooter. From the single picture, we’re going to say ‘not bad.’ It’s a gas-powered weed wacker mounted to a homemade frame.

Every year, in December, we take a look back at what Hackaday has accomplished in the past twelve months. Sure, we gave out hundreds of thousands of dollars in awards in the Hackaday Prize, and yes, we’ve pushed our coverage of tech advancements into weird, uncharted, but awesome territory. Our biggest accomplishment, though, is always how many readers we reach. This year, we had a slight fall-off in our readership in the Democratic People’s Republic of North Korea. We’re down from 156 views in 2017 to 75 views this year. While the year isn’t over, we don’t expect that number to change much. What was the cause of this drop-off? We’re not quite sure. Only time will tell, and we’re looking forward to serving fresh hacks every day to the DPRK in 2019.

Friday Hack Chat: Circuit Python

Back in the olden days, if you wanted to learn how to program a computer, you used the BASIC interpreter stored in ROM. This is how an entire generation of devs learned how to program. Now, home computers do not exist, there is no programming language stored in ROM, and no one should inflict JavaScript on 8-year-olds. What is the default, My First Programming Language™ today? Python. And now it’s on microcontrollers.

For this week’s Hack Chat on hackaday.io, we’re going to be talking all about Circuit Python. Circuit Python is based on the Open Source MicroPython, a Python 3 interpreter that implements a subset of the Python language on microcontrollers and other constrained environments. It is the spiritual successor of BASIC on every computer: MicroPython has an interactive prompt, arbitrary precision integers, closures, lists, and more. All of this fits on a microcontroller with 256 kB of code space and 16 k of RAM.

Our guests for this week’s Hack Chat will be [Scott Shawcroft] and [Dan Halbert] from Adafruit. [Scott] started working on MicroPython with Adafruit in September 2016 and has led the renamed CircuitPython effort ever since. [Dan] started working on CircuitPython in early 2017 and joined Adafruit in August of that year. [Dan], by the way, is the original author of the ‘more’ command in UNIX.

For this Hack Chat, we’re going to be talking about CircuitPython, its history, current boards that support the project, and the end goals for CircuitPython. We’ll be talking about future plans, what will be supported in the future, and asking any technical questions about CircuitPython.

join-hack-chat

Our Hack Chats are live community events on the Hackaday.io Hack Chat group messaging. This Hack Chat is going down Friday, February 2nd at noon, Pacific time. Time Zones got you down? Here’s a handy countdown timer!

Click that speech bubble to the left, and you’ll be taken directly to the Hack Chat group on Hackaday.io.

You don’t have to wait until Friday; join whenever you want and you can see what the community is talking about.

MicroPython Learns A New Trick – ISP For AVRs

One of the reasons why the Arduino became so popular was the ability to program it with ease. It meant the end of big parallel programmers that would cost an arm and a leg. The latest installment of CircuitPython from [Lady Ada] and the team over at Adafruit is a library for programming AVR microcontrollers without a dedicated PC.

For the uninitiated, in-system programming or ISP for AVR controllers employ the SPI bus to write the compiled binary to the flash memory of the controller. The discount on the number of pins used itself is a benefit though getting the timings right was a bit tricky in the good old days. Most dedicated ISPs handle this nicely, though they are normally slaves to a host PC where an ‘upload’ button initiates the process.

With CircuitPython (a derivative of MicroPython), programming microcontrollers does not require going through the code-compile-flash cycle. It can be run on a number of processors, however, AVRs are not among them so this neat little library offers the next best thing. Wire-up an Atmega328P or ATmega2560 to a board like the ESP8266 that does run CircuitPython, and you can write firmware on the fly.

There is a complete tutorial on the subject thanks to [Phillip Torrone] and [Lady Ada] which includes some demo files for testing out the functionality. This opens up a lot of possibilities where OTA firmware updates for an AVR co-processor. We expect to see some keychain AVR programmers in the near future taking a hint from the ESP8266 based Two-Factor Authentication featured previously.

Two Factor Authentication With The ESP8266

Google Authenticator is a particularly popular smartphone application that can be used as a token for many two factor authentication (2FA) systems by generating a time-based one time password (referred to as TOTP). With Google Authenticator, the combination of your user name and password along with the single-use code generated by the application allows you to securely authenticate yourself in a way that would be difficult for an attacker to replicate.

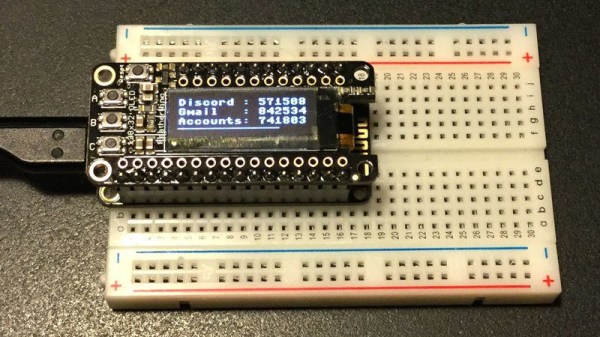
That sounds great, but what if you don’t have a smartphone? That’s the situation that [Lady Ada] recently found herself in, and rather than going the easy route and buying a hardware 2FA token that’s compatible with Google Authenticator, she decided to build one herself based on the ESP8266. With the hardware and source documented on her site, the makings of an open source Google Authenticator hardware token are available for anyone who’s interested.

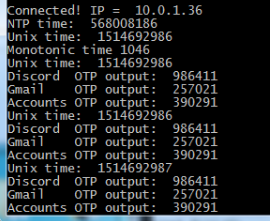
Generated codes can also be viewed via serial.

For the hardware, all you need is the ESP8266 and a display. Naturally [Lady Ada] uses her own particular spin on both devices which you can purchase if you want to create an identical device, but the concept will work the same on the generic hardware you’ve probably already got in the parts bin. Software wise, the code is written in CircuitPython, a derivative of MicroPython, which aims to make microcontroller development easier. If you haven’t tried MicroPython before, grab an ESP and give this a roll.

Conceptually, TOTP is relatively simple. You just need to know what time it is, and run an SHA1 hash. The time part is simple enough, as the ESP8266 can connect to the network and get the current time from NTP. The calculation of the TOTP is handled by the Python code once you’ve provided it with the “secret” pulled from the Google Authenticator application. It’s worth noting here that this means your 2FA secrets will be held in clear-text on the ESP8266’s flash, so try not to use this to secure any nuclear launch systems or anything, OK? Then again, if you ever lose it the beauty of 2-factor is you can invalidate the secret and generate a new one.

We’ve covered the ins and outs of 2FA applications before here at Hackaday if you’d like to know more about the concept, in addition to previous efforts to develop a hardware token for Google Authenticator.

Bodging On More Flash Memory

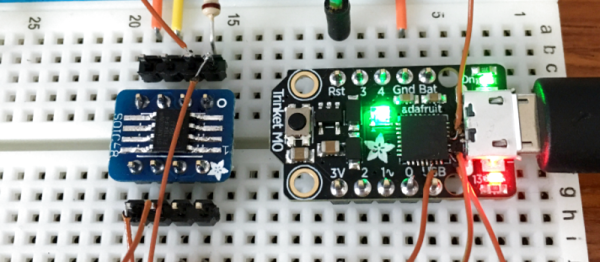
[Curmudegeoclast] found himself running out of flash memory on a Trinket M0 board, so he decided to epoxy and fly-wire a whopping 2 MB of extra flash on top of the original CPU.

We’ll just get our “kids these days” rant out of the way up front: the stock SAMD21 ARM chip has 256 kB (!) of flash to begin with, and is on a breakout board with only five GPIO pins, for a 51 kB / pin ratio! And now he’s adding 2 MB more? That’s madness. The stated reason for [Curmudegeoclast]’s exercise is MicroPython, which takes up a big chunk of flash just for the base language. We suspect that there’s also a fair amount of “wouldn’t it be neat?” in the mix as well. Whatever.

The hack is a classic. It starts off with sketchy wires soldered to pins and breadboarded up with a SOIC expander board. Following that proof of concept, some degree of structural integrity is brought to the proceedings by gluing the flash chip, dead-bug, on top of the microcontroller. We love the (0805?) SPI pullup resistor that was also point-to-point soldered into place. We would not be able to resist the temptation to entomb the whole thing in hot glue for “long-term” stability, but there are better options out there, too.

This hack takes a minimalist board, and super-sizes it, and for that, kudos. What would you stuff into 2 MB of free flash on a tiny little microcontroller? Any of you out there using MicroPython or CircuitPython care to comment on the flash memory demands? 256 kB should be enough for anyone.