3D-Printed Transformer Disappoints, But Enlightens

Transformers are deceptively simple devices. Just coils of wire sharing a common core, they tempt you into thinking you can make your own, and in many cases you can. But DIY transformers have their limits, as [Great Scott!] learned when he tried to 3D-print his own power transformer.

To be fair, the bulk of the video below has nothing to do with 3D-printing of transformer coils. The first part concentrates on building transformer cores up from scratch with commercially available punched steel laminations, in much the same way that manufacturers do it. Going through that exercise and the calculations it requires is a great intro to transformer design, and worth the price of admission alone. With the proper number of turns wound onto a bobbin, the laminated E and I pieces were woven together into a core, and the resulting transformer worked pretty much as expected.

The 3D-printed core was another story, though. [Great Scott!] printed E and I pieces from the same iron-infused PLA filament that he used when he 3D-printed a brushless DC motor. The laminations had nowhere near the magnetic flux density of the commercial stampings, though, completely changing the characteristics of the transformer. His conclusion is that a printed transformer isn’t possible, at least not at 50-Hz mains frequency. Printed cores might have a place at RF frequencies, though.

In the end, it wasn’t too surprising a result, but the video is a great intro to transformer design. And we always appreciate the “DIY or Buy” style videos that [Great Scott!] does, like his home-brew DC inverter or build vs. buy lithium-ion battery packs.

Continue reading “3D-Printed Transformer Disappoints, But Enlightens”

Build Your Own Solenoid Engine

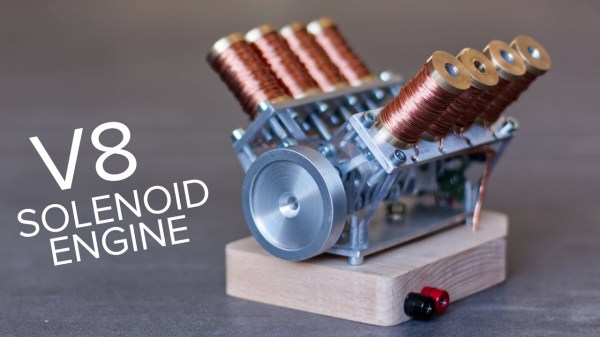
A solenoid engine is a curiosity of the electrical world. By all measures, using electricity to rotate something can be done almost any other way with greater efficiency and less hassle. But there’s just something riveting about watching a solenoid engine work. If you want to build one of your own and see for yourself, [Emiel] aka [The Practical Engineer] has a great how-to.

For this build though he used a few tools that some of us may not have on hand, such as a lathe and a drill press. The lathe was used to make the plastic spool to hold the wire, and also to help wind the wire onto the spool itself rather than doing it by hand. He also milled the wood mounts and metal bearings as well, and the quality of the work really shows through in the final product. The final touch is the transistor which controls power flow to the engine.

If you don’t have all of the machine tools [Emiel] used it’s not impossible to find substitute parts if you want to build your own. It’s an impressive display piece, or possibly even functional if you want your build to have a certain steampunk aesthetic (without the steam). You can even add more pistons to your build if you need extra power.

Continue reading “Build Your Own Solenoid Engine”

Turn A Ceiling Fan Into A Wind Turbine… Almost

It’s not uncommon to drive around the neighborhood on trash day and see one or two ceiling fans haphazardly strewn onto a pile of garbage bags, ready to be carted off to the town dump. It’s a shame to see something like this go to waste, and [Giesbert Nijhuis] decided he would see what he could do with one. After some painstaking work, he was able to turn a ceiling fan into a wind turbine (of sorts).

While it’s true that some generators and motors can be used interchangeably by reversing the flow of electricity (motors can be used as generators and vice-versa) this isn’t true of ceiling fans. These motors are a type called induction motors which, as a cost saving measure, have no permanent magnets and therefore can’t simply be used as a generator. If you make some modifications to them, though, like rewiring some of the windings and adding permanent magnets around them, you can get around this downside of induction motors.

[Giesbert] does note that this project isn’t a great way to build a generator. Even after making all of the changes needed to get it working, the motor just isn’t as efficient as one that was built with its own set of magnets. For all the work that went into it, it’s not that great of a time investment for a low-quality generator. However, it’s interesting to see the theory behind something like this work at all, even if the end result wasn’t a complete wind turbine. Perhaps if you have an old ceiling fan lying around, you can put it to better use.

Continue reading “Turn A Ceiling Fan Into A Wind Turbine… Almost”

Flexible PCB Robot Flops Around To Get Around

In his continuing quest to reduce the parts count of a robot as far as possible, [Carl Bugeja] has hit upon an unusual design: robots built of almost nothing but PCBs.

Admittedly, calling these floppy four-legged critters robots is still a bit of a stretch at this point. The video below shows that while they certainly move under their own power, there’s not a lot of control to the movement – yet. [Carl]’s design uses an incredibly fragile looking upper arm assembly made from FR4. Each arm holds a small neodymium magnet suspended over the center of a flexible PCB coil, quite like those we’ve seen him use before as actuators and speakers. The coils are controlled by a microcontroller living where the four legs intersect. After a few uninspiring tethered tests revealed some problems with the overly compliant FR4 magnet supports, [Carl] made a few changes and upped the frequency of the leg movements. This led to actual motion and eventually to untethered operation, with the bot buzzing around merrily.

There are still issues with the lack of stiffness of the magnet arms, but we’re optimistic that [Carl] can overcome them. We like this idea a lot, and can see all sort of neat applications for flapping and flopping locomotion.

Continue reading “Flexible PCB Robot Flops Around To Get Around”

Turn Old Pinball Parts Into A Unique Digital Clock

It’s getting ever harder to build a truly unique digital clock. From electronic displays to the flip-dots and flip-cards, everything seems to have been done to death. But this pinball scoring reel clock manages to keep the unique clock ball in play, as it were.

It’s not entirely clear whom to credit with this build, but the article was written by [Lucky]. Nor do they mention which pinball machine gave up its electromechanical scoring display for the build. Our guess would be a machine from the ’60s, before the era of score inflation that required more than the four digits used. And indeed, the driver for the display is designed so that a scoring unit from any pinball machine from the electromechanical era can be used. An ESP8266 keeps the time with the help of an RTC and drives the coils of the scoring unit through a bunch of MOSFETs. The video below shows that it wouldn’t make a great clock for the nightstand; thankfully, it has a user-configured quiet time to limit the not inconsiderable noise to waking hours. It also flashes the date every half hour, rings solenoid operated chimes, and as a bonus, it can be used to keep score in a pinball game built right into the software.

We like the idea of honoring the old pinball machines with clock builds like this. We’ve seen a word clock built from the back-glass of an old machine, and one that uses a four-player back to display the date and alarm time too.

Continue reading “Turn Old Pinball Parts Into A Unique Digital Clock”

Energy Sipping Neodymium Sphere Keeps On Spinning

At this point we’re sure you are aware, but around these parts we don’t deduct points for projects which we can’t immediately see a practical application for. We don’t make it our business to say what is and isn’t worth your time as an individual hacker. If you got a kick out of it, great. Learned something? Even better. If you did both of those things and took the time to document it, well that’s precisely the business we’re in.

So when [Science Toolbar] sent in this project which documents the construction of an exceptionally energy efficient spinning neodymium sphere, we knew it was our kind of thing. In the documentation it’s referred to as a motor, though it doesn’t appear to have the torque to do any useful work. But still, if it can spin continuously off of the power provided by a calculator-style photovoltaic cell, it’s still a neat trick.

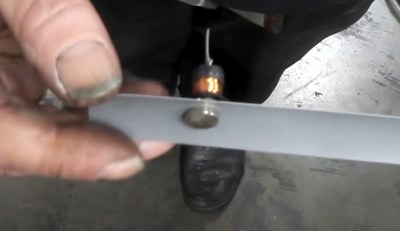
But how does it work? It starts by cracking open one of those little solar powered toys; the ones that wave or dance around as soon as any light hits the panel in their base. As [Science Toolbar] explains, inside these seemingly magical little gadgets is a capacitor and the classic black epoxy blob that contains an oscillator circuit. A charge is built up in the capacitor and dumped into a coil at roughly 1 Hz, which provides just enough of a push to get the mechanism going.

In the video after the break, [Science Toolbar] demonstrates how you can take those internals and pair it with a much larger coil. Rather than prompting a little sunflower or hula girl to do its thing, the coil in this version provides the motive force for getting the neodymium sphere spinning. To help things along, they’re even using a junk box zero friction magnetic bearing made up of a wood screw and a magnetized screwdriver tip.

It’s an interesting example of how a tiny charge can be built up over time, and with a nice enough enclosure this will make for a pretty cool desk toy. We’ve previously seen teardowns of similar toys, which revealed a surprising amount of complexity inside that little epoxy blob. No word on whether or not the version [Science Toolbar] cannibalized was quite so clever, however.

Continue reading “Energy Sipping Neodymium Sphere Keeps On Spinning”

Stepper Motor Mods Improve CNC Flat Coil Winder

Finding just the right off-the-shelf part to complete a project is a satisfying experience – buy it, bolt it on, get on with business. Things don’t always work out so easily, though, which often requires the even more satisfying experience of modifying an existing part to do the job. Modifying a stepper motor by drilling a hole down its shaft probably qualifies for the satisfying mod of the year award.

That’s what [Russ] did to make needed improvements to his CNC flat-coil winder, which uses a modified delta-style 3D-printer to roll fine magnet wire out onto adhesive paper to form beautiful coils of various sizes and shapes. [Russ] has been tweaking his design since we featured it and coming up with better and better coils. While experimenting, the passive roller at the business end proved to be a liability. The problem was that the contact point lagged behind the center axis of the delta, leading to problems with the G-code. [Russ] figured that a new tool with the contact point at the dead center would help. The downside would be having to actively swivel the tool in concert with the X- and Y-axis movements. The video below shows his mods, which include disassembling the NEMA-17 stepper and drilling out the shaft to pass the coil wire. [Russ] also spent some time reversing the rotor in the frame and provided a small preload spring to keep the coil roller in contact with the paper.

A real-time coil winding session starts at the 21:18 mark, and we’ve got to admit it’s oddly soothing to watch. We’re not sure exactly what [Russ] intends to do with these coils, and by his own admission, neither is he. But it’s still pretty cool to see, and the stepper motor mods are a neat trick to keep in mind.

Continue reading “Stepper Motor Mods Improve CNC Flat Coil Winder”