How fast can you count to a million? It would probably take you a while. A computer could certainly do it faster. Indeed, the The National Museum of Computing figured it could actually prove to be a simple but useful benchmark for comparing computers over many eras and architectures. Thus was born the Million Measure.
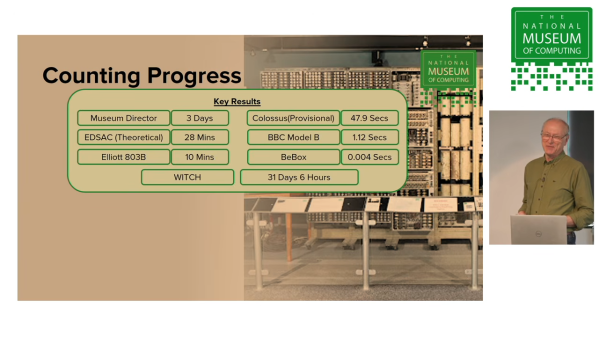
The intention was to develop a benchmark that could run on just about anything considered a “computer.” As explained in a recent talk, the Million Measure can be run quite simply on anything from an ancient World War II computer like Colossus, to a modern Raspberry Pi. There are no complicated algorithms that need optimization, nor architecture-specific code required to do the job. The museum also found it to be a useful way to figure out which computers in their collection were actually working at any given time. Early computers from the mid-20th century reported benchmark times in minutes, while a 1995 BeBox is the fastest machine tested so far at 0.004 seconds.
It’s not a particularly useful measure for modern machines, which are so fast as to make the test difficult to parse in an intuitive way. But if you’re working with today’s hardware, there are other techniques you can use. Video after the break.