Emulating Oric-1 Floppy Disk Hardware

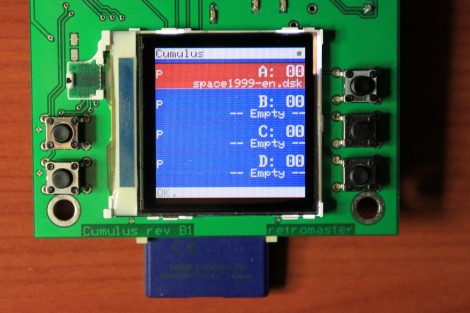
This device is called the Cumulus and it’s used to emulate the floppy disk hardware for Oric-1 and Oric Atmos computers. These 1980’s era computers included an expansion slot to which you could connect a floppy drive. That module, called a Microdisc system, also included the driver circuit which means you can’t just use a modern-day floppy drive as a replacement. [Retromaster] sidestepped the need for magnetic media all together by building an SD card interface which emulates the original module. We can tell by the use of a color screen and clean board layout that a lot of love went into the project. A CPLD implements the communications protocol used by the Microdisc system and creates all of the registers that would have been found on the original hardware. A PIC takes care of the SD card communications and the user interface.

With the exception of comforting noises, we’d bet there are few who have fond memories of using floppy disks. No wonder we’ve been seeing hacks to replace them quite a bit lately.

What Development Board To Use? (Part Two)

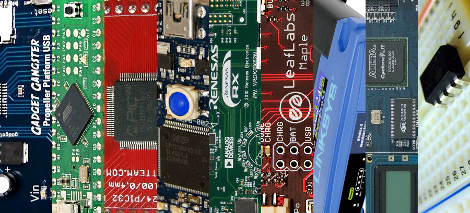
We asked for responses to our last Development Board post, and you all followed through. We got comments, forum posts, and emails filled with your opinions. Like last time, there is no way we could cover every board, so here are a few more that seemed to be popular crowd choices. Feel free to keep sending us your favorite boards, we may end up featuring them at a later date!

Continue reading “What Development Board To Use? (Part Two)”

V4Z80P: The 8-bit Laptop

[Phil] over at Retroleum has cobbled together a clean, well put together laptop based entirely around a Zilog Z80 microprocessor and a pair of Spartan II FPGAs. These FPGAs allow him to reduce the number of devices on his board, and therefore cut his production cost as well as device size. He even managed to integrate a salvaged PSOne screen. The laptop comes complete with [Phil]’s own Homebrew OS as well as a great graphical vector based demo.

Sure he’s updated the project in recent years to shrink the board, speeding up the Z80, and increasing the peripheral speed and functionality, but we’re suckers here for a total package hack. Seriously though, check out the newest version of the device as well as the backlog that shows the project growing over time.

Thanks to [Steth] for the heads up.

40 MSPS Digital Oscilloscope

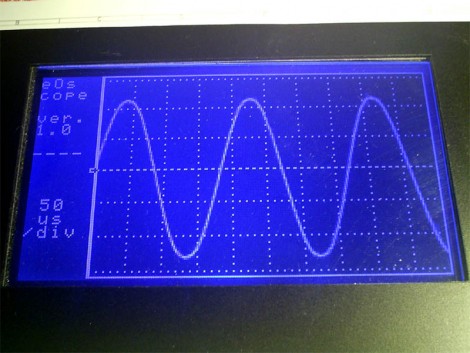
If you can fabricate single-sided circuit boards at home you can build this digital oscilloscope. It uses mostly through-hole components with just a couple of surface mount chips to contend with. An ATmega162 handles the hardware end of things with a CPLD used to manage the sampling rate. Data is displayed on a 240×128 LCD display which will be the most expensive component to acquire. It’s still a lot cheaper than buying a commercially available oscilloscope, even if you get a base model and hack it to unlock all the features.

[Thanks Juan]

NES Processor Cloned On A FPGA

nes-on-an-fpga

[Bradley] decided to tackle the challenge to recreate the original Nintendo Entertainment System’s processor in a Field Programmable Gate Array. Say what? The original NES is a Legacy System, still used but no longer manufactured. If a system breaks, it becomes more and more difficult to repair or find replacements parts as time passes. By using a programmable integrated circuit such as a CPLD or a FPGA to clone the functionality of the original hardware, legacy systems can live on long after the original hardware has given up the ghost.

It took [Bradley] about a year to fully implement the NES processor as part of his Master’s project at Bradley University. He used what was known about the processor combined with some detective work with logic probes along the way. The programming was done in VHDL and those files are available for download (click on Documentation).

With the ubiquity of NES emulators on every device known to man you probably won’t be replicating this unless you want a reason to play with a FPGA. What interests us is the hardware solution this type of work provides for obsolete hardware that still serves a useful purpose. If you’ve used a FPGA or similar device to keep an old system running, let us know about it in the comments.

T-Mobile G1 Teardown

g1teardown

In our Dev Phone 1 excitement last week, we somehow overlooked phoneWreck’s teardown of the T-Mobile G1. The complex slider mechanism is certainly worth looking out. One of the major oddities they point out is the inclusion of two vibration motors. One is mounted next to the SIM on the mainboard. While the other is mounted in the frame next to the earpiece. We wonder what was gained/solved by using two. The phone also includes a digital compass module. We’d like a more detailed explanation of how the Xilinx CPLD is used. From this article in 2006, it seems HTC uses them to generate custom clock signals and switching off devices for power management.

How-to: Programmable Logic Devices (CPLD)

Complex programmable logic devices (CPLDs) contain the building blocks for hundreds of 7400-serries logic ICs. Complete circuits can be designed on a PC and then uploaded to a CPLD for instant implementation. A microcontroller connected to a CPLD is like a microcontroller paired with a reprogrammable circuit board and a fully stocked electronics store.

At first we weren’t sure of the wide appeal and application of CPLDs in hobbyist projects, but we’ve been convinced. A custom logic device can eliminate days of reading datasheets, finding the ideal logic IC combination, and then waiting for chips to arrive. Circuit boards are simpler with CPLDs because a single chip with programmable pin placement can replace 100s of individual logic ICs. Circuit mistakes can be corrected by uploading a new design, rather than etching and stuffing a new circuit board. CPLDs are fast, with reaction times starting at 100MHz. Despite their extreme versatility, CPLDs are a mature technology with chips starting at $1.

We’ve got a home-etchable, self programming development board to get you started. Don’t worry, this board has a serial port interface for working with the CPLD, and doesn’t require a separate (usually parallel port) JTAG programmer.

Continue reading “How-to: Programmable Logic Devices (CPLD)”