Build Yourself A Beautiful Interactive Light Toy

Sometimes, we build things with LEDs as indicator lamps or to illuminate something important. Sometimes, we build things with LEDs purely to glow and be beautiful. This interactive light toy from [Jens] falls into the latter category.

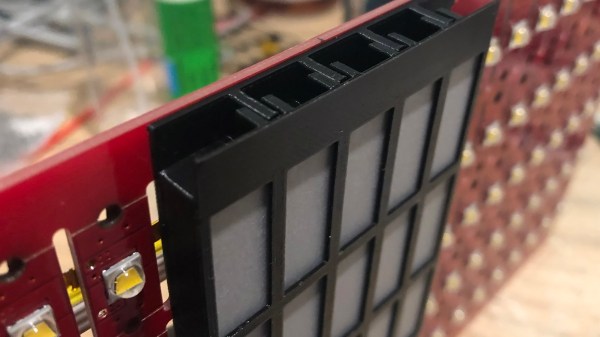
The build uses a 16×16 addressable LED matrix.  [Jens] then ported some “Bouncy Bubbles” Processing code from Keith Peters to the Arduino Mega, and set it up to display on the matrix. An accelerometer was used to control the bouncing ball animations, while a second Arduino was then tapped to act as a musical synthesizer to add more vibes. The whole kit was then built into a 3D-printed housing with a nice hazy diffuser to give the LEDs a smoother, even look. [Jens] steps through how he got the diffuser just right, including a support structure that made all the difference to the aesthetic of the finished product. Getting diffusion right is key to making a nice LED project, and [Jens] got it very right here.

It’s a nice little art piece that looks kind of relaxing to play with in a dark room. We love a good glowable project here at Hackaday, so if you’ve built your own—don’t hesitate to let us know! Video after the break.

Continue reading “Build Yourself A Beautiful Interactive Light Toy”

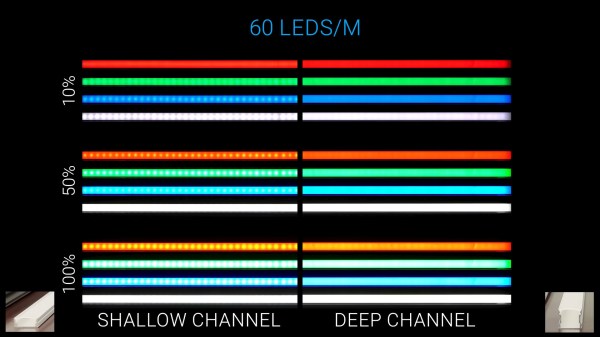
Screenshot from the video showing comparisons between diffused light pictures at different brightnesses and diffusers applied

LED Diffusers Confusing? Organize A Practical Contest

We all want a nice and shiny LED strip that doesn’t actually look like it consists of individual LEDs – a bar of uniform light is just that much more attractive. There’s all kinds of diffusion options available out there, but they can be confusing – sometimes you’d just like to know, which one is better? If there’s one thing that could easily settle this, it’s a practical test, and that’s what [The Hook Up] has devised for us to learn from.

First off, he talks about LED strips available – between 30, 60 and 144 LED per meter variations, the latter is going to be easier to diffuse than the former. From there, there’s a few different kinds of diffuser covers and aluminum profiles you can get, and [The Hook Up] pairs them in combinations, filming them from a distance and giving us concise visuals of how each combination works at different duty cycles, as well as making brightness measurements every now and then to evaluate losses of different diffuser layers. He proposes a simple rule – when picking a diffuser, distance between the LEDs and the diffuser has to be larger than the between-LED distance, and experiments confirm that. In the end, one of the takeaways is that the differences between 60LED/m and 144LED/m strips are not significant enough that they can’t be compensated for with a decent diffuser.

Continue reading “LED Diffusers Confusing? Organize A Practical Contest”

Circuit-less PCB Featured As Faceplate For A Digital Clock

If there’s no circuitry on a printed circuit board, does it cease being a “PCB” and perhaps instead become just a “PB”?

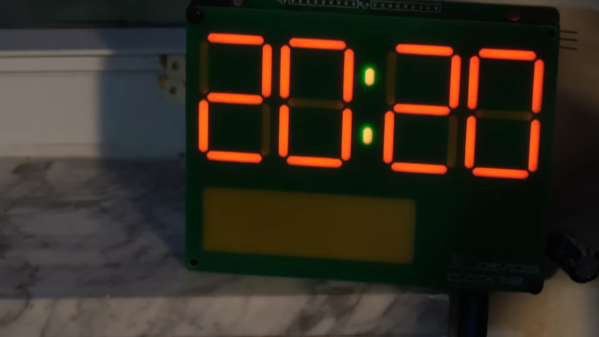
Call them what you will, the fact that PCBs have become so cheap and easy to design and fabricate lends them to more creative uses than just acting as the wiring for a project. In this case, [Jeremy Cook] put one to work as the faceplate for his “742 Clock,” a name that plays on the fact that his seven-segment display is 42 mm tall, plus it’s “24/7” backward.

In addition to the actual circuit board that holds the Wemos ESP32 module and the LEDs, a circuit-less board was designed with gaps in the solder mask to act as light pipes. Sandwiched between the boards is a 3D printed mask, to control the light and direct it only through the light pipes. [Jeremy] went through a couple of iterations of diffuser and mask designs, finally coming up with a combination that works well and looks good. He mentions a possible redesign of the faceplate board to include a copper backplane for better opacity, which we think is a good idea. We’d also like to see how different substrates work; would boards of different thickness or using FR-4 with different glass transition temperatures work better? Check out the video below and see what you think.

We’re seeing more and more PCBs turn up as structural elements, from enclosures to control panels and even tools, and we approve of this trend. But what we really approve of is what [Jeremy] did here by making this clock just a dumb display that gets network time over NTP. Would that all three digital clocks in our kitchen did the same thing — maybe then they wouldn’t each be an infuriating minute out of sync with the others.

Continue reading “Circuit-less PCB Featured As Faceplate For A Digital Clock”

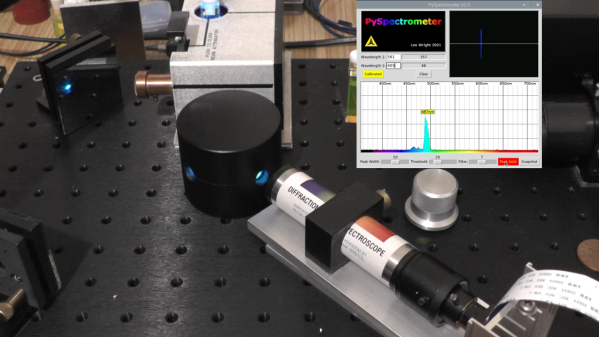
Integrating sphere test setup

Cannonball Mold Makes A Dandy Integrating Sphere For Laser Measurements

It’s an age-old riddle: if you have a perfect sphere with a perfectly reflective inner surface, will light bounce around inside it forever? The answer is pretty obvious when you think it through, but that doesn’t mean that you can’t put the principle to use, as we see with this homemade Ulbricht sphere for optical measurements.

If you’ve never heard of an Ulbricht sphere, don’t worry — it’s also known as an integrating sphere, and that makes its function a little more apparent. As [Les Wright] explains, an integrating sphere is an optical element with a hollow spherical cavity that’s coated with a diffusely reflective coating. There are two ports in the sphere, one for admitting light — usually from a laser — and one for light to exit. The light bounces around inside the sphere and becomes perfectly diffuse, and creates a uniform beam at the exit port.

[Les]’ need for an integrating sphere comes from the desire to measure the output of some of his lasers with his Raspberry Pi-based PySpectrometer. Rather than shell out for an expensive commercial integrating sphere, or turn one on a lathe, [Les] turned to an unlikely source: cannonball molds. The inside of the mold was painted with an equally unlikely ultra-white paint concocted from barium sulfate and PVA glue. With a few ports machined into the mold, it works perfectly to diffuse the light from his dye lasers for proper measurements.

Lasers can be an expensive hobby, but [Les] always seems to find a way to make things more affordable and just as good. Whether it’s homemade doorknob caps for high-voltage power supplies or blasting the Bayer filter off a cheap CCD camera, he always seems to find a way.

Continue reading “Cannonball Mold Makes A Dandy Integrating Sphere For Laser Measurements”

Unique LED Display Inspired By Fighter Jet Dashboard

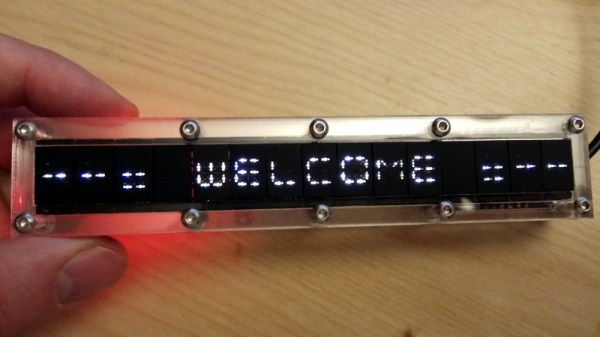
Last year, [Mangy_Dog] was asked by a few friends to consult on a project they were working on. The goal was to build an authentic replica of an F-18 cockpit, apparently for the purposes of creating a film. The project never materialized, but it did inspire him to take a hard look at the 1970s era alphanumeric displays utilized in the real aircraft. One thing lead to another, and he ended up using his own take on the idea to build his own “starburst” digit display.

As [Mangy_Dog] explains, while the faces of these original displays might have been quite small, there was a lot going on behind the scenes. Due to the technical limitations of the time, each alphanumeric character was made up of an array of incandescent light bulbs and fiber optic cables. This worked well enough, but was bulky and complex to manufacture.
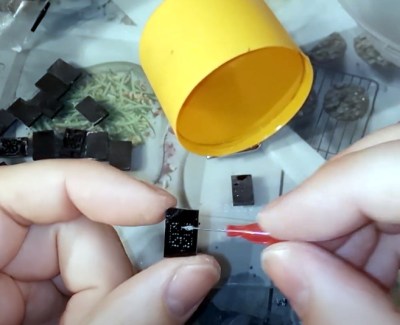
Today, we can do better, even on the hobbyist level. As it turns out, 0402 LEDs are just about the right size to recreate the segments of the original starburst displays. So [Mangy_Dog] came up with a simple PCB design to not only align the LEDs properly, but drive them with a 74HC595 shift register and an array of MOSFETs. While assembly wasn’t without its challenges, he made good use of his custom built reflow oven to get all the diminutive components in place.

He went through a few different ideas for the diffuser, but eventually settled on black plastic with tiny holes drilled through courtesy of his laser cutter. Behind each set of three holes is a small pocket that got filled from both sides with transparent UV resin, which was then sanded down after curing. The end result isn’t perfect as you can still tell the center dot is brighter than its peers, but the overall effect is still very nice and definitely has a sort of faux-retro appeal.

The military naturally has access to some incredible technology, though they have a tendency to hold onto it for decades. That an individual with a meager budget and homemade tools can improve upon a piece of hardware installed in a $60+ million airplane is a testament to just how fast things are moving.

Continue reading “Unique LED Display Inspired By Fighter Jet Dashboard”

Rolling Your Own LED Matrix Driver, With Copper Foil Tape To The Rescue

It all started when [Damien Walsh] got his hands on some surplus LED boards. Each panel contained 100 mini-PCBs hosting a single bright LED that were meant to be to be snapped apart as needed. [Damien] had a much better idea: leave them in their 20×5 array and design a driver allowing each LED to be controlled over WiFi. He was successful (a brief demo video is embedded down below after the break) and had a few interesting tips to share about the process of making it from scratch.

The first hurdle he ran into was something most of us can relate to; it’s difficult to research something when one doesn’t know the correct terms. In [Damien]’s case, his searches led him to a cornucopia of LED drivers intended to be used for room lighting or backlights. These devices make a large array of smaller LEDs act like a single larger light source, but he wanted to be able to individually address each LED.

Eventually he came across the IS32FL3738 6×8 Dot Matrix LED Driver IC from ISSI which hit all the right bases. Three of these would be enough to control the 100-LED panel; it offered I2C control and even had the ability to synchronize the PWM of the LEDs across multiple chips, so there would be no mismatched flicker between LEDs on different drivers. As for micontroller and WiFi connectivity, we all have our favorites and [Damien] is a big fan of Espressif’s ESP32 series, and used the ESP32-WROOM to head it all up.

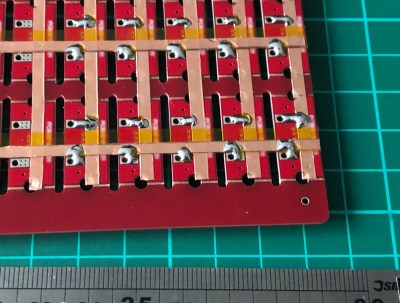
LED pads bridged to copper tape, with Kapton (polyimide) tape insulating any crossovers.

The other issue that needed attention was wiring. Each of the LEDs is on its own little PCB with handy exposed soldering pads, but soldering up 100 LEDs is the kind of job where a little planning goes a long way. [Damien] settled on a clever system of using strips of copper tape, insulated by Kapton (a super handy material with a sadly tragic history.) One tip [Damien] has for soldering to copper tape: make sure to have a fume extractor fan running because it’s a much smokier process than soldering to wires.

A 3D-printed baffle using tracing paper to diffuse the light rounds out the device, yielding a 20 x 5 matrix of individually-controlled rectangles that light up smoothly and evenly. The end result looks fantastic, and you can see it in action in the short video embedded below.

Continue reading “Rolling Your Own LED Matrix Driver, With Copper Foil Tape To The Rescue”

Huge Seven Segment Display Made From Broken Glass

A staple of consumer devices for decades, seven segment displays are arguably one of the most recognizable electronic components out there. So it’s probably no surprise they’re cheap and easy to source for our own projects. But that doesn’t mean there isn’t room for personal interpretation.

[MacCraiger] wanted to build a wall clock with the classic seven segment LED look, only his idea was to make it slightly larger than average. With RGB LED strips standing in for individual LEDs, scaling up the concept isn’t really a problem on a technical level; the tricky part is diffusing that many LEDs and achieving the orderly look of a real seven segment display.

All those segments perfectly cut out of a sheet of plywood come courtesy of a CNC router. Once the rectangles had been cut out, [MacCraiger] had to fill them with something that could soften up the light coming from the LEDs mounted behind them. He decided to break up a bunch of glass bottles into small chunks, lay them inside the segments, and then seal them in with a layer of clear epoxy. The final look is unique, almost as though the segments are blocks of ice.

At first glance the use of a Raspberry Pi Zero to control the LED strips might seem overkill, but as it turns out, [MacCraiger] has actually added in quite a bit of extra functionality. The purists might say it still could have been done with an ESP8266, but being able to toss some Python scripts on the Linux computer inside your clock certainly has its appeal.

The big feature is interoperability with Amazon’s Alexa. Once he tells the digital home assistant to set an alarm, the clock will switch over to a countdown display complete with digits that change color as the timer nears zero. He’s also written some code that slowly shifts the colors of the digits towards red as the month progresses, a great way to visualize at a glance how close you are to blowing past that end of the month deadline.

We’ve seen something of a run on custom multi-segment displays recently. Just last month we saw a clock that used some incredible 25-segment LED displays, complete with their own unique take on the on epoxy-filled diffusers.

Continue reading “Huge Seven Segment Display Made From Broken Glass”