Accurate Digital Clock Keeps Ticking With FPGA

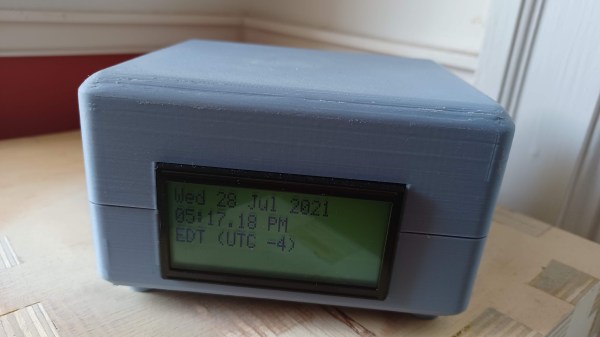
Even the most punctual among us are content to synchronize their clocks to external time sources like navigation satellite constellations, network time servers, frequency-controlled AC mains, or signals broadcast by radio stations such as WWV, CHU, and DFC77 — but not [zaphod]. After building a couple of more traditional clocks over the years, he set his sights on making a completely isolated digital clock that doesn’t rely on external synchronization (well, except to initialize the time at first power-up).

The accuracy goal he set for himself was that of a Casio F-91W wristwatch, which is specified to maintain +/- 30 seconds per month (about 12 ppm). At the heart of the design is an oven-controlled crystal oscillator whose stability is in the single-digits parts-per-billion.

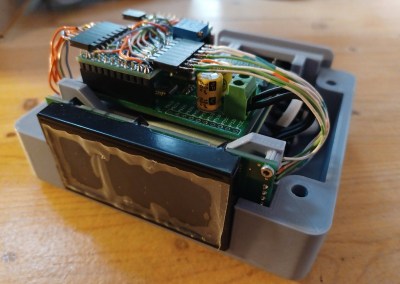
The counter chain that accumulates the time is implemented in an FPGA — admittedly overkill, but [zaphod] wanted to learn FPGA programming for this project as well. An ATmega328 drives the display and does other bookkeeping tasks. The whole design is partitioned into three PCBs which fit inside a custom 3D-printed case.

[zaphod] does a thorough job documenting his build, including the bugs and failures along the way. We like the honest summary he wrote at the project’s conclusion, noting things that could be improved or should have been done differently. Be sure to check out the GitHub repository, where all the source code and PCB design files are posted. How accurate is your wristwatch, if you even wear one anymore?

Big Time Character LCD Clock

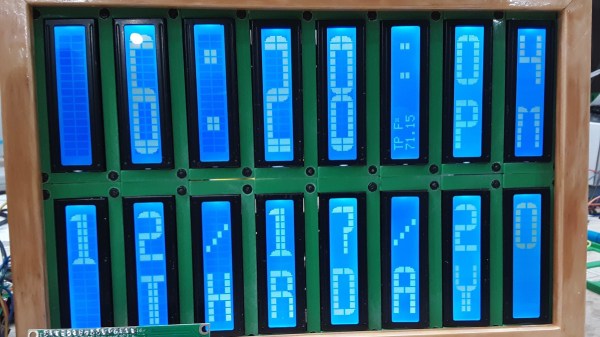
While the SSD1306 OLED has somewhat become the go-to display for up-to-date projects, the good old character displays with their Hitachi HD44780 controller don’t seem to be disappearing just yet either. And why would they, especially if you want to show just text, having a built-in font has certainly its perk compared to worrying about integrating your own characters — which you can still do on top as well. Or perhaps you can combine both worlds, which is what [oldmaninSC] did with his digital clock that takes an entire 16×2 LCD to show each single digit.

The whole clock uses 16 individual, upright rotated 16×2 LCDs that are arranged in two rows of eight LCDs each, turning the entire construct sort of into a giant 8×2 display itself. For some additional information such as the date, there’s also a smaller font available that uses only half the height, allowing up to four total rows of information. To communicate with each LCD via I2C, two TCA9548A I2C multiplexers are connected to an Arduino, along with an RTC to keep track of the time and date itself.

As the TCA9548A has three pins dedicated to define its own address, the entire clock could be scaled up to a total of 64 LCDs — so how about a 16×4 display made out of 16×4 displays? Sure, adding smooth scrolling might become a bit tricky at some point, but imagine playing Tetris on that one!

Building A Giant Meta-Clock Made Of Smaller Clocks

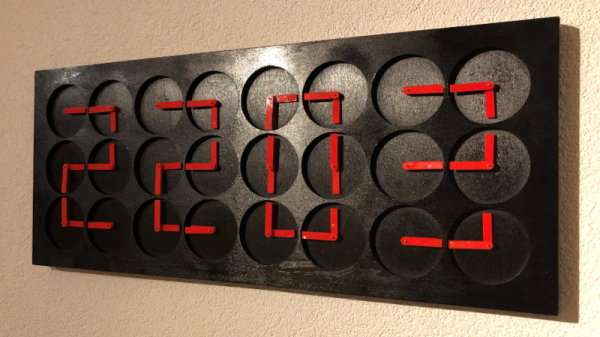
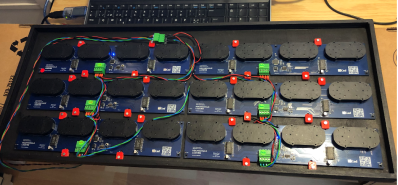
Have any last-minute projects you finished just before the end of the decade? To help pass the time, [Erich Styger] decided to build a meta digital clock made up of 24 individual analog clocks, the perfect item to help welcome in the new year. The stepper clock is controlled by a network of LPC microcontrollers, displaying the time and room temperature, as well as several aesthetically pleasing loading animations.

Each clock operates from a 5 V USB power bank drawing less than 2 A for the full 24-clock setup. The meta-clock resides in a laser cut enclosure, with 3D printed hands telling the time. While having one board per clock would be easier to implement, [Erich] decided to use one board per four clocks arranged in rows to save on costs. The arrangement fixes the distance between clocks, though [Erich] also made the clock size slightly smaller to compensate.

The ‘stepper’ part of the stepper clock uses a 360 degree version of the VID28 stepper motor to reduce the height of the design and the cost of the project. Apart from the X12.017 driver silently driving the motors, the stepper motors also conveniently only need a ‘direction’ and ‘step’ pin, reducing the pin count needed for the microcontroller. Neodymium magnets and hall effect sensors are used for tracking the position of the hands as the clocks move, with the magnets embedded into the clock hands.

As for communication, rather than use the common I2C protocol, the more robust RS-485 was selected. A master coordinates all of the clocks using the bus, providing a command line interface. The master is also able to communicate with the host PC over USB to maintain RTC time.

During the software development phase, [Erich] made use of the SEGGER J-Link EDU mini CLI for keeping track of information about the driver and each individual stepper motor. The software controlling the motors is written in C, with boards running FreeRTOS. The stepping is handled with a timer interrupt, but because the LPC845 doesn’t have enough timer channels, all of the functionality is done within a single channel. This results in plenty of interrupt handlers, flags, and callbacks across the code, which makes for some good fun.

Speaking of clocks, check out some of our other past clock hacks, including this mini-VFD clock and this fun LED matrix clock (it lets you play Tetris!)

Continue reading “Building A Giant Meta-Clock Made Of Smaller Clocks”

Dozens Of Servos Flip The Segments Of This 3D-Printed Digital Clock

A digital clock based on seven-segment displays? Not exciting. A digital clock with seven-segment displays that’s really big and can be read across a football field? That’s a little more interesting. A large format digital clock that uses electromechanical seven-segment displays? Now that’s something to check out.

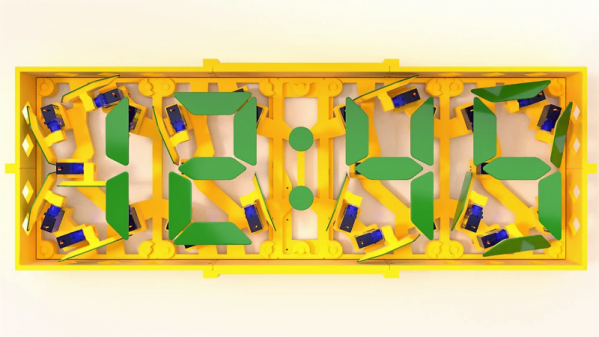
This clock comes to us by way of [Otvinta] and is a nice example of what you can do with 3D-printing and a little imagination. Each segment of the display is connected to a small hobby servo which can flip it 90°. Mounted in a printed plastic frame, the segments are flipped in and out of view as needed to compose the numerals needed to display the time. The 28 servos need two Pololu controller boards, which talk to a Raspberry Pi running Windows IoT, an interesting design choice that we don’t often see. You’d think that 28 servos clattering back and forth might be intolerable, but the video below shows that the display is actually pretty quiet. We’d love to see this printed all in black with white segment faces, or even a fluorescent plastic; how cool would that look under UV light?

We’re not saying this is the only seven-segment servo clock we’ve seen, but it is a pretty slick build. And of course there’s more than one way to use servos to tell the time.

Continue reading “Dozens Of Servos Flip The Segments Of This 3D-Printed Digital Clock”

Heathkit: Getting Closer This Time?

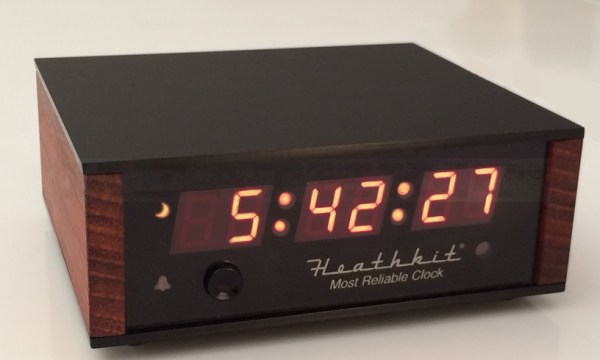
We’ve been following the Heathkit reboot for a while now, and it looks like the storied brand is finally getting a little closer to its glory days. I was thumbing through the new issue of QST magazine while I was listening in on a teleconference for the day job – hey, a guy can multitask, can’t he? – when I spied an ad for the Heathkit GC-1006 digital clock, which they brand the “Most Reliable Clock”. As soon as the meeting was over, I headed over to the Heathkit website to check out this latest offering.

I had cautiously high hopes. After the ridiculous, feature-poor, no-solder AM radio kit (although they sensibly followed up with a solder version of that kit) and an overpriced 2-meter ham antenna, I figured there was nowhere for Heathkit to go but up. And the fact that the new kit was a clock was encouraging. I have fond memories of Heathkit clocks from the 80s when I worked in a public service dispatch center; Heathkit clocks were about the only clocks you could get that would display 24-hour time. Could this actually be a kit worth building?

Alas, the advertisement was another one of those wall-of-text things that the new Heathkit seems so enamored of. And like the previous two kits offered, the ad copy is full of superlatives and cutesy little phrases that really turn me off. Then again, most advertising turns me off, so I’m probably not a good gauge of such things. Nor am I sure I’m in the target demographic for this product – in fact, I’m not even sure to whom this product is being marketed. Is it the younger crowd of the maker movement? Or is it the old-timers who want to relive the glory days of Heathkit builds? Given the $100 price, I’d have to say the nostalgia market is the most likely buyer of this one.

To be fair, $100 might not be that much to spend on a decent clock. I’m a bit of a clock snob, and I’ve gotten to the point where I can almost tell which chip is in a clock just by looking at the controls. The feature set of a modern digital clock has converged to a point where every clock has almost exactly the same deficiencies. The GC-1006 claims to address a few of my hot button issues, like not being able to set the time to the exact second – I hate that! An auto-dimming display is nice, as is a 12- or 24-hour display, a 10-minute timer (nice for hams, who are required to ID their station every 10 minutes), and a battery backup that claims to last for 4 weeks.

Is this worth buying? At this point, I’m on the fence. Looking at an unboxing video, it appears to be a high-quality kit, and it would be fun to build. But spending $100 on a clock might be a tough sell to my loan officer.

Still, I think I might take one for the team here so we have a first-hand report of what the new Heathkit is all about. And it would be nice to build another Heathkit product. I’ll let you know how it goes.

Continue reading “Heathkit: Getting Closer This Time?”

Digital Clock Building

clock

[punkky] has been documenting his adventures building digital clocks. They each use six 7-segment LED displays, but he’s been gradually changing how they are built. The first version used a CMOS BCD-to-7-sement latch on each display, which is tied to a PIC16F627a. For the next run, he added multiplexing, so he could drive all the segments using just thirteen pins. He’s posted a final schematic with code and details of how the clock timing actually works.