Electric Puzzle Board Lets You Assemble Circuits With Ease

Many hackers learned about electronics over the years with home experimenter kits from Radio Shack and its ilk. Eschewing soldering for easier screw or spring based connections, they let the inexperienced build circuits with a minimum of fuss, teaching them the arcane ways of the electron along the way. [victorqedu] has put a modern spin on the form, with his Electric Puzzle Game.

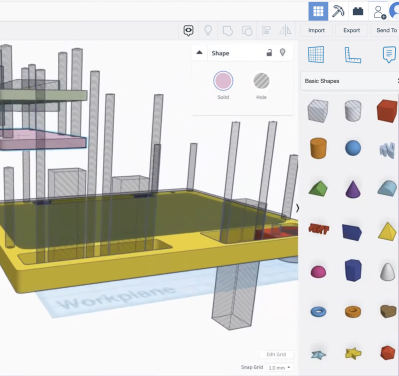
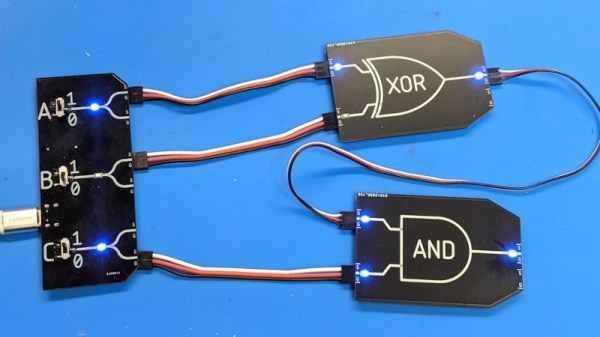
The build consists of a series of 3D printed blocks, each containing a particular electronic component or module. The blocks can be joined together to form circuits, with magnets in the blocks mating with screws in the motherboard to hold everything together and make electrical contact between the parts. It’s a project that requires a significant amount of 3D printing and upfront assembly to build, but it makes assembling circuits a cinch.

The variety of circuits that can be built is impressive. [victorqedu] shows off everything from simple LED and switch arrangements to touch sensors and even a low-powered “Tesla coil”. We imagine playing with the blocks and snapping circuits into place would be great fun. We’ve seen other unconventional approaches before, too – such as building squishy circuits for educational purposes. Video after the break.

Continue reading “Electric Puzzle Board Lets You Assemble Circuits With Ease”

Quick And Simple Milliohmmeter

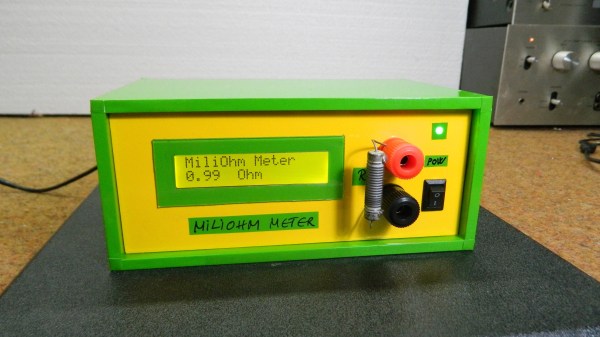
User [mircemk] presents his “MiliOhm Meter” project which you can build with an Arduino, a handful of common parts from your lab, and a cigar box.  It doesn’t get much simpler than this, folks.  While this is something you won’t be getting calibrated with NIST traceability, it looks like a fun and quick project that’s more than suited for hobbyist measurements.  It’s not only easy to build, the Arduino sketch is less than thirty lines of code.  This is a great learning project, plus you get something useful for your lab when its finished.

We like the creative use of colored tape instead of paint on the project’s box.  If this style suits you, [mircemk] has published several other similar lab instrument projects on his Hackaday.io page, including a frequency meter, an audio spectrum analyzer, and an auto-ranging capacitance meter to name a few.  You might recognize him from some other projects we’ve featured, such as the crazy kinematic arms that set a clock’s hands every minute.

Continue reading “Quick And Simple Milliohmmeter”

Developing An Open Source Electronics Trainer

It’s a safe bet that most Hackaday reader’s interest in electronics started at a young age, and that their early forays into the world of hardware hacking likely involved some form of “playground” kit. As long as you didn’t lose any of the components, these kits promised the user that hundreds of possible projects were just a few jumper wires away. Extra points awarded for when you decide to toss away the manual and fly solo.

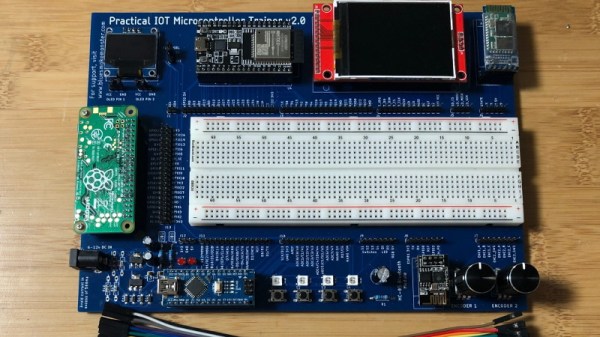
While there’s still no shortage of such products on the market, [Josh Kittle] felt the concept could do with a freshening up. His open hardware “Microcontroller Trainer” harkens back to those old multi-kits, but adds in the sort of high-tech gadgetry that makes the modern DIY world go round.

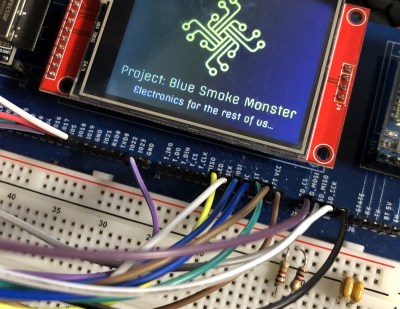
It’s still got the traditional layout: a center mounted breadboard surrounded by an array of LEDs, a handful of buttons, and a pair of potentiometers. But there’s also sockets for the Raspberry Pi, ESP8266, ESP32, and Arduino. Plus a few of their most popular friends to keep them company: a .96″ OLED, 2.4″ Touch TFT, and a BC05 Bluetooth module.

Originally [Josh] created this design to help clean up his own workspace, figuring he could just put his most used components on a single compact board. But as you might expect, others expressed interest in the concept. Now he’s producing them as kits, and even working his way towards a third hardware revision that adds features such as an integrated 18650 battery for portable use.

While electronics kits that have you build a functional device are a great way to learn the ropes, we’re always glad to see fresh takes on the classic electronic “playground” concept.

Raspberry Pi Cluster Shows You The Ropes

Raspberry Pi clusters are a common enough project, but a lot of the builds we see focus on the hardware side of the cluster. Once it’s up and running, though, what comes next? Raspberry Pis aren’t very powerful devices, but they can still be a great project for learning how to interact with a cluster of computers or for experimental test setups. In this project from [Dino], four Pis are networked together and then loaded with a basic set of software for cluster computing.

The first thing to set up, after the hardware and OS, is the network configuration. Each Pi needs a static IP in order to communicate properly. In this case, [Dino] makes extensive use of SSH. From there, he gets to work installing Prometheus and Grafana to use as monitoring software which can track system resources and operating temperature. After that, the final step is to install Ansible which is monitoring software specifically meant for clusters, which allows all of the computers to be administered more as a unit than as four separate devices.

This was only part 1 of [Dino]’s dive into cluster computing, and we hope there’s more to come. There’s a lot to do with a computer cluster, and once you learn the ropes with a Raspberry Pi setup like this it will be a lot easier to move on to a more powerful (and expensive) setup that can power through some serious work.

Gain An Understanding Of Injection Molding’s Design Gotchas

When it comes to manufacturing, sheet metal and injection molding make the world go ’round. As a manufacturing method, injection molding has its own range of unique design issues and gotchas that are better to be aware of than not. To help with this awareness, [studiored] has a series of blog posts describing injection molding design issues, presented from the perspective of how to avoid and address them.

Design of screw bosses demonstrating conflict between molder’s guidelines and vendor’s recommendations. Compromising between both is a science and an art.

Because injection molding involves heat, warp is one issue to be aware of and its principles will probably be familiar to anyone with nitty-gritty experience in 3D printing. Sink marks are also an issue that comes down to differential cooling causing problems, and can ruin a smooth and glossy finish. Both of these play a role in how best to design bosses.

Minimizing and simplifying undercuts (similar to overhangs in 3D printer parlance) is a bit more in-depth, because even a single undercut means much more complex tooling for the mold. Finally, because injection molding depends on reliably molding, cooling, and ejecting parts, designing parts with draft (a slight angle to aid part removal) can be a fact of life.

[studiored] seems to have been working overtime on sharing tips for product design and manufacture on their blog, so it’s worth keeping an eye on it for more additions. We mentioned earlier that much of the manufacturing world revolves around injection molding and sheet metal, so to round out your knowledge we published a primer on everything you need to know about the art and science of bending sheet metal. With a working knowledge of the kinds of design issues that affect these two common manufacturing methods, you’ll have a solid foundation for any forays into either world.

Teaching Science With An Empty Soda Bottle

Creating the next generation of scientists and engineers starts by getting kids interested in STEM at an early age, but that’s not always so easy to do. There’s no shortage of games and movies out there to entertain today’s youth, and just throwing a text book at them simply isn’t going to cut it anymore. Modern education needs to be engrossing and hands-on if it’s going to make an impact.

Which is exactly what the Institute of Science and Technology Austria hopes to accomplish with the popSCOPE program. Co-founded by [Dr. Florian Pauler] and [Dr. Robert Beattie], the project uses off-the-shelf hardware, 3D printed parts, and open source software to create an engaging scientific instrument that students can build and use themselves. The idea is to make the experience more personal for the students so they’re not just idle participants sitting in a classroom.

The hardware in use here is quite simple, essentially just a Raspberry Pi Zero W, a camera module, a Pimoroni Blinkt LED module, and a few jumper wires. It all gets bolted to a 3D printed frame, which features a female threaded opening that accepts a standard plastic soda (or pop, depending on your corner of the globe) bottle. You just cut a big opening in the side of the bottle, screw it in, and you’ve saved yourself a whole lot of time by not printing an enclosure.

So what does the gadget do? That obviously comes down to the software it’s running, but out of the box it’s able to do time-lapse photography which can be interesting for biological experiments such as watching seeds sprout. There’s also a set of 3D printable “slides” featuring QR codes, which the popSCOPE software can read to show images and video of real microscope slides. This might seem like cheating, but for younger players it’s a safe and easy way to get them involved.

For older students, or anyone interested in homebrew scientific equipment, the Poseidon project offers a considerably more capable (and complex) digital microscope made with 3D printed parts and the Raspberry Pi.

MakerBot Targets Schools With Rebranded Printers

MakerBot was poised to be one of the greatest success stories of the open source hardware movement. Founded on the shared knowledge of the RepRap community, they created the first practical desktop 3D printer aimed at consumers over a decade ago. But today, after being bought out by Stratasys and abandoning their open source roots, the company is all but completely absent in the market they helped to create. Cheaper and better printers, some of which built on that same RepRap lineage, have completely taken over in the consumer space; forcing MakerBot to refocus their efforts on professional and educational customers.

This fundamental restructuring of the company is perhaps nowhere more evident than in the recent unveiling of “SKETCH Classroom”: an $1,800 package that includes lesson plans, a teacher certification program, several rolls of filament, and two of the company’s new SKETCH printers. It even includes access to MakerBot Cloud, a new online service that aims to help teachers juggle student’s print jobs between multiple SKETCH printers.

Of course, the biggest takeaway from this announcement for the average Hackaday reader is that MakerBot is releasing new hardware. Their last printer was clearly not designed (or priced) for makers, and even a current-generation Replicator costs more than the entire SKETCH Classroom package. On the surface, it might seem like this is a return to a more reasonable pricing model for MakeBot’s products; something that could even help them regain some of the market share they’ve lost over the years.

There’s only one problem, MakerBot didn’t actually make the SKETCH. This once industry-leading company has now come full-circle, and is using a rebranded printer as the keystone of their push into the educational market. Whether they were unable to build a printer cheap enough to appeal to schools or simply didn’t want to, the message is clear: if you can’t beat them, join them.

Continue reading “MakerBot Targets Schools With Rebranded Printers”