Ice Clock

Binary Clock Fit For Queen Elsa’s Ice Palace

When life gives you lemons, you make lemonade. When life gives you freezing cold temperatures and a yard full of snow, you make binary clocks out of ice. At least that’s what [Dennis] does, anyway.

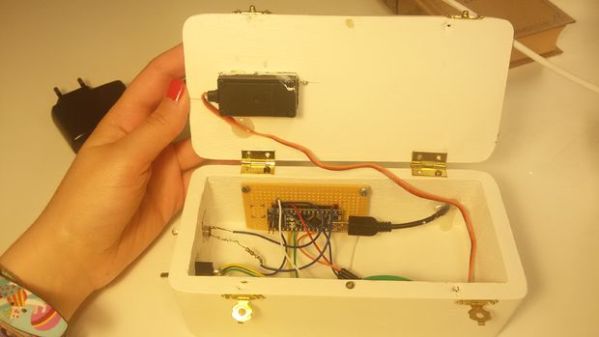
[Dennis’] clock is made from several cylindrical blocks of ice stacked on top of one another. There are six columns of ice blocks. The blocks were made by pouring water into empty margarine containers and freezing them. Once they were frozen, [Dennis] bore a 5/16″ hole into the bottom of each block to house an LED. Wires ran from the LEDs back into the drainage port of a cooler.

The cooler housed the main electronics. The LED controller board is of [Dennis’] own design. It contains six TLC59282 chips allowing for control of up to 96 LEDs. Each chip has its output lines running to two RJ45 connectors. [Dennis] couldn’t just use one because one of the eight wires in the connector was used as a common power line. The main CPU is an Arduino. It’s hooked up to a DS3234 Real Time Clock in order to keep accurate time. The oscillator monitors temperature in order to keep accurate time even in the dead of winter. Continue reading “Binary Clock Fit For Queen Elsa’s Ice Palace”

USB Cap

Never Forget Your USB Stick Again

USB sticks are very handy. They are a very portable and relatively inexpensive means of storing data. Possibly the most annoying part about using one of these devices is when you inevitable leave it behind somewhere by accident. This is especially true if it contains sensitive information. [Eurekaguy] feels your pain, and he’s developed a solution to the problem.

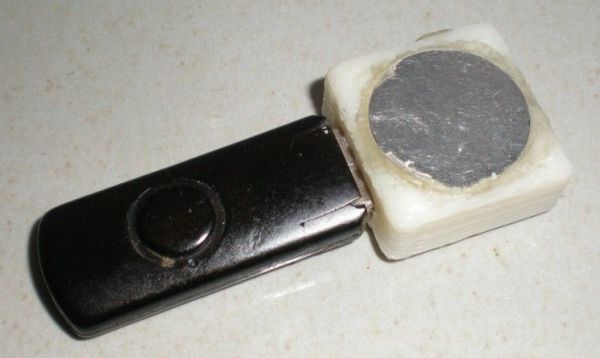
[Eurekaguy] designed a custom cap for USB sticks that beeps approximately every minute after the USB stick has been plugged in for five minutes. The cap is 3D printed and then slightly modified with four 1mm holes. Two wires are routed between these holes to make contact points for the VCC and GND pins of the USB stick.

The beep circuit is comprised of a tiny PIC12F629 microcontroller along with a couple of other supporting components. The circuit is wired together dead bug style to conserve space. Three AG5 batteries power the circuit. A small piezo speaker provides the repeating beep to remind you to grab your USB stick before you walk away from the computer.

[Thanks Irish]

Universal Active Filters Part 1

Universal Active Filters: Part 1

Today I am experimenting with a single chip Universal Active Filter, in this case I made a small PCB for the UAF-42 from Texas Instruments. I chose this part in particular as it facilitates setting the filter frequency by changing just a pair of resistors and the somewhat critical values that are contained on the chip have been laser trimmed for accuracy. This type of active filter includes Operational Amplifiers to supply gain and it supports various configurations including simultaneous operating modes such as Band Pass, Low Pass and High Pass make it “Universal”.

Filter Basics

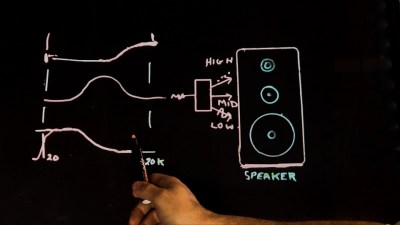
Speaker Crossover Example

Looking at the block diagram you can see where I have inserted a dual-ganged potentiometer to change both resistors simultaneously which should allow a straight forward adjustment for our purposes here.

Looking into the components of a simple RC filter which can easily implement a simple Low Pass or High Pass filter, we see that the math is fairly straight forward and swapping the components with each other is all that is needed to change the type of filter. Continue reading “Universal Active Filters: Part 1”

Bluetooth Fuel Monitor

Bluetooth Enabled Fuel Consumption Monitor

[Malebuffy] bought himself a used boat last year. Fuel isn’t exactly cheap where he lives, so he wanted a way to monitor his fuel consumption. He originally looked into purchasing a Flowscan off the shelf, but they were just too expensive. In the interest of saving money, [Malebuffy] decided to build his own version of the product instead.

To begin, [Malebuffy] knew he would need a way to display the fuel data once it was collected. His boat’s console didn’t have much room though, and cutting holes into his recently purchased boat didn’t sound like the best idea. He decided he could just use his smart phone to display the data instead. With that in mind, [Malebuffy] decided to use Bluetooth to transmit the data from the fuel sensors to his smart phone.

The system uses an older Arduino for the brain. The Arduino gets the fuel consumption readings from a Microstream OF05ZAT fuel flow sensor. The Arduino processes the data and then transmits it to a smart phone via a Bluetooth module. The whole circuit is powered from the boat battery using a DC adapter. The electronics are protected inside of a waterproof case.

[Malebuffy’s] custom Android apps are available for download from his website. He’s also made the Arduino code available in case any one wants to copy his design.

Name of the game

Repairing And Reviewing A 1976 PONG Clone

Hackaday alum [Todd] has been searching for an old PONG clone for the last two years. This variant is called, “The Name of the Game”. [Todd] has fond memories of playing this game with his sister when they were young. Unfortunately, being the hacker that he is, [Todd] tore the game apart when he was just 14 to build his own Commodore 64 peripherals. He’s been wanting to make it up to his sister ever since, and he finally found a copy of this game to give to his sister last Christmas.

After opening up the box, [Todd] quickly noticed something strange with the power connector. It looked a bit charred and was wiggling inside of the enclosure. This is indicative of a bad solder joint. [Todd] decided he’d better open it up and have a look before applying power to the device.

It was a good thing he did, because the power connector was barely connected at all. A simple soldering job fixed the problem. While the case was still opened, [Todd] did some sleuthing and noticed that someone else had likely made repairs to several other solder joints. He also looked for any possible short circuits, but everything else looked fine. The system ended up working perfectly the first time it was started.

The end of the video shows that even after all this time, simple games like this can still capture our attention and be fun to play for hours at a time. [Todd] is working on part 2 of this series, where he’ll do a much more in-depth review of the system. You can watch part 1 below. Continue reading “Repairing And Reviewing A 1976 PONG Clone”

phone controller

Breathe New Life Into Payphones With Asterisk

Payphones used to be found on just about every street corner. They were a convenience, now replaced by the ubiquitous mobile phone. These machines were the stomping grounds for many early computer hackers, and as a result hold a place in hacker history. If you’ve ever wanted to re-live the good ol’ days, [hharte’s] project might be for you.

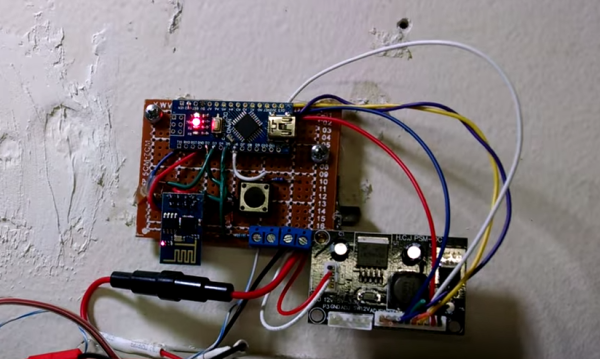
[hharte] has been working to make these old payphones useful again with some custom hardware and software. The project intends to be an interface between a payphone and an Asterisk PBX system. On the hardware side, the controller board is capable of switching various high voltage signals required for coin-line signaling. The controller uses a Teensy microcontroller to detect the hook status as well as to control the relays. The current firmware features are very basic, but functional.

[hharte] also wrote a custom AGI script for Asterisk. This script allows Asterisk to detect the 1700hz and 2200hz tones transmitted when coins are placed into the machine. The script is also in an early stage, but it will prompt for money and then place the call once 25 cents has been deposited. All of the schematics and code can be found on the project’s github page.

[Thanks mies]

Direct Digital Synthesis (DDS)

Direct Digital Synthesis (DDS) Explained By [Bil Herd]

One of the acronyms you may hear thrown around is DDS which stands for Direct Digital Synthesis. DDS can be as simple as taking a digital value — a collection of ones and zeroes — and processing it through a Digital to Analog Converter (DAC) circuit. For example, if the digital source is the output of a counter that counts up to a maximum value and resets then the output of the DAC would be a ramp (analog signal) that increases in voltage until it resets back to its starting voltage.

This concept can be very useful for creating signals for use in a project or as a poor-man’s version of a signal or function generator. With this in mind I set out here to demonstrate some basic waveforms using programmable logic for flexibility, and a small collection of resistors to act as a cheap DAC. In the end I will also demonstrate an off-the-shelf and inexpensive DDS chip that can be used with any of the popular micro-controller boards available that support SPI serial communication.

All of the topics covered in the video are also discussed further after the break.

Continue reading “Direct Digital Synthesis (DDS) Explained By [Bil Herd]”