Embossing Leather With A Pipe Bender And 3D Printed Tooling

Embossed leather belts can be deliciously stylish. However, the tooling for making these fashionable items is not always easy to come by, and it rarely comes cheap. What do we do when a tool is expensive and obscure? We 3D print our own, as [Myth Impressions] demonstrates.

The build is based around a Harbor Freight pipe bender. However, instead of the usual metal tooling, it’s been refitted with a printed embossing ring specifically designed for imprinting leather. The tool features raised ridges in an attractive pattern, and the pipe bender merely serves as a straightforward device for rolling the plastic tooling over a leather belt blank. Once cranked through the machine, the leather belt comes out embossed with a beautiful design.

It’s a neat project, and the 3D printed tooling works surprisingly well. The key is that leather is relatively soft, so it’s possible to use plastic tools quite effectively. With that said, you can even form steel with printed tooling if you use the right techniques.

We’ve seen some other neat leatherworking hacks before, like this nicely-modified Singer sewing machine.

Continue reading “Embossing Leather With A Pipe Bender And 3D Printed Tooling”

Embossing Graphics By 3D Printing On Wood

Embossing (making raised shapes) and debossing (making sunken shapes) on 3D-printed surfaces is not a new idea; we do it all the time. [Cory] from Vancouver Hack Space was playing around with 3D printing on wood, and came up with the idea of creating raised tactile surfaces using a simple transfer process.

We don’t often try to print directly onto a wooden surface for various reasons, but [Cory] wanted to give it a go. They hoped to get some grain patterns to transfer to the surface, but as they say in the blog entry, the beauty of wood patterns is in the colouration, which doesn’t transfer. Next, they laser etched a logo into the wood surface to see how well that would transfer. It did create a discernable raised impression, but they forgot to mirror the image (oops!) and relevel the bed, so the results are less impressive than they could be. Still, it’s another useful technique to consider.

Embossing is the process by which braille sheets are made. This DIY braille encoder is pretty sweet. Of course, the process can simply be decorative. Here’s how to use a laser cutter to create your own embossing seals. The traditional way to emboss paper for a fancy effect was to use embossing powder to selectively change the properties of drying paper. But how can you make the stuff for cheap?

Build An ESP32 Stock Ticker To Watch Your GME Gains

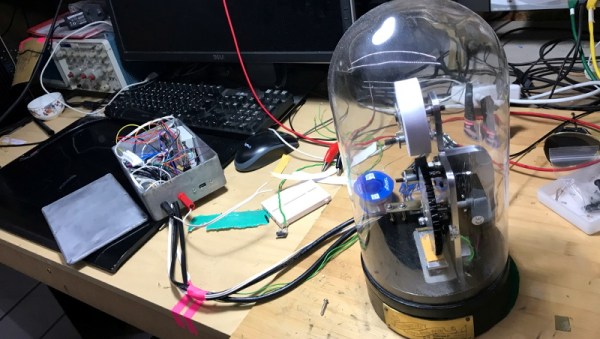
Meme investing is all the rage these days, and what better way to get in on the loss fun than with your very own old-timey mechanical stock ticker? Unfortunately, they’re about as expensive and rare as you might expect for a piece of Victorian-era electronics. Lucky for us, [secretbatcave] has shown that you can put together a functional look-alike that costs about as much as a GameStop (GME) share was worth before it started heading to the Moon.

This might seem like an ambitious project, but in actuality the machine only has a few moving parts. There’s a stepper motor to feed the paper, another to spin an inked embossing wheel, and a couple of solenoids attached to a pusher plate. Rather than trying to move the heavy wheel, the pusher plate smashes the paper up into it. The fact that this produces a satisfying “clack” sound as each character is printed is just an added bonus.

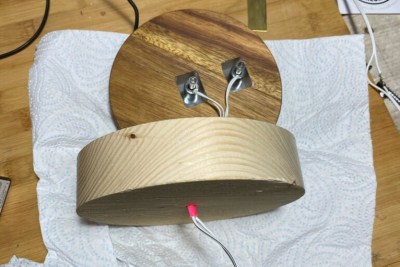
Extending the base to hold the solenoids.

To sell the look, [secretbatcave] put the whole mechanism inside a tall glass dome from IKEA. The matching wooden base was extended so the pusher plate solenoids could fit inside, after which it was dunked in ink and sprayed with a gloss sealer to give it that shiny black finish people seemed to love in the 1900s. With the addition of an engraved brass nameplate, it looks like the machine fell out of a time warp.

In terms of electronics, there’s an ESP32, a pair of stepper motor controllers, and a relay for the solenoids. As of right now it all lives in a rather utilitarian box that’s tethered to the ticker, but we’re sure the lot could get tucked under the base with the help of a custom PCB should you be so inclined.

With an ESP32 at the helm, the ticker could easily be configured to print out whatever data it receives over the network or picks up from MQTT. With hardware like this and a pair of Diamond Hands, those tendies are as good as yours.

Continue reading “Build An ESP32 Stock Ticker To Watch Your GME Gains”

Dymo Rides Again With This Dot-Matrix Label Embosser

For a five-year-old future Hackaday scribe, there could be no greater day than that on which a Dymo label maker appeared in the house. With its spinny daisy-wheel to choose a character and its squeezy handle to emboss the letter into the plastic tape, there would follow a period of going nuts kerchunking out misspelled labels and slapping them on everything. Plus the things look like space guns, so there would have been a lot of pew-pewing too.

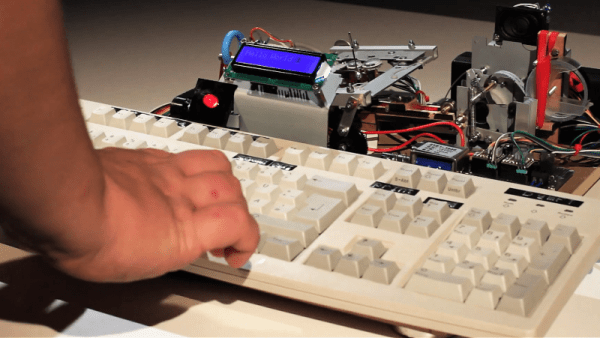
This Dymo dot-matrix label maker bears no resemblance to our long-lost label blaster, but it’s pretty cool in its own right. The product of collaborators [Felix Fisgus] and [Timo Johannes] and undertaken as a project for their digital media program, the only thing the labeler has in common with the Dymos of old is the tape. Where the manual labelers press the characters into the tape with a punch and die, their project uses a dot-matrix approach. Messages are composed on an old PS/2 keyboard through an Arduino and a 16×2 LCD display, and punched onto the tape a dot at a time. The punch is a large darning needle riding on the remains of an old CD drive and driven by a solenoid. When it comes time to cut the label, servo driven scissors do the job. It’s a noisy, crazy, Rube Goldberg affair, and we love it. Check it out in action in the video below.

We applaud [Felix] and [Timo] for carrying the torch of embossed label making. It’s a shame that we’ve turned to soulless thermal printers to handle most of our labeling needs; then again, we’ve seen some pretty neat hacks for those too.

Continue reading “Dymo Rides Again With This Dot-Matrix Label Embosser”

Leather Working With A 3D Printer

No, you can’t print in leather — at least not yet. But [Make Everything] has a tutorial about how to produce a custom leather embossing jig with a 3D printer. From a 3D printing point of view, this isn’t very hard to do and you might want to skip over the first six minutes of the video if you’ve done 3D printing before.

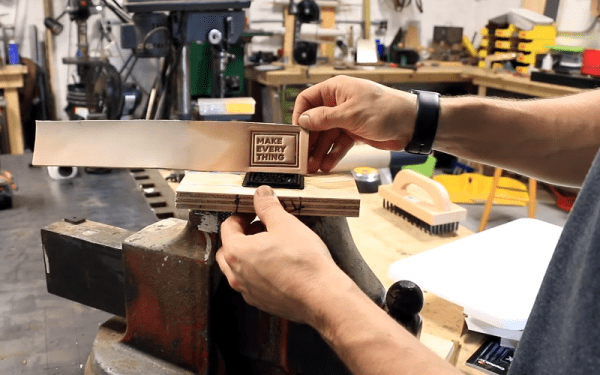
The real action is when he has the 3D print completed. He glues the stamp down to some wood and then fits the assembly to a vise that he’ll use as a press. After wetting the leather, the wood and 3D printed assembly sandwiches the piece and the vise applies pressure for ten minutes. He did make the leather a bit oversized to make alignment more forgiving. After the embossing is complete, he trims it out.

Continue reading “Leather Working With A 3D Printer”

Emboss Your Own Seals With A Laser Cutter

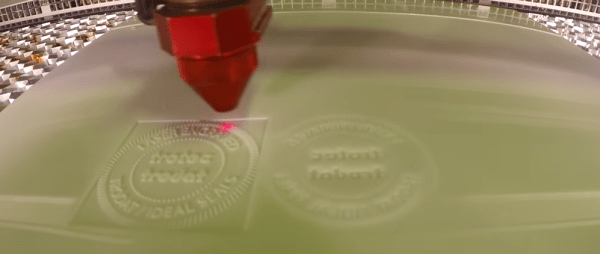
Parchment might be a thing of the past, but for those of us who still use paper an embossed seal can give everything from your official documents to your love letters a bold new feeling of authenticity. As far as getting your own seals made, plenty of folks will settle for having a 3rd party make them a seal, but not us. [Jason] shows us just how simple it is to raster our own seals with a laser cutter.

As far as the process goes, there are no tricks outside the typical workflow for raster engraving. Here, [Jason] simply creates a positive and (mirrored) negative seal pattern for each side of the seal embosser. The pattern is set for raster engraving, and the notched outline will be vector cut. From here, he simply exports the design, and the laser handles the rest.

This hack turned out so cleanly it almost seems like it could got into professional use–and it already is! Some extra Google-fu told us that it’s actually a fairly standard technique across the embossing industry for making embossing seals. Nevertheless, we couldn’t share our excitement for just how accessible this technique can be to anyone within reach of some time on a laser cutter.

[Jason] is using Delrin as his material to capture the design, which cuts cleanly and nicely handles the stress of being squished against your legal documents a couple hundred times. We’ve had our fair share of love on these pages for this engineering plastic. If you’re looking to get a closer look at this material, have a go at our materials-to-know debrief and then get yourself equipped with some design principles so that you’re ready to throw dozens of designs at it.

It’s not the first time the crafting and hacking communities intermingle and start sharing tools. In fact, if you’ve got yourself a vinyl cutter kicking around, why not have a go at churning out a few pcb stencils?

Thanks for the tip, [Doug]!

Continue reading “Emboss Your Own Seals With A Laser Cutter”

3D Printing And Book Binding

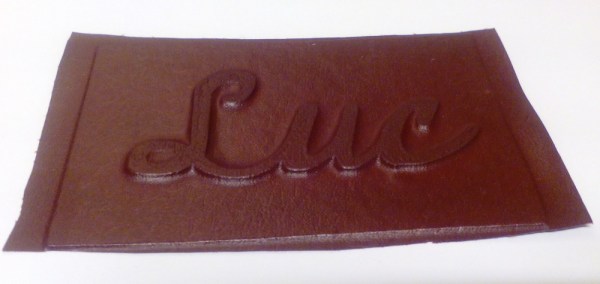
How exactly do you use 3D printing to assist in the extremely tedious and difficult art of leather book binding? It’s pretty simple actually — by 3D printing the title you want to emboss!

[Luc Volders] is a hobbyist book binder. He’s also recently gotten into 3D printing, by building his own Prusa I2, and even now, he’s working on building a Delta printer. Typically to do a relief or embossed title on a leather-bound book requires a lot of time — and it’s pretty easy to mess up.

He’s done book covers with relief before, by painstakingly carving each letter out with a knife, then gluing leather onto the cover, pressing it into the indent left by carving. It’s not easy. Continue reading “3D Printing And Book Binding”