Nightlights are a great way to calm children who may be afraid of the dark, as well as to avoid stubbing your toe on furniture in the hallway. However, in this day and age of connected everything, they can do so much more. [Andy] came up with a great way to do just that, creating an advanced networked solution to suit his needs.
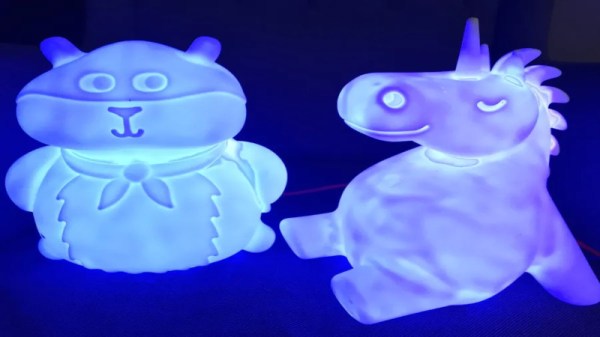
[Andy’s] nightlight serves not just in the usual fashion, but also as an indicator for his children. Depending on the time of day, the colour changes, indicating whether it’s time for bed, or also, if it’s too early to get out of bed in the morning and start watching cartoons. Each nightlight around the house runs on an ESP8266, which lights up using a set of WS2812B LEDs. The ESP8266 decides on colour values based on commands from a basic webserver running on a Raspberry Pi, updated every minute. This gives [Andy] the flexibility to make changes in one place, that then automatically roll out across the Nightlight Network (TM).
It’s a fun way of teaching the kids not to ruin a good Saturday sleep in, as well as serving as a fun colourful nightlight, too. Of course, luxury smart nightlights are becoming a thing, as this teardown of a Bluetooth unit shows. If you’ve built your own, be sure to drop us a line!
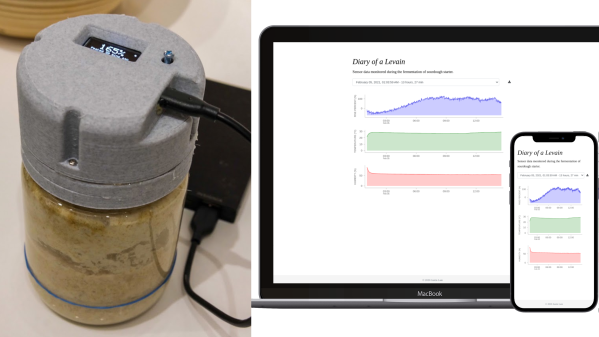
[Justin Lam] created a wonderfully-detailed writeup of his Smart Sourdough Lid project, which was created out of a desire to get better data on the progress and health of his sourdough starters, and to do so more efficiently. The result is a tidy, one-piece lid that constantly measures temperature, humidity, and height of the starter in the jar. Data is sent wirelessly for analysis, but there is also a handy OLED display on the top of the lid that shows immediately useful data like how much the starter has peaked, and how much time has passed since it did so.
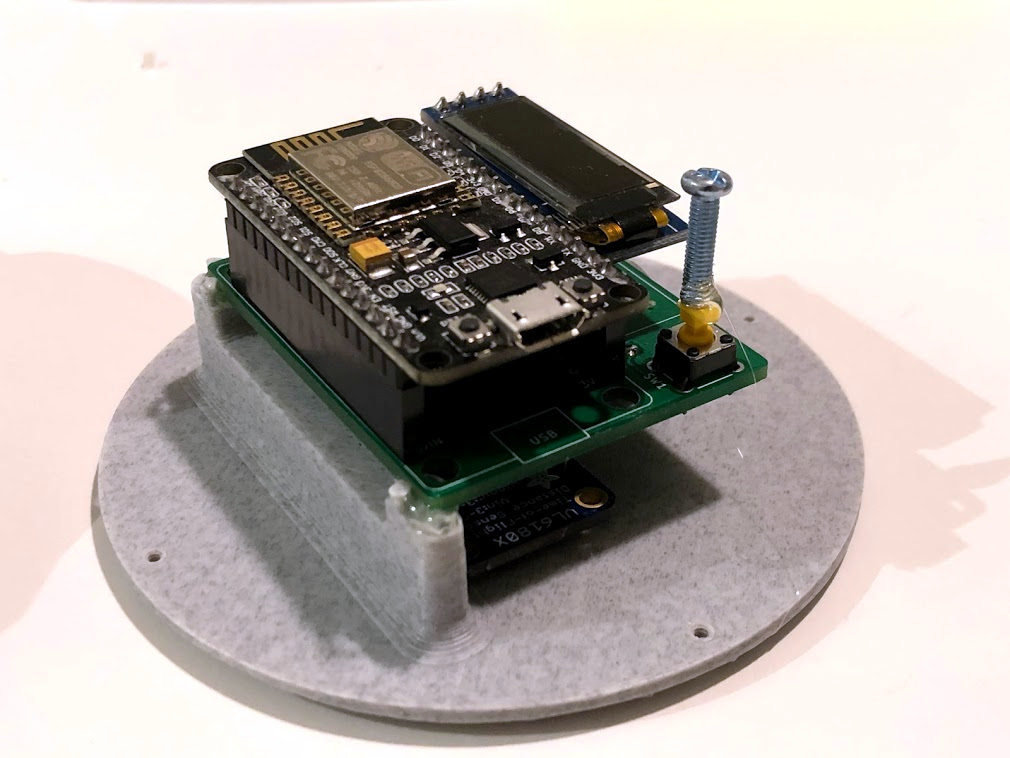
The PCB was optimized for size, and not designed with mounting in mind, so a hot-glued machine screw serves as a “button extender”. Issues like this can happen when enclosures are designed after the fact; it’s something to which we can all relate.
We really like how focused the design is, and the level of detail [Justin] goes into to explain his design decisions and describe how well they worked out. This isn’t [Justin]’s first kick at the can when it comes to getting data on his sourdough, after all. We remember his earlier work using computer vision to analyze sourdough starters, and he used what he learned to inform this new design; the smart lid is easier to use and handles data much more efficiently.
The project’s GitHub repository has all the information needed to build your own. The lid is ESP8266-based and integrates a VL6180X time-of-flight (ToF) distance sensor, DHT22 to sense temperature and humidity, and a small SSD1306 OLED display for data. A small custom PCB keeps the modules tidy, and a 3D-printed custom enclosure makes it one tidy package.
[Justin] also analyzes the results he obtained and talks about what they mean in the last part of his writeup, so if you’re into baking and interested in his findings, be sure to give that a look.
Smart switches are fun, letting you control lights and appliances in your home over the web or even by voice if you’re so inclined. However, they can make day-to-day living more frustrating if they’re not set up properly with regards to your existing light switches. Thankfully, with some simple wiring, it’s possible to make everything play nice.
The method is demonstrated here by [MyHomeThings], in which an ESP8266 is used with a relay to create a basic smart switch. However, it’s wired up with a regular light switch in a typical “traveller” multiway switching scheme – just like when you have two traditional light switches controlling the same light at home. To make this work with the ESP8266, though, the microcontroller needs to be able to know the current state of the light. This is done by using a 240V to 3.3V power supply wired up in parallel with the light. When the light is on, the 3.3V supply is on. This supply feeds into a GPIO pin on the ESP8266, letting it know the light’s current state, and allowing it to set its output relay to the correct position as necessary.
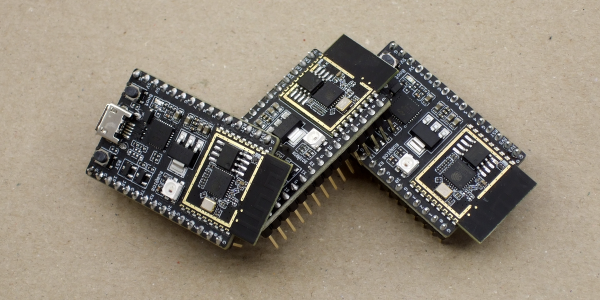
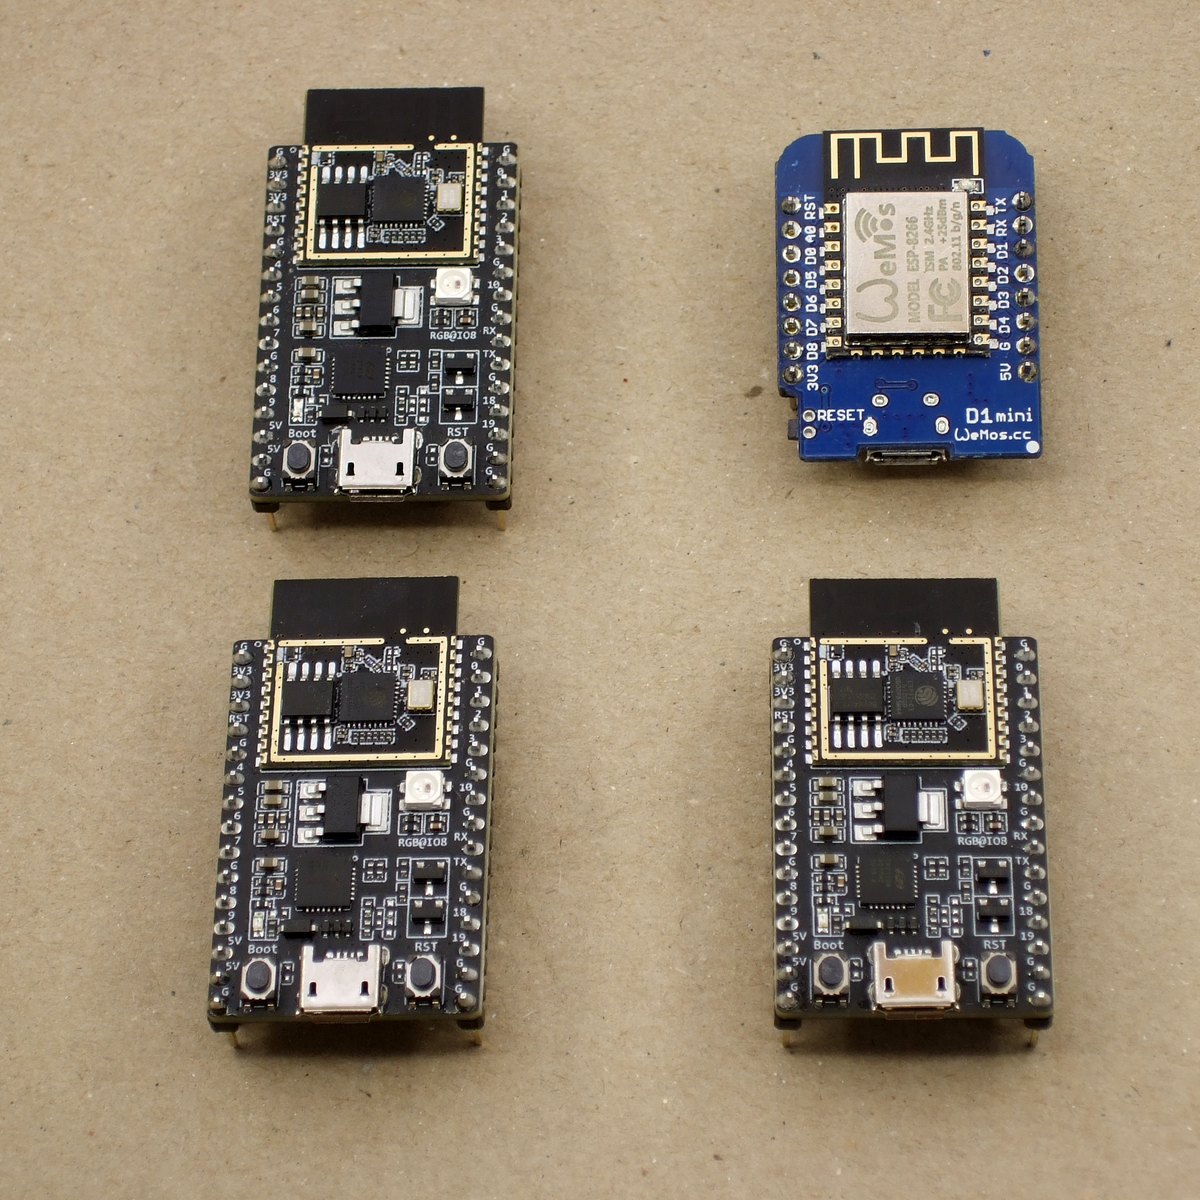
We just got our hands on some engineering pre-samples of the ESP32-C3 chip and modules, and there’s a lot to like about this chip. The question is what should you compare this to; is it more an ESP32 or an ESP8266? The new “C3” variant has a single 160 MHz RISC-V core that out-performs the ESP8266, and at the same time includes most of the peripheral set of an ESP32. While RAM often ends up scarce on an ESP8266 with around 40 kB or so, the ESP32-C3 sports 400 kB of RAM, and manages to keep it all running while burning less power. Like the ESP32, it has Bluetooth LE 5.0 in addition to WiFi.
Espressif’s website says multiple times that it’s going to be “cost-effective”, which is secret code for cheap. Rumors are that there will be eight-pin ESP-O1 modules hitting the streets priced as low as $1. We usually require more pins, but if medium-sized ESP32-C3 modules are priced near the ESP8266-12-style modules, we can’t see any reason to buy the latter; for us it will literally be an ESP8266 killer.
On the other hand, it lacks the dual cores of the ESP32, and simply doesn’t have as many GPIO pins. If you’re a die-hard ESP32 abuser, you’ll doubtless find some features missing, like the ultra-low-power coprocessor or the DACs. But it does share a lot of the ESP32 standouts: the LEDC (PWM) peripheral and the unique parallel I2S come to mind. Moreover, it shares the ESP-IDF framework with the ESP32, so despite running on an entirely different CPU architecture, a lot of code will run without change on both chips just by tweaking the build environment with a one-liner.
One of these things is not like the other
If you were confused by the chip’s name, like we were, a week or so playing with the new chip will make it all clear. The ESP32-C3 is a lot more like a reduced version of the ESP32 than it is like an improvement over the ESP8266, even though it’s probably destined to play the latter role in our projects. If you count in the new ESP32-S3 that brings in USB, the ESP32 family is bigger than just one chip. Although it does seem odd to lump the RISC-V and Tensilica CPUs together, at the end of the day it’s the peripherals more than the CPUs that differentiate microcontrollers, and on that front the C3 is firmly in the ESP32 family.
Our takeaway: the ESP32-C3 is going to replace the ESP8266 in our projects, but it won’t replace the ESP32 which simply has more of everything when we need it. The shared codebase and peripheral architecture makes it easier to switch between the two when we don’t need the full-blown ESP32. In that spirit, we welcome the newcomer to the family.
But naturally, we’ve got a lot more to say about it. Specifically, we were interested in exactly what the RISC-V core brought to the table, and ran the module through power and speed comparisons with the ESP32 and ESP8266 — and it beats them both by a small margin in our benchmarks. We’ve also become a lot closer friends with the ESP-IDF SDK that all of the ESP32 family chips use, and love how far it has come in the last year or so. It’s not as newbie-friendly as ESP-Arduino, for sure, but it’s a ton more powerful, and we’re totally happy to leave the ESP8266 SDK behind us.
By and large, alarm clocks (including phones that double as alarm clocks) are annoyingly alarming. If it’s not the light or the sound, it’s both. Yes, we know that’s the point of an alarm clock, but sometimes life presents opportunities to check the time and/or the weather and sleep in a little bit longer based on the result. We don’t know about you, but loud noises and eye-blasting light are not conducive to getting back to sleep, especially if you’re a light sleeper.
In [Stavros Korokithakis]’ case, if it’s a tennis practice morning but it’s raining, then it’s no longer a tennis practice morning and he can go back to sleep for a while. A phone seems perfect for this, but the problem is that it provides too much information: the phone can’t check the weather without the internet, and once it has internet access, a bunch of eye-opening notifications come flooding in.
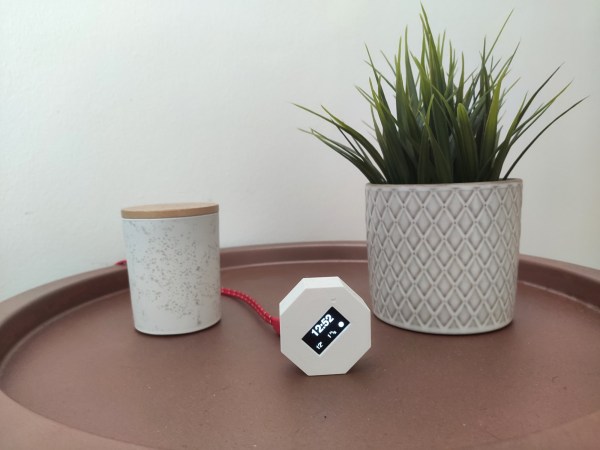
[Stavros] had a long list of must-haves when it came to building the ultimate alarm clock, and we can totally get behind that. He needed something smarter than the average off-the-shelf clock radio, but nothing too smart. Enter the ESP8266. As long as it has an internet connection, it can fetch the time and the weather, which is really all that [Stavros] needs. It gets the current temperature, wind speed, and forecast for the next two hours with the OpenWeather API, and this information is converted to icons that are easy to read at a sleepy, one-eyed glance at the OLED.
Adaptive brightness was high on the list of must-haves, which [Stavros] solved by adding a photoresistor to judge the ambient light and adjust the OLED screen brightness appropriately. And he really did think of everything — the octagonal shape allows for the perfect angle for reading from bed. There’s just one problem — it can’t accept input, so it doesn’t actually function as an alarm clock. But it makes a damn good bedside clock if you ask us.
Measuring the usage of domestic utilities such as water, gas or electricity usually boils down to measuring a repetitive pulse signal with respect to time. To make things easy, most modern utility meters have a pulsed LED output, which can be used to monitor the consumption by using an external optical sensor. But what do you do if your meter isn’t so cooperative?
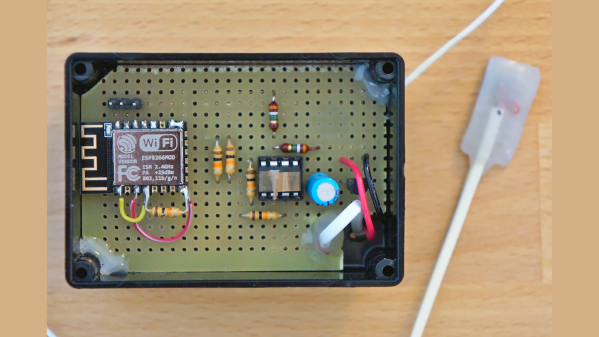
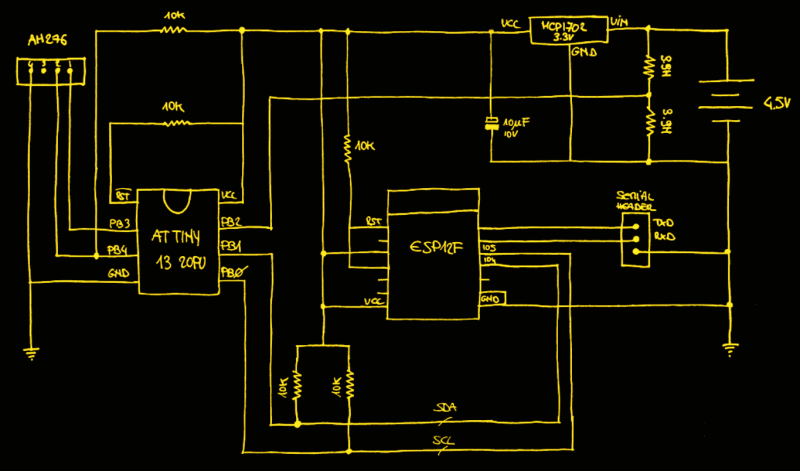
That’s exactly what [Francesco] had to figure out while developing the non-invasive gas tracking system he calls ESPmeter. His meter might not have an LED, but it did have a magnet attached to the counter disk which activated an internal hall sensor. With some hacking, he was able to attach an external Hall-effect sensor to pick up this magnet and use the signal to monitor his daily gas consumption.
A big stumbling block in such projects is the issue of powering the device for an extended period, and remembering when it’s time to change the batteries. With the clever use of commonly available parts, he was able to reduce power consumption allowing three AA batteries to last about a year between changes. For one thing, he uses an ATtiny13 to actually read the sensor values. The chip doesn’t run continuously, its watchdog is set at 1 Hz, ensuring that the device is woken up often enough so that it has time to power up the sensor and detect the presence of the magnet. Battery voltage is also measured via a voltage divider connected to the chip’s ADC pin.
At regular intervals throughout the day, the ESP8266 polls the ATtiny13 to pull the stored sensor pulses and voltage measurement. Then at midnight, the ESP transmits all the collected data to a remote server. Overall, this whole scheme allows [Francesco] to reliably gather his gas consumption data while not having to worry about batteries until he gets the low voltage notification. Since the data visualization requirements are pretty basic, he is keeping things simple by using Plotly to display his time series data.
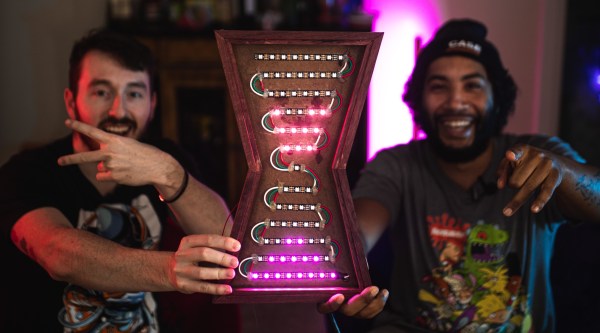
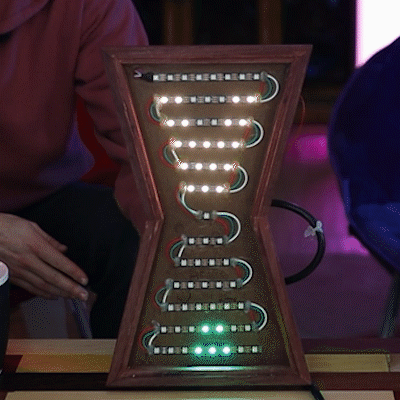
If you want to waste time in a meaningful way, get yourself an hourglass. It’s simultaneously mesmerizing and terrifying to sit there and watch the seconds slip through the threshold that separates possibility from missed opportunity.
[Ty and Gig]’s LED hourglass is equally beautiful to watch. It doesn’t actually tell time, but that’s perfectly fine by us. What it does do is animate the LEDs to approximate grains of sand in gravity, no matter how the hourglass is tilted.
In either vertical orientation, the sand falls as long as there is some in the top. When the hourglass is horizontal, the LEDs settle just like real sand does. [Ty and Gig] achieved this with a whole lot of code that breaks the animation frames into structure arrays.
By contrast, the hardware part of this build is fairly simple: all that’s needed to replicate this build is some RGB LEDs a beefy power supply to drive them, an accelerometer, and a microcontroller.
[Ty and Gig] were planning to use an ESP8266, but misplaced it and went with an Arduino Mega instead. (You know what they say — buy a replacement and the one you lost will turn up almost immediately.) The beautiful frame is made from leftover purpleheart, a hardwood that turns purple with exposure to air. Check out the build video after the break.