One more go at new enclosures for the Amiga 1200. Yes, it’s a Kickstarter campaign, and we mentioned a similar the same campaign last month. The previous campaign received a little more than half of the desired funding in a 30-day campaign. The new campaign received half its funding in a week. The only difference? Now you can put a Raspberry Pi in a newly manufactured A1200 case. And they say Raspberry Pi consumerism isn’t a thing…
Cheap SLA printing service. [Ian] and Dangerous Prototypes have made a name for themselves with dirt cheap, acceptable quality PCBs. Now they’re going for custom prints on a resin machine. It’s $0.95 per gram (density is 1.3g/cc). That’s cheap.
[James Willis] built a floppy drive orchestra. There are 16 drives in this orchestra, all controlled by an FPGA. Here’s the writeup.
Here’s a video overview of a real, huge, rideable hexapod robot. ‘Wow’ is just about the only thing we got for this.
Western Digital introduced a hard drive made specifically for the Raspberry Pi. It’s a hard drive with a USB interface, and a USB cable that connects to the Pi, the drive, and a power adapter. In other news, externally powered USB hard drives exist. You can buy a 2TB drive for the price of the 1TB PiDrive. What was that thing about Raspi consumerism?
Next week is the Open Hardware Summit in Philadelphia. We’ll be there (or rather, I will). We’ll have a post on the OHS badge up on Monday. Would anyone like to go see the lady made out of soap? It’s right around the corner from the venue.
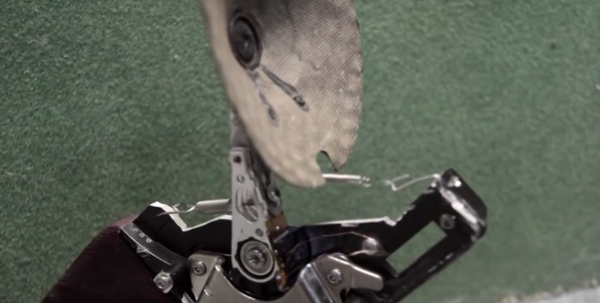
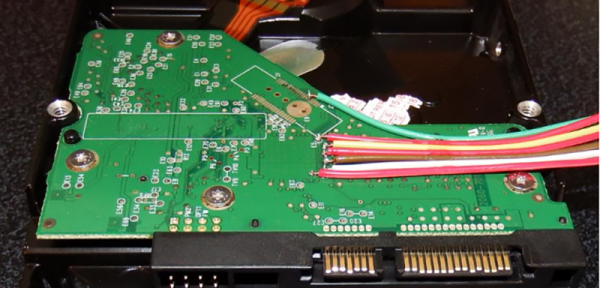
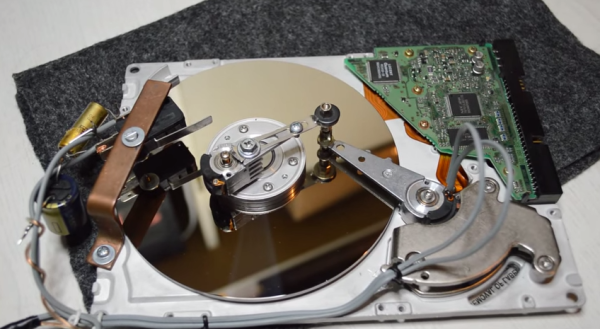
 The drive’s arm and voice coil actuator are the key parts of this project. It was modified with a metal extension so that a paper cone cut from an audio speaker could be attached, an idea used in