Building A New RF Remote From Scratch

We’ve seen no shortage of projects that use the ESP8266 or ESP32 to add “smart” features to existing home appliances, often by pairing the microcontroller with a radio or IR transmitter. If your device has an existing remote, integrating it into a custom home automation system is often just a matter of getting a few cheap modular components and writing some simple code to glue it all together.

But what if the appliance you want to control doesn’t use a common frequency? That’s a question that [eigma] recently had to answer after finding the remote control for the bedroom ceiling fan was operating at a somewhat unusual 304 MHz. Something like the MAX1472 could probably have been tuned to this frequency, but the chip doesn’t seem to be available in a turn-key module as the popular 315 MHz transmitters are.

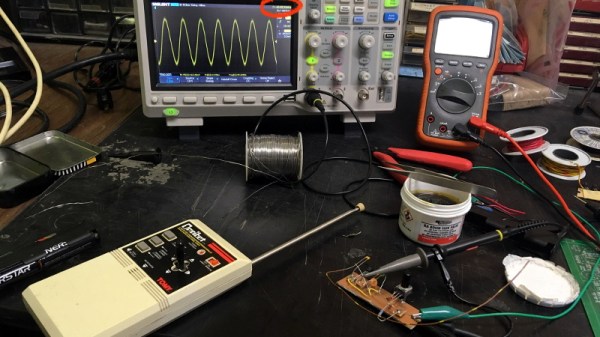
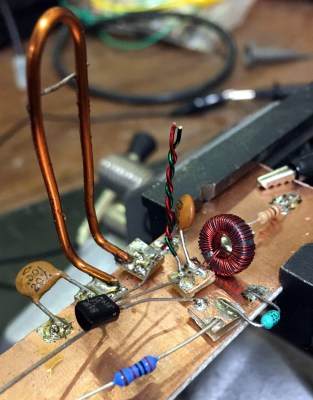
There were a few possible options, including using a software defined radio (SDR), but [eigma] didn’t want to spend a fortune on this project or wait months for parts to get shipped from overseas. The most straightforward solution was to design a custom transmitter tuned to the proper frequency using discrete components; something of a dark art to those of us who’ve been spoiled by the high availability of modular components.

What follows is an fascinating look at the design, testing, and troubleshooting of a truly scratch-built transmitter. You won’t find any ICs here, the carrier signal is generated with just a transistor, some carefully measured pieces of wire, and a handful of passive components. By modulating the signal with an ESP32, [eigma] successfully makes the oddball ceiling fan an honorary member of the Internet of Things.

The write-up that [eigma] has done is an absolutely invaluable resource if you ever find yourself in need of rolling a bespoke transmitter. It easily ranks among some of the most informative radio reverse engineering work we’ve covered, and you’d be wise to file this one away for future reference. That said, most of the newer hardware you’re going to run into will probably be utilizing a widely-supported frequency like 433 MHz.

DIY ESP32 Alarm System Leverages 433 MHz Sensors

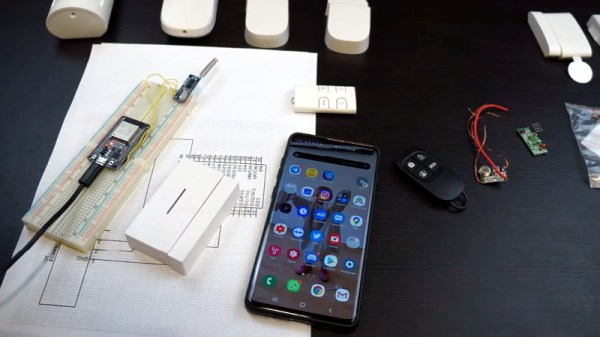
There’s a huge market for 433 MHz alarm system hardware out there, from PIR motion detectors to door and window sensors. If you want to put them to work, all you need is a receiver, a network-enabled microcontroller, and some code. In his latest video, [Aaron Christophel] shows how easy it can be.

In essence, you connect a common 433 MHz receiver module to an ESP32 or ESP8266 microcontroller, and have it wait until a specific device squawks out. From there, the code on the ESP can fire off using whatever API works for your purposes. In this case [Aaron] is using the Telegram API to send out messages that will pop up with a notification on his phone when a door or window is opened. But you could just as easily use something like MQTT, or if you want to go old-school, have it toggle a relay hooked up to a loud siren.

Even if you aren’t looking to make your own makeshift alarm system, the code and video after the break are a great example to follow if you want to get started with 433 MHz hardware. Specifically, [Aaron] walks the viewer through the process of scanning for new 433 MHz devices and adding their unique IDs to the list the code will listen out for. If you ever wondered how quickly you could get up and running with this stuff, now you’ve got your answer.

In the past we’ve seen the Raspberry Pi fill in as an RF to WiFi gateway for these type of sensors, as well as projects that pulled them all together into a complete home automation system on the cheap.

Continue reading “DIY ESP32 Alarm System Leverages 433 MHz Sensors”

Reverse Engineering A Ceiling Fan Remote

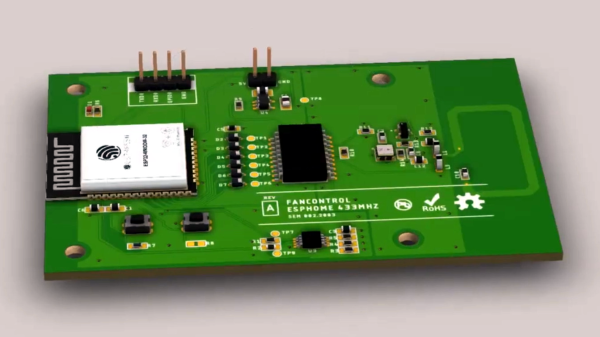
In the quest to automate everything in your home, you no doubt have things that aren’t made with home automation in mind. Perhaps your window AC unit, or the dimmer in your dining room. [Seb] has several ceiling fans that are controlled by remotes and wanted to connect them to his home automation system. In doing so, [Seb] gives a good overview of how to tackle this problem and how to design a PCB so he doesn’t have a breadboard lying around connected to the guts of his remote control.

There are several things [Seb] needs to figure out in order to connect his fans to Home Assistant, the home automation system he uses: He needs to determine if the circuit in the remote can be powered by 5 or 3.3 V, he needs to connect the circuit to an ESP32 board, and he needs to figure out if he can create a custom PCB that combines the circuit and the ESP32 into one. The video goes through each of these steps and shows the development of each along the way.

There’s a lot of info in the video, so it might need to be slowed down a bit to see all the details. There are some other reverse engineering of home automation gear on the site, here, or, you might want to build your own remote to control your automated devices.

Continue reading “Reverse Engineering A Ceiling Fan Remote”

Printed Door Handle Turns Key With A Servo

[Madalin Valceleanu] had a somewhat unique problem. He wanted to make his front door a bit “smarter”, but none of the IoT door locks he found were compatible with the style of reinforced door he had. So he set out to design and 3D print his own Internet-controlled door handle.

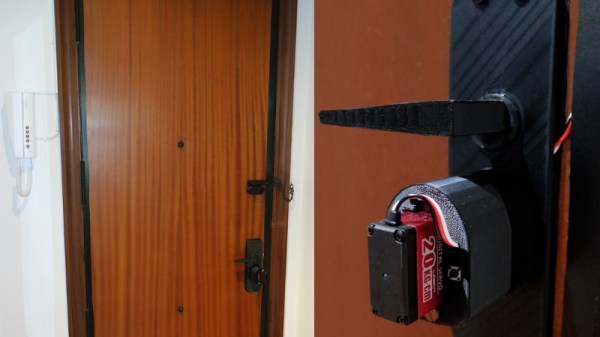
Now we say handle and not lock because the internal mechanisms haven’t actually been replaced. Those aren’t exactly the kind of parts that lend themselves to being recreated in PLA, after all. The printed components simply replace the original plate and handle on the interior of the door.

In that case, you might be wondering what the point of all this was. If he’s still using the same internal mechanism, how does a new handle help? On his new handle, [Madalin] has integrated a servo that’s capable of turning the original key in the door. With the servo wired up to a Raspberry Pi, this allows him to lock and unlock the door through his home automation system.

[Madalin] has made the STLs for his printed handles available on Thingiverse, but like most of these “bolt on” style door modifications, we imagine the design is bespoke enough that it won’t be much practical use to anyone else. Still, it’s an excellent example of solving a real-world problem with some outside of the box thinking. Continue reading “Printed Door Handle Turns Key With A Servo”

Flashing Sonoff Devices With Tasmota Gets Easier

Tasmota is an alternative firmware for ESP boardsĀ  that provides a wealth of handy features, and [Mat] has written up a guide to flashing with far greater ease by using Tasmotizer. Among other things, it makes it simple to return your ESP-based devices, like various Sonoff offerings, to factory settings, so hack away!

Tasmotizer is a front end that also makes common tasks like backing up existing firmware and setting configuration options like, WiFi credentials, effortless. Of course, one can’t really discuss Tasmotizer without bringing up Tasmota, the alternative firmware for a variety of ESP-based devices, so they should be considered together.

Hacks based on Sonoff devices are popular home automation projects, and [Mat] has also written all about what it was like to convert an old-style theromostat into a NEST-like device for about $5 by using Tasmota. A video on using Tasmotizer is embedded below, so give it a watch to get a head start on using it to hack some Sonoff devices.

Continue reading “Flashing Sonoff Devices With Tasmota Gets Easier”

NFC For Your Home Automation

If home automation in the IoT era has taught us anything, it is that no one wants to run wires. Many of us rent, so new cabling is not even an option, even if we wanted to go that route. If you want a unique sensor, you have to build your own, and [tmkThings] wanted an NFC scanner at his front door. Just like arriving at work, he scans his credentials, and the door unlocks automagically.

Inside a little white box, we find an ESP8266 speaking Wifi attached to a PN532 talking NFC, and both are familiar names on these pages. The code, which is available on GitHub, links up with IFTTT and MQTT. For the security-minded, we won’t see this on your front door, but you can trigger your imagination’s limit of events from playing your favorite jams at the end of the day to powering down all the televisions at bedtime.

NFC hacks are great because they are instantly recognizable and readers are inexpensive, but deadbolt hacking is delightful in our books.

Continue reading “NFC For Your Home Automation”

An Eight-Day Home Automation Hackathon Is Inspiration For Getting More Projects Done

There’s nothing quite like a deadline to cut through extras and get right at the heart of the problem. Maybe we should all follow Interpreet’s example and stop thinking about automating our homes and just make it in an eight-day hackathon. His talk at the 2019 Hackaday Superconference covers the zero-to-deployment home automation build he finished in the eight days leading up to his move from one continent to another.

Hackaday’s very own Inderpreet Singh found himself pulling up roots and moving from his home in India to teach at Centennial College in Toronto, Canada. He needed a way to keep an eye on his home from afar and the name of the game is IoT. When the only choice is “whatever works right now”, you can learn a lot about simple solutions.

He chose familiar hardware to work with, with the ESP8266 making up the bulk of the nodes and a Raspberry Pi as as a central hub for the setup. He chose to communicate between all the nodes on his system using WiFi because the hardware is robust and available. With security in mind, he keeps the automation system separate from the daily use WiFi system by grabbing an extra access point to serve as the automation network. The Raspberry Pi serves as a router of sorts; its Ethernet port is connected to the IoT device’s AP, while the onboard WiFi is used to connect to the home’s main AP for a connection to the wider Internet.

Software for the system is built on a REST API served by a Python Flask app. Many would advocate for using MQTT but Inderpreet’s testing with that protocol came up short as the broker he intended to use was no longer available. One of the interesting parts of his system design is that all nodes will check in at regular intervals; this allows them to inquire about actions they need to take, but it also allows the system to detect a malfunctioning node immediately. I’ve seen a similar trick used by Elliot Williams where he assigns a “ping” topic to all MQTT devices that causes them to report in with their IP address. Having a system to query and ensure the health of every node is a big tip to take away from this talk.

Continue reading “An Eight-Day Home Automation Hackathon Is Inspiration For Getting More Projects Done”