Into The Belly Of The Beast With Placemon

No, no, at first we thought it was a Pokemon too, but Placemon monitors your place, your home, your domicile. Instead of a purpose-built device, like a CO detector or a burglar alarm, this is a generalized monitor that streams data to a central processor where machine learning algorithms notify you if something is awry. In a way, it is like a guard dog who texts you if your place is unusually cold, on fire, unlawfully occupied, or underwater.

[anfractuosity] is trying to make a hacker-friendly version based on inspiration from a scientific paper about general-purpose sensing, which will have less expensive components but will lose accuracy. For example, the article suggests thermopile arrays, like low-resolution heat-vision, but Placemon will have a thermometer, which seems like a prudent starting place.

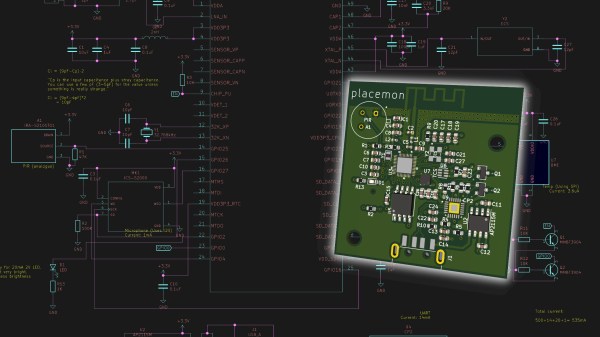
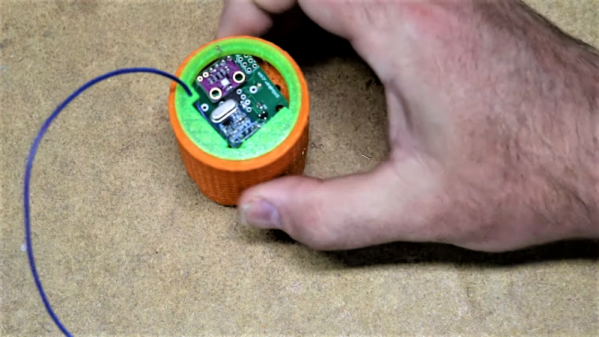
The PCB is ready to start collecting sound, temperature, humidity, barometric pressure, illumination, and passive IR then report that telemetry via an onboard ESP32 using Wifi. A box utilizing Tensorflow receives the data from any number of locations and is training to recognize a few everyday household events’ sensor signatures. Training starts with events that are easy to repeat, like kitchen sounds and appliance operations. From there, [anfractuosity] hopes that he will be versed enough to teach it new sounds, so if a pet gets added to the mix, it doesn’t assume there is an avalanche every time Fluffy needs to go to the bathroom.

We have another outstanding example of sensing household events without directly interfacing with an appliance, and bringing a sensor suite to your car might be up your alley.

Harvesting Energy From Ambient Moisture

Generating electricity out of thin air is the fantasy for our modern technology dependant world, but still falls squarely in the world of science fiction. However, researchers from the University of Massachusetts Amherst claim that they have found a way to do exactly that, using protein nano-wires to produce tiny amounts of electricity from ambient humidity.

The protein nano-wires in question are harvested from the microbe Geobacter sulfurreducens, to create a 7 µm thick film that is placed between two gold electrodes. One electrode completely covers the back of the film, while the front electrode covers only a tiny portion of the surface area. When the film is exposed ambient moisture, researchers measured 0.4 V – 0.6 V produced continuously for more than two months. The current density was about 17 µA/cm². This is only a fraction of the output of a commercial solar panel, but it can be layered with air gaps in between. The electricity is supposedly produced due to a moisture gradient through the thickness of the film. Harvesting energy using ambient humidity is not new, but the improvement in power density on this study is at least two orders of magnitude larger than that of previous studies.

The researches have named the technology Air-Gen and hope to develop it commercially. As we have seen many times before, promising lab results often don’t translate well into real world products, but this technology is definitely interesting.

We’ll continue to see all sorts of weird and wonderful ways to free up electrons, like using sweat, but we’ll have to wait and see what sticks.

Thanks for the tip [William Polo]!

Stylish Thermometer Is DIY Hardware Perfection

Over the last few years, we’ve seen a steady improvement in the sort of custom hardware a dedicated individual can produce. With affordable desktop 3D printers and PCB fabrication services, the line between store bought and home built can get very blurry. This slick MQTT-connected thermometer created by [Martin Cerny] is a perfect example.

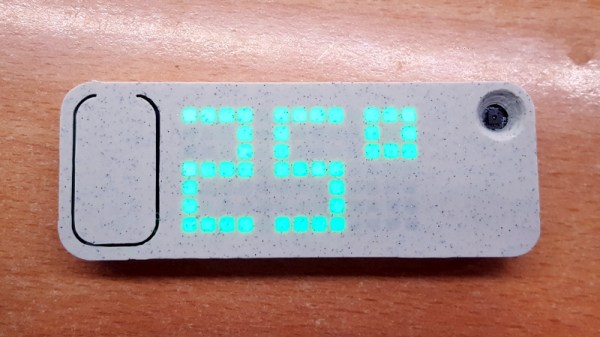
The case for the device, which [Martin] calls Temper, is printed in a stone-look PLA filament and has been carefully designed so that LEDs shining behind it illuminate perfect square “pixels” on the front. There’s a living hinge button on the left side, and on the right, an opening for the SHT30 temperature and humidity sensor. Some may say that the look of the sensor aperture could be improved with a printed grille, but there was likely a concern about reduced airflow.

Inside the case is a 13×7 array of SMD LEDs, a few 74HC595 shift registers, a TP4054 charging chip to keep the internal 250 mAh battery topped off via USB, and some passives to round out the party. The ESP-12E module that brings it all together and the battery are on the flip side of the PCB. At a press of the button, the display fires up for 5 seconds and Temper publishes temperature, humidity and battery percentage through MQTT. If you’re looking for more granular data, it can also be configured to publish regular updates at the cost of increased energy consumption.

The physical product is gorgeous on its own, but we’re happy to report that the firmware and documentation have been handled with a similar attention to detail. The project’s GitHub repo has a Wiki to help others build and configure their very own Temper, and the device’s web configuration portal is easily just as nice as anything you’d find in a piece of modern consumer electronics (if not moreso).

We’ve seen plenty of ESP8266-based environmental monitoring devices here at Hackaday, but we think this one really pushes the state-of-the-art forward. This is a device that wouldn’t be out of place on the shelf at a Big Box electronics retailer, and while [Martin] says he has no interest in building and selling them himself, we don’t doubt that folks out there will be spinning up their own Temper clones before too long.

A VFD Wall Thermometer

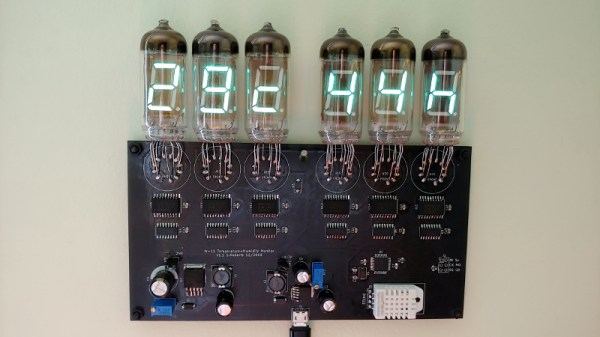
Want to build something using VFD tubes, but don’t need yet another clock project? In that case, this wall mounted temperature and humidity display created by [commanderkull] might be exactly what you’re looking for. With six IV-11 tubes, this display is a practical way to add some of that gorgeous blue-green glow to your home or office.

The USB powered display uses a XL6009 and an XL7015 to provide the 24 V and 1.8 V needed by the IV-11 tubes, respectively. Both of which can be disconnected with jumpers to shut down the tubes without powering off the entire device, a useful feature when programming and debugging the display’s ATmega328P microcontroller. Each tube is connected to the ATmega with an 74HC595 shift register and a UDN2981 driver. Temperature and humidity data is provided, perhaps unsurprisingly, by the exceptionally common DHT22 sensor.

If you are looking to build another clock with these style tubes, there’s certainly enough prior art out there to get you started. We’ve also seen faux VFDs that you could use for either project, just in case you aren’t looking to deal with the voltage requirements and relative rarity of the real thing.

Cheap Sensors And An SDR Monitor Conditions In This Filament Drying Farm

We don’t know where [Scott M. Baker] calls home, but it must be a pretty humid place indeed. After all, he has invested quite a bit in fancy vacuum storage containers to keep his 3D-printer filament dry, with the result being this sensor-laden filament drying farm.

[Scott] wasn’t content to just use these PrintDry containers without knowing what’s going on inside. After a little cleaning and lube to get all the containers working, he set about building the sensors. He settled on a wireless system, with each container getting a BME280 temperature/humidity/pressure sensor and an SYN115 315-MHz ISM band transmitter module. These go with an ATtiny85 into a compact 3D-printed case holding a little silica desiccant. The transmitters are programmed to comply with ISM-band regulations – no need to run afoul of those rules – while the receiver is just an SDR dongle and a Raspberry Pi running rtl_433. The long-ish video below details design and construction.

The idea behind these vacuum containers would seem to be to pull out humid air and prevent it from coming back in. But as [Scott] quickly learned from his telemetry, following the instructions results in the equivalent atmospheric pressure of only about 2700′ (823 meters) elevation – not exactly a hard vacuum. But as [Scott] points out, it’s enough to get a nice, tight seal, and his numbers show a lowered and constant relative humidity over time.

Continue reading “Cheap Sensors And An SDR Monitor Conditions In This Filament Drying Farm”

Xpedit Is A Mood Ring For Mother Nature

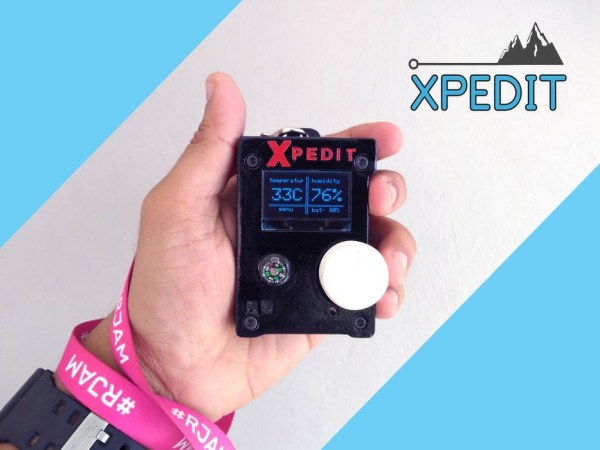
Whether you’re in the woods or way up a mountain, basic knowledge of your environment can yield a lot of power. The more you know about the temperature, humidity, barometric pressure, and your altitude, the easier it is to predict future weather and stick to your height limits. Sure, you could buy some pre-fab doohickey that does all of this, but why? [DIYMechanics] shows how easy it is to build your own pocket-sized weather station for under $20.

Xpedit’s brain is an ATMega328 running on a 20MHz crystal heartbeat. The atmospheric readings come from a BME280, a nifty all-in-one module that’s available for pennies on Ali. The rotary encoder handles user inputs, and the simple interface displays on an OLED. There’s even a tiny compass embedded in the 3D printed case.

We really like the custom alarm feature, which can buzz you via vibe motor if you’ve climbed too high, or the pressure is dropping. [DIYMechanics] has Xpedit completely open-sourced, so trek on down to the GitHub for the latest Eagles, Gerbers, and INOs. Don’t have a USBtiny ISP yet? He’s got the plans for that, too.

Maybe you’re the indoorsy type who’d rather read about mountainous jungle adventures than experience them firsthand. Add some weather-driven ambiance to your book nook by hacking an IKEA cloud lamp.

Exploring Basement Humidity With A Raspberry Pi

Sometimes a hack isn’t about building something cool. Sometimes it’s more tactical, where the right stuff is cobbled together to gather the information needed to make decisions, or just to document some interesting phenomenon.

Take this impromptu but thorough exploration of basement humidity undertaken by [Matthias Wandel]. Like most people with finished basements in their homes, [Matthias] finds the humidity objectionable enough to warrant removal. But he’s not one to just throw a dehumidifier down there and forget about it. Seeking data on how well the appliance works, [Matthias] wired a DHT22 temperature/humidity sensor to a spare Raspberry Pi to monitor room conditions, and plugged the dehumidifier into a Kill-A-Watt with a Pi camera trained on the display to capture data on electrical usage.

His results were interesting. The appliance does drop the room’s humidity while raising its temperature, a not unexpected result given the way dehumidifiers work. But there was a curious cyclical spike in humidity, corresponding to the appliance’s regular defrost cycle driving moisture back into the room. And when the dehumidifier was turned off, room humidity gradually increased, suggesting an unknown source of water. The likely culprit: moisture seeping up through the concrete slab, or at least it appeared so after a few more experiments. [Matthias] also compared three different dehumidifiers to find the best one. The video below has all the details.

We always appreciate [Matthias]’ meticulous approach to problems like these, and his field expedient instrumentation. He seems to like his creature comforts, too – remember the target-tracking space heater from a few months back?

Continue reading “Exploring Basement Humidity With A Raspberry Pi”