GoGo Starts Testing New In-Flight Internet Technology

GoGo, the largest provider of Internet above 30,000 feet, has announced they are now testing their next generation of in-flight Internet.

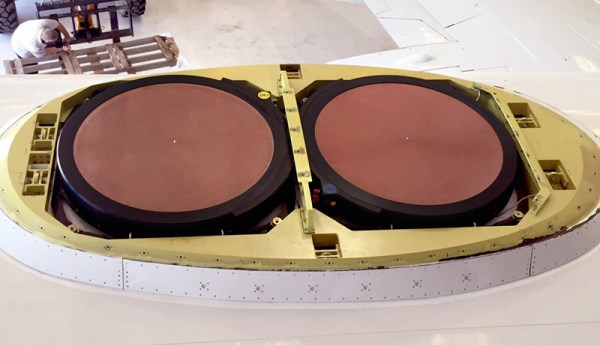
Of special interest in the new 2Ku system is the antennas strapped to the top of a GoGo-equipped plane’s fuselage. These antennas form a mechanically-phased-array that are more efficient than previous antennas and can provide more bandwidth for frequent fliers demanding better and faster Internet.

The Antenna Pod
The Antenna Pod

Currently, GoGo in-flight wireless uses terrestrial radio to bring the Internet up to 35,000 feet. Anyone who has flown recently will tell you this is okay, but you won’t be binging on Nexflix for your next cross country flight. The new system promises speeds up to 70Mbps, more than enough for a cabin full of passengers to be pacified by electronic toys. The 2Ku band does this with a satellite connection – much faster, but it does have a few drawbacks.

Because the 2Ku system provides Internet over a satellite connection, ping times will significantly increase. The satellites GoGo is using orbit at 22,000 miles above Earth, or about 0.1 light seconds away from the plane. Double that, and your ping times will increase by at least 200ms compared to a terrestrial radio connection.

While this is just fine for email and streaming, it does highlight the weaknesses and strengths of mobile Internet.

Wifi Antenna

Simple Directional WiFi Antenna

Back in 2007, [Stathack] rented an apartment in Thailand. This particular apartment didn’t include any Internet access. It turned out that getting a good connection would cost upwards of $100 per month, and also required a Thai identification card. Not wanting to be locked into a 12-month contract, [Stathack] decided to build himself a directional WiFi antenna to get free WiFi from a shop down the street.

The three main components of this build are a USB WiFi dongle, a baby bottle, and a parabolic Asian mesh wire spoon. The spoon is used as a reflector. The parabolic shape means that it will reflect radio signals to a specific focal point. The goal is to get the USB dongle as close to the focal point as possible. [Stathack] did a little bit of math and used a Cartesian equation to figure out the optimal location.

Once the location was determined, [Stathack] cut a hole in the mesh just big enough for the nipple of the small baby bottle. The USB dongle is housed inside of the bottle for weatherproofing. A hole is cut in the nipple for a USB cable. Everything is held together with electrical tape as needed.

[Stathack] leaves this antenna on his balcony aiming down the street. He was glad to find that he is easily able to pick up the WiFi signal from the shop down the street. He was also surprised to see that he can pick up signals from a high-rise building over 1km away. Not bad for an antenna made from a spoon and a baby bottle; plus it looks less threatening than some of the cantenna builds we’ve seen.

thermostat

Arduino Thermostat Includes Vacation Mode

When [William’s] thermostat died, he wanted an upgrade. He found a few off-the-shelf Internet enabled thermostats, but they were all very expensive. He knew he could build his own for a fraction of the cost.

The primary unit synchronizes it’s time using NTP. This automatically keeps things up to date and in sync with daylight savings time. There is also a backup real-time clock chip in case the Internet connection is lost. The unit can be controlled via the physical control panel, or via a web interface. The system includes a nifty “vacation mode” that will set the temperature to a cool 60 degrees Fahrenheit while you are away. It will then automatically adjust the temperature to something more comfortable before you return home.

[William’s] home is split into three heat zones. Each zone has its own control panel including an LCD display and simple controls. The zones can be individually configured from either their own control panel or from the central panel. The panels include a DHT22 temperature and humidity sensor, an LCD display, a keypad, and support electronics. This project was clearly well thought out, and includes a host of other small features to make it easy to use.

UDP Between STM32-F4 Discovery Boards

stm32-f4-udp

[The Backwoods Engineer] tested out a new accessory kit for the STM32-F4 Discovery board. The image above shows two boards communicating with the UDP protocol. Notice the extra PCB into which each Discovery board has been plugged. This is a third-party add-on which adds Ethernet, RS-232, SD card slot, and a connector for LCD or Camera. We’ve had one of these F4 Discovery boards on hand for a while and haven’t figured out a good way to connect external hardware to the huge dual pin-headers. This doesn’t solve the problem — the base board also includes dual headers to break-out all the pins — but having Ethernet, serial, and SD certainly reduces the need to add all that much more. The other drawback to the hardware is that the sample firmware is targeted at the IAR Embedded Workbench which is neither free, nor in the realm of affordable for hobbyists.

The NIC used on the baseboard has auto-crossover capabilities so the boards were connected using a regular Cat6 patch cable. This example has the boards constantly sending UDP packets with the module on the right reporting status information to a terminal via the serial connection.

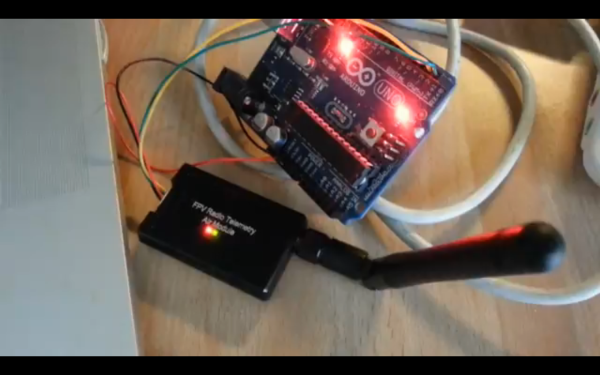
Vodafone USB 3G Modem Driver From Mbed

Wow, that’s a really simple hardware setup to supply your device with a 3G Internet connection. Better yet, the software side is just as simple thanks to the Vodafone USB Modem library for mbed. It will work for any of the cell data plans offered by Vodafone. The only problem you may have is not living in one of the 30 countries serviced by the telco.

The dongle seen at the right is sold by Vodafone and is meant to be used for Internet data, so you won’t be doing anything that might get your SIM banned. Connecting to the network is a one-liner thanks to the previously mentioned library. From there, gets and posts can be done with your favorite package. The  Hello World example uses HTTPClient. And since the mbed is simply an ARM platform it shouldn’t be hard to use the library with the ARM chip of your choice.

TouchIt Fabulously With Other People On The Internet

[John] from MIT is working on a project to bring a little bit of interactivity to the hacks he does. Because his hacks receive much more attention on the Internet than in real life, [John] made it so clicking a button in your browser can change something in the real world. He calls his creation TouchIt Fabulously (check out that URL!), and it allows a queue of people on the Internet to take part in a real-world hack.

The basic idea of [John]’s build is very simple: a microcontroller connected to the Internet and a 7-segment display receives button presses from random people on the web. [John] did a lot of work to make sure everything is ‘fair’ when a lot of people are hitting his server by including per-IP queuing and rate limiting.

Right now, it’s just a 7-segment display connected to the Internet with a live video stream. With each press of a button, the counter decrements by one, and the person to take it all the way to zero gets to put their comment up on the web site.

If this build receives a lot of interest, [John] plans on turning it into a much bigger build that will control the lights in his office, shoot ping-pong balls at him, and an interactive display where people can draw graffiti in one of MIT’s many hallways.

Now that [John]’s build is up on Hackaday, we look forward to the stress testing our readers will graciously provide.

Thanks go to [Steve Baconmeister] for sending this in and having the best fake name ever.

Checking Network Status With A Traffic Light

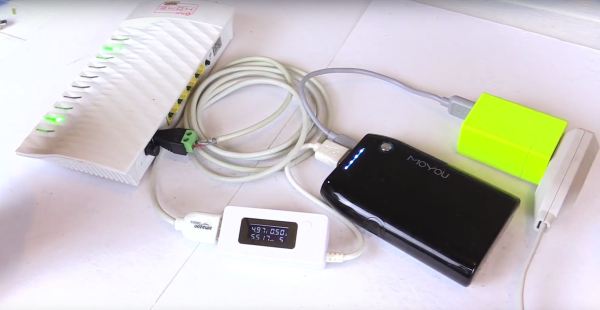
If you’ve ever dealt with a buggy Internet connection, you know how frustrating it can be. This project takes the guesswork out of mashing F5 over and over, or simply walking over to your router and ‘turning it on and off again.’

Necessity is the mother of invention, and when the folks at the Bitlair hackerspace in Amersfoort, Netherlands got tired of opening up a terminal to see if their network connection was down at this weekend’s Haxogreen camp they did what any self-respecting hackerspace would do: make a traffic light monitor the Internet.

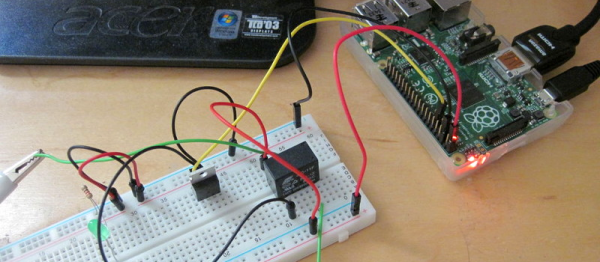
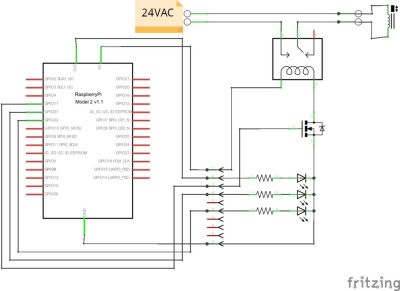
The traffic light is controlled by a Raspberry Pi the Bitlair folks had lying around attached to a spare traffic light they somehow obtained with a relay. Green means the Raspi can reach 8.8.8.8, red means there is no connection, and flashing lights means there is packet loss.

Not bad for a project put together in a few hours. Now if we only knew how they obtained a traffic light, ‘just lying around.’

Video after the break.

Continue reading “Checking Network Status With A Traffic Light”