KiCad Action Plugins

The last two years has been a particularly exciting time for KiCad, for users, casual contributors, and for the core developers too. Even so, there are many cool new features that are still in process. One bottleneck with open-source development of complex tools like KiCad is the limited amount of time that developers can devote for the project. Action plugins stand to both reduce developer load and increase the pace of development by making it easier to add your own functionality to the already extensible tool.

Sometime around version 4.0.7 (correct us if we’re wrong), it was decided to introduce “action plugins” for KiCad, with the intention that the larger community of contributors can add features that were not on the immediate road map or the core developers were not working on. The plugin system is a framework for extending the capabilities of KiCad using shared libraries. If you’re interested in creating action plugins, check out documentation at KiCad Plugin System and Python Plugin Development for Pcbnew. Then head over to this forum post for a roundup of Tutorials on python scripting in pcbnew, and figure out how to Register a python plugin inside pcbnew Tools menu. Continue reading “KiCad Action Plugins”

A New KiCAD Tutorial Hits The Scene

KiCAD has a rightfully earned image problem regarding beginners. The shiny new version 5 has improved things (and we’re very excited for v6!) but the tool is a bit obtuse even when coming from a electronics design background, so we’re always excited to see new learning material. [Mike Watts] is the latest to join the esteemed group of people willing to export their knowledge with his KiCAD tutorial series on GitHub that takes the aspiring user from schematic through fab and assembly.

The tutorial is focused around the process of creating a development board for the dimuitive Microchip née Atmel ATSAMD10 Cortex M0 ARM CPU. It opens by asking the reader to create a schematic and proceeds to teach by directing them to perform certain actions then explaining what’s going on and which shortcuts can accelerate things. This method continues through layout, manufacturing, and assembly.

Of note is that when defining the board outline [Mike] describes how to use OpenSCAD to parametrically define it; a neat micro-tutorial on using the two great tools to compliment each other. We also love that upon successful completion of the tutorial series the user will have developed a tiny but useful development board that can be assembled for about $3 in single quantities!

As with all open source work, if you have quibbles or want to contribute open a pull request and give [Mike] a hand!

Bit Preserve: A Sanctuary For Modern Captures Of Vintage Schematics

Vintage parts may be documented, but that doesn’t mean they’re particularly useful or accessible. If the phrase “eyestrain from unsearchable, badly-scanned PDF datasheets” makes your lower eyelid twitch in sympathy, read on.

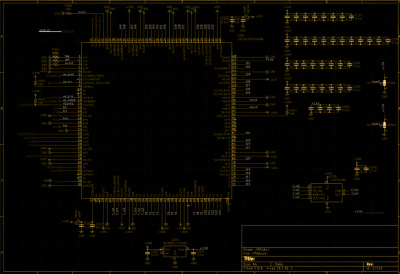
While [Bald Engineer] was researching how he might make a portable Apple II, he was delighted to find that the vintage components he needed to examine were documented. However, he became frustrated with the seemingly endless number of poor quality PDF scans and the inability to search effectively. He decided to re-create the entire Apple IIgs schematic in KiCad, and in the process the Bit Preserve project was born. The goal is to act as a safe haven for modern and editable versions of vintage electronic schematics. The GitHub repository can be found here.

[Bald Engineer] talks a bit about his Apple II project, as well as the ideas behind the Bit Preserve project in his KiCon 2019 talk “Preserving History with KiCad”. KiCon was wild, and we have loads of photos of the projects and details so be sure to check it out.

Laser Cutting Wooden Pogo Pin Test Jigs

Now as far as problems go, selling so many products on Tindie that you need to come up with a faster way to test them is a pretty good one to have. But it’s still a problem that needs solving. For [Eric Gunnerson] the solution involved finding a quick and easy way to produce wooden pogo test jigs on his laser cutter, and we have a feeling he’s not the only one who’ll benefit from it.

The first step was exporting the PCB design from KiCad into an SVG, which [Eric] then brought into Inkscape for editing. He deleted all of the traces that he wasn’t interested in, leaving behind just the ones he wanted to ultimately tap into with the pogo pins. He then used the Circle tool to put a 0.85 mm red dot in the center of each pad.

You’re probably wondering where those specific parameters came from. The color is easy enough to explain: his GlowForge laser cutter allows him to select by color, so [Eric] can easily tell the machine to cut out anything that’s red. As for the size, he did a test run on a scrap of wood and found that 0.85 mm was the perfect dimensions to hold onto a pogo pin with friction.

[Eric] ran off three identical pieces of birch plywood, plus one spacer. The pogo pins are inserted into the first piece, the wires get soldered around the back, and finally secured with the spacer. The whole thing is then capped off with the two remaining pieces, and wrapped up in tape to keep it together.

Whether you 3D print one of your own design or even modify a popular development board to do your bidding, the test jig is invaluable when you make the leap to small scale production.

KiCad Gets Banana For Scale

Over the years we’ve seen KiCad grow from a niche, somewhat incomplete, but Open Source PCB design suite to a full-featured extravaganza of schematics and board layouts. We’ve plumbed the depths of keys and kais and queues and quays, and KiCad just had its first conference last weekend. While we wait for the rest of the talks to be published, there’s a special treat for KiCad users everywhere. Here’s a banana for scale.

Have you ever worried your PCB was too big? Confused if you’re working in inches or millimeters? Do you just want to know the scale of your PCB? Just add this footprint to your KiCad project, and you’ll have a banana on your board view. This is immediate visual feedback, giving you all the information you need to continue on with your design. There’s a 2D view and a 3D view. It’s something no electrical engineer should be without. All of this can be yours for the low, low, cost of free because KiCad is Open Source.

If you’re wondering what official features are in the works for the EDA suite, the first two talks from the con delve into that. project leader Wayne Stambaugh’s talk covers features new to version 5.1 and plans for 6.0. There was also a developers panel that provides insight on what goes into a large project like this one.

KiCad Community Shines At First Ever KiCon

Last weekend was KiCon, a gathering of hardware developers from all over the world who use KiCad open source EDA software. This included many of the software engineers who drive development, people who use KiCad in their business, and those who simply love it for being a professional quality tool available for anyone to use.

From hardware show-and-tell, to the lineup of talks, and the social events each evening, there was so much packed into two (plus) days. Join me after the break for a whirlwind tour of the people and the hardware found at 2019 KiCon.

Continue reading “KiCad Community Shines At First Ever KiCon”

Mechanical Integration With KiCad

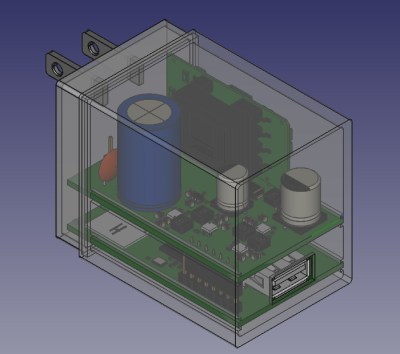
Eagle and Fusion are getting all the respect for integrating electronic and mechanical design, but what about KiCad? Are there any tools out there that allow you to easily build an enclosure for your next printed circuit board? [Maurice] has one solution, and it seamlessly synchronizes KiCad and FreeCAD. KiCad will give you the board, FreeCAD will give you the enclosure, and together you have full ECAD and MCAD synchronization.

This trick comes in the form of a FreeCAD macro (on the Github, with a bunch of documentation) that loads a KiCad board and components into FreeCAD and export them as a STEP file. You can align the KiCad board in FreeCAD, convert STEPs to VRMLs, check interference and collision, and create an enclosure around a KiCad board.

KiCad has gotten some really great visualization tools over the past few years, and we would be remiss if we didn’t mention it’s one of the best ways to visualize a completed circuit board before heading to production. Taking that leap from electronic CAD to mechanical CAD is still something that’s relatively rare in the KiCad ecosystem, and more tools to make this happen is always wanted.