We can gather that [Stefan] is a professional machinist by trade. Like all professionals who do the same thing for work and play, he was spoiled by the nicer tools at work. One tool in particular, a toolmaker’s magnet, always came in handy. These are strong magnets that have been ground flat, square, and parallel.
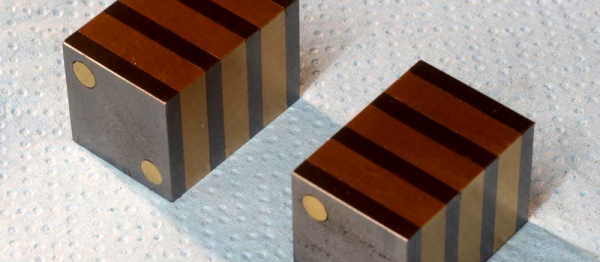
He really only needed one magnet, so he started to build a 20 x 20 x 100 mm one. It would be made out of alternating mild steel and brass plates. The steel plates would have a hole drilled through them and he’d place a correctly oriented magnet in the middle. It would all be clamped and glued together.
The build was going pretty well when he decided that he couldn’t really trust the glue alone. He had just begun grinding, but decided to switch to a quick drilling operation. Two brass rods through the whole assembly would be enough to hold it together. He started drilling, and then, suddenly, he had two magnets.
The assembly had broken in half. He decided that, all things considered, two 20 x 20 x 50 mm magnets were also handy. So he completed the drilling, and ground the new set of magnets to be a perfect match to each other. In the end he had a tool that looks just as expensive as the commercial option. There is also a video series on the magnets, part 1 and part 2, viewable after the break.
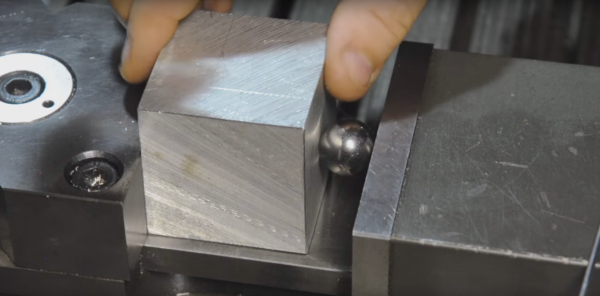
Is it possible to make an entertaining video about turning a cube of aluminum into a slightly cubier cube? As it turns out, yes it is, and you might even learn something along with the sight gags and inside jokes if you watch [This Old Tony] cover the basics of squaring up stock.
Whether you’re working in wood or metal, starting with faces that are flat, smooth and perpendicular is the key to quality results. [Tony] is primarily a machinist, so he works with a nice billet of aluminum and goes through some of the fundamental skills every metalworker needs to know. When you’re working down to the thousandths of an inch it’s easy to foul up, and tricks such as using a ball bearing between the vise jaws and the stock to prevent canting are critical skills. He covers tramming the mill, selecting which faces to cut and in which order, and ways to check your work on the surface plate and make any corrections if and when things go wrong. Look for cameos by fellow machinist [Abom79] and [Stefan Gotteswinter], including one with [Stefan] in a very compromising position. But a ball in a vise and no [AvE] reference? C’mon!
[Tony] makes a potentially tedious subject pretty entertaining by keeping things light, and we appreciate both the humor and attention to detail. He’s turned out some great videos that we’ve covered before, like making your own springs or a shop-built boring head, and his stuff is really worth checking out.
You don’t need any fancy tools. A CNC machine is nice. A 3D printer can help. Laser cutters are just great. However, when it comes to actually making something, none of this is exactly necessary. With a basic set of hand tools and a few simple power tools, most of which can be picked up for a pittance, many things of surprising complexity, precision, and quality can be made.
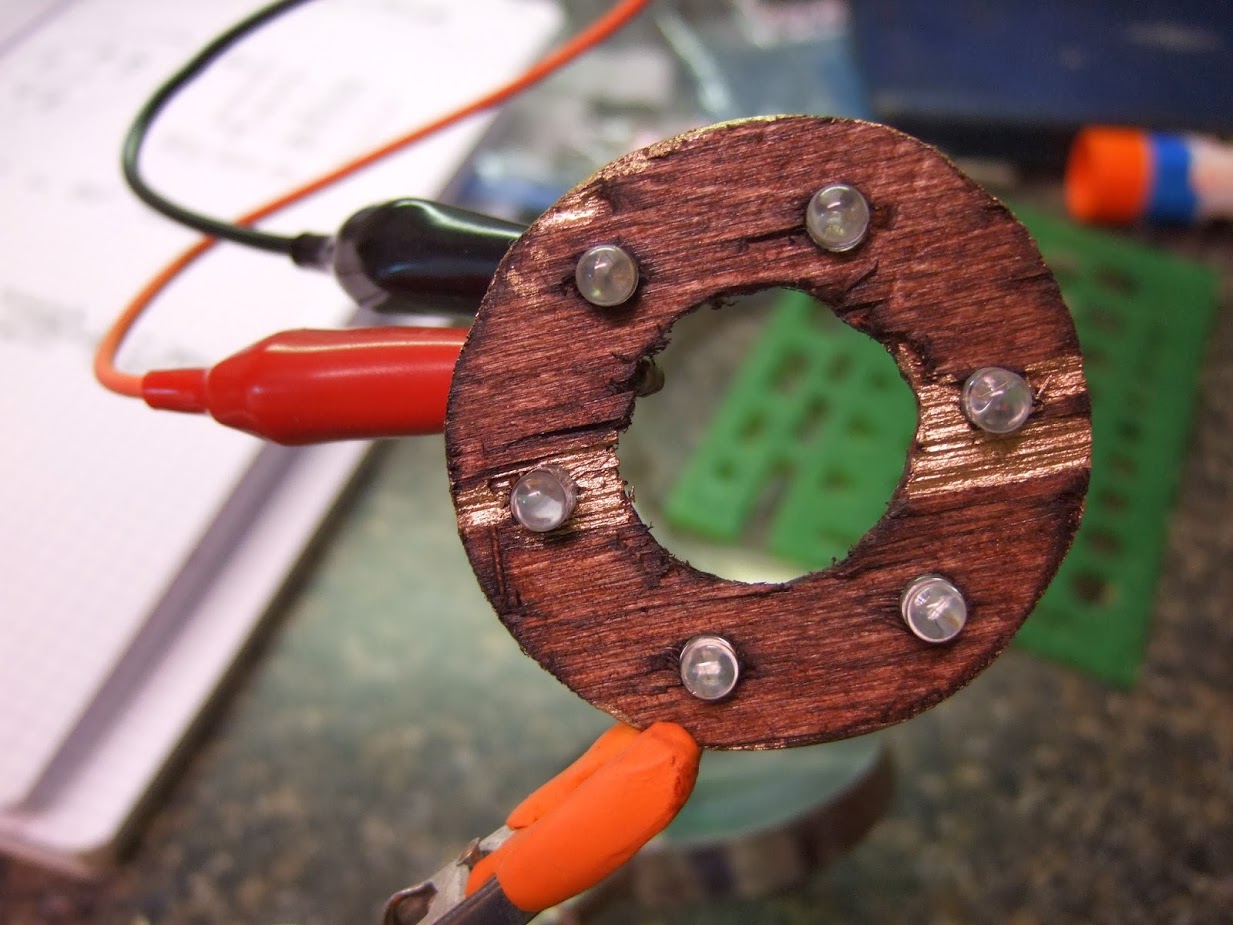
Not as pretty, but worked just the same.
A while back I was working on a ring light for my 3D printer. I already had a collection of LEDs, as all hackers are weak for a five-dollar assortment box. So I got on my CAD software of choice and modeled out a ring that I was going to laser cut out of plywood. It would have holes for each of the LEDs. To get a file ready for laser cutting ook around ten minutes. I started to get ready to leave the house and do the ten minute drive to the hackerspace, the ten minutes firing up and using the laser cutter (assuming it wasn’t occupied) and the drive back. It suddenly occurred to me that I was being very silly. I pulled out a sheet of plywood. Drew three circles on it with a compass and subdivided the circle. Under ten minutes of work with basic layout tools, a power drill, and a coping saw and I had the part. This was versus the 40 minutes it would have taken me to fire up the laser cutter.
[This Old Tony] was cleaning up his metal shop after his yearly flirtation with woodworking when he found himself hankering for a nice coffee. He was, however, completely without a coffee making apparatus. We imagine there was a hasty round of consulting with his inanimate friends [Optimus Prime] and [Stefan Gotteswinter Brush] before he decided the only logical option was to make his own.
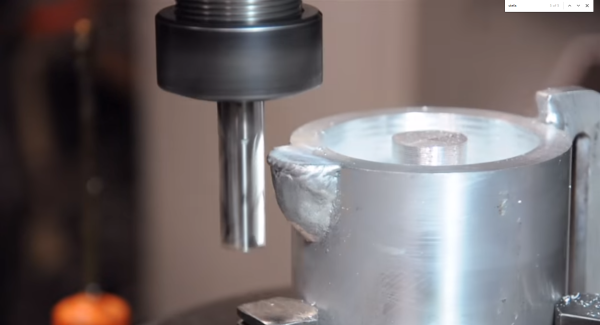
So, he brought out two chunks of aluminum from somewhere in his shop, modeled up his plan in SolidWorks, and got to work. It was designed to be a moka style espresso pot sized around both the size of stock he had, and three purchased parts: the gasket, funnel, and filter. The base and top were cut on a combination of lathe and mill. He had some good tips on working with deep thin walled parts. He also used his CNC to cut out some parts, like the lid and handle. The spout was interesting, as it was made by building up a glob of metal using a welder and then shaped afterward.
As usual the video is of [This Old Tony]’s exceptional quality. After quite a lot of work he rinsed out most of the metal chips and WD40, packed it with coffee, and put it on the stove. Success! It wasn’t long before the black stuff was bubbling into the top chamber ready for consumption.
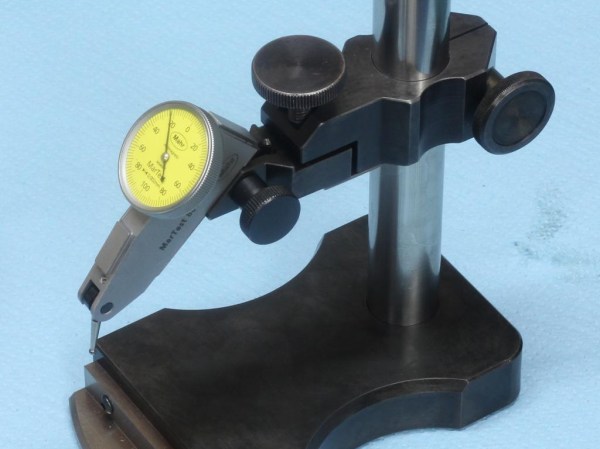
He was looking enviously at the squareness comparator that [Tom Lipton] had made when somone on Instagram posted a photo of the comparator they use every day. [Stefan] loved the design and set out to build one of his own. He copied it shamelessly, made a set of drawings, and got to work.
[Stefan]’s videos are always a trove of good machine shop habits and skills. He always shows how being careful, patient, and doing things the right way can result in really astoundingly precise work out of a home machine shop. The workmanship is beautiful and his knack for machining is apparent throughout. We chuckled at one section where he informed the viewer that you could break a tap on the mill when tapping under power if you bottom out. To avoid this he stopped at a distance he felt was safe: 0.5 mm away.
The construction and finishing complete, [Stefan] shows how to use the comparator at the end of the video, viewable after the break.
Newton’s Cradle is thought of as the most elegant of executive desk toys. But that 20th-century dinosaur just got run off the road as [Ben Katz]’s Furuta pendulum streaks past in the fast lane, flipping the bird and heralding a new king of desk adornments.
This Furata pendulum has wonderfully smooth movement. You can watch it go through its dance in the video after the break. Obviously you agree that this is the desk objet d’art for the modern titan of industry (geek). Just don’t stop at watching it in action. The best part is the build log that [Ben] put together — this project has a little bit of everything!
“I wasted a weekend learning why elemental bismuth is not commonly used for metal parts.“
It’s a fair assessment of his time spent growing unspectacular bismuth crystals, casting a bismuth cylinder that cracked, and machining bismuth only to be left with a very rough finish. But even though he admits the exercise was unsuccessful, he does provide us with a fascinating look at the physical properties of the element.
This is what [David] wanted to make. Alchemist-hp + Richard Bartz with focus stack. (Own work) [CC BY-SA 3.0], via Wikimedia Commons
Bismuth is one of those elements you pass by in your school chemistry lessons, it has applications in machining alloys and as a lead replacement but most of us have never knowingly encountered it in the real world. It’s one of the heavy metals, below antimony and to the right of lead on the Periodic Table. Curious schoolchildren may have heard that like water it expands on solidifying or that it is diamagnetic, and most of us have probably seen spectacular pictures of its crystals coated in colourful iridescent oxides.
It was a Hackaday story about these crystals that attracted [David] to the metal. It has a low enough melting point – 271.5 °C – that it can be liquified on a domestic stove, so mindful of his marital harmony should he destroy any kitchen appliances he bought a cheap electric ring from Amazon to go with his bismuth ingot. and set to work.
His first discovery was that cheap electric rings outdoors aren’t very effective metallurgy furnaces. Relocating to the kitchen and risking spousal wrath, he did eventually melt his bismuth and pick off the top layer once it had resolidified, to reveal some crystals.
These are the bismuth crystals he made.
Unfortunately for him, instead of spectacular colors and huge crystals, the sight that greeted him was one of little brilliance. Small grey crystals with no iridescence. It seems the beautiful samples are made by a very slow cooling of the liquid bismuth, followed by a quick pouring off of the remaining molten metal. Future efforts, he assures us, will involve sand-insulated molds and careful temperature monitoring.
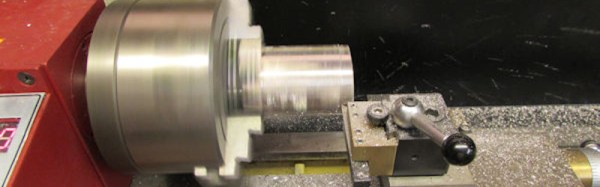
Undeterred, he continued with his stock of bismuth and embarked on the creation of a cylinder. Early efforts with a clay mold resulted in cracked cylinders, so in desperation he cast the entirety of the metal in an aluminium baking tray and cut the resulting ingot to a rough piece of stock for turning.
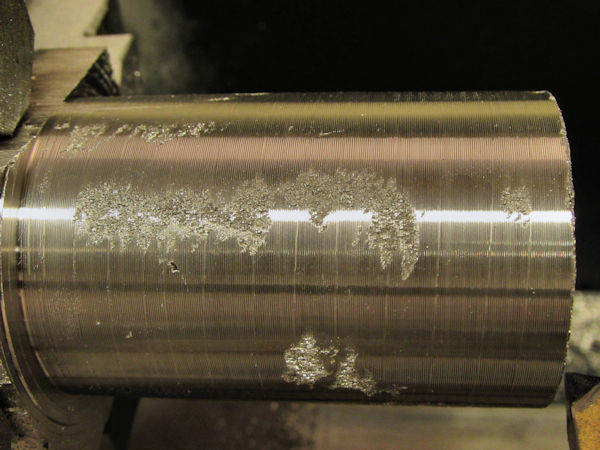
Poor finish on machined bismuth.
With the bismuth in the lathe, he then came face to face with what he alluded to in his conclusion above, why machined bismuth parts aren’t something you’ll encounter. His cylinder came out with significantly rough patches on the surface, because bismuth is both crystalline and brittle. He suggests improvements could be made if the metal could be solidified with fewer crystals, but it’s obvious that elemental bismuth on its own is not a winner in the turning stakes.
We suggest you take a look at [David]’s write-up. It may be presented as a Fail of The Week here, but in fact it’s more of a succession of experiments that didn’t work than an unmitigated disaster. The result is an interesting and well-documented read that we’re sure most Hackaday readers will gain something from.
Fail of the Week is a Hackaday column which celebrates failure as a learning tool. Help keep the fun rolling by writing about your own failures and sending us a link to the story -- or sending in links to fail write ups you find in your Internet travels.


![This is what [David] wanted to make. Alchemist-hp + Richard Bartz with focus stack. (Own work) [CC BY-SA 3.0], via Wikimedia Commons](https://hackaday.com/wp-content/uploads/2016/08/bi-crystal.jpg)

 Fail of the Week is a Hackaday column which celebrates failure as a learning tool. Help keep the fun rolling by writing about your own failures and


