Stunning 4-Cylinder Solenoid Motor Should Be A Hit With Subaru Fans

As far as electric propulsion is concerned, the vast majority of applications make use of some kind of rotational motor. Be it induction, universal, brushed or brushless, these are the most efficient ways we have to do mechanical work with electricity. There are other, arcane methods, though – ones which [Maker B] explores with this 4-cylinder solenoid engine.

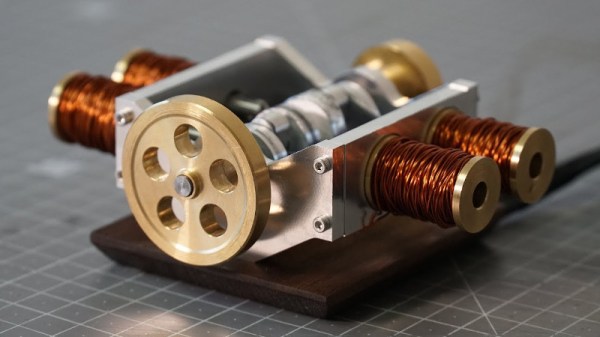
The principle of the solenoid engine is simple. Cylinders are wound with coils to act as solenoids, with the piston acting as the armature. When the solenoid is energised, it pulls the piston into the cylinder. The solenoid is then de-energised, and the piston can return to its initial position. The piston is coupled to a crankshaft via a connecting rod, and a flywheel is used to help the motor run continually. These are also known as reciprocating electric motors.

[Maker B]’s build is a 4-cylinder design in a boxer configuration. Produced with basic hand-operated machine tools, the build process is one to watch. Aluminium and brass are carefully crafted into the various components of the motor, and parts are delicately assembled with small fasteners and plenty of retaining compound. Solenoid timing is via a series of microswitches, installed neatly in the base of the motor and actuated by the crankshaft.

While solenoid motors are inefficient, they’re quite something to watch in action. This one is no exception, with the motor spinning up to 1100 rpm when running at 7.2 volts. We’d love to see some data on the power output and efficiency too. It’s possible to build solenoid motors in different configurations, too – this radial build is particularly fun. Video after the break.

Continue reading “Stunning 4-Cylinder Solenoid Motor Should Be A Hit With Subaru Fans”

(Mis)use This Part To Attach 3D Printed Stuff To A Shaft

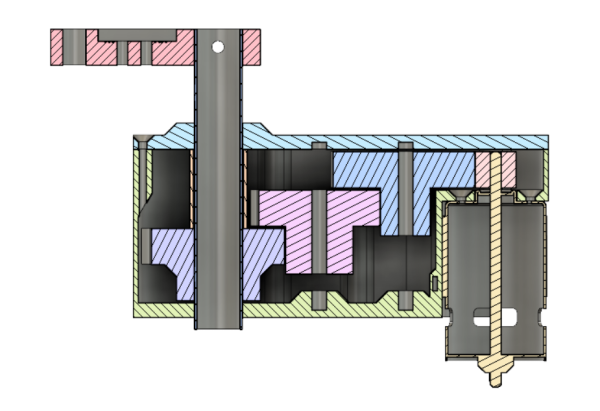
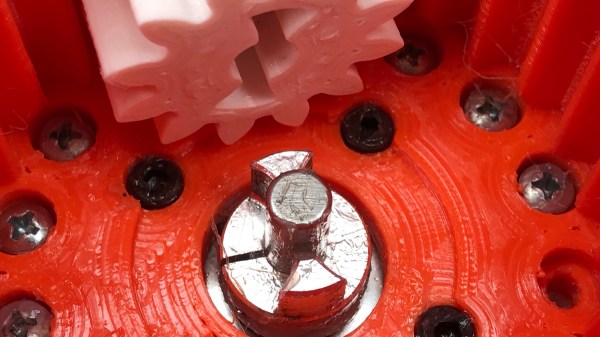
Interfacing a shaft to a 3D printed gear doesn’t have to be tricky. [Tlalexander] demonstrated a solution that uses one half of a spider coupling (or jaw coupling) to create an effective modular attachment. The picture above (and this older link) shows everything you need to know: the bottom of the coupling is mounted to the shaft, and a corresponding opening is modeled into the the 3D printed part. Slide the two together, and the result is a far sturdier solution than trying to mate a 3D printed gear directly to a motor shaft with a friction fit or a screw. This solution isn’t necessarily limited to attaching gears either, any suitable 3D printed part could be interfaced to a shaft in this way.

These couplings are readily available, and fortunately for hobbyists, come in sizes specifically designed for common stepper motors like NEMA 17 and NEMA 23. Ironically, these couplings are often used when building custom 3D printers for those same reasons. With this method interfacing anything at all to a motor shaft becomes mostly a matter of modeling a matching hole out of the part to be 3D printed. One coupling even provides two such attachments, since only one of the two sides is used.

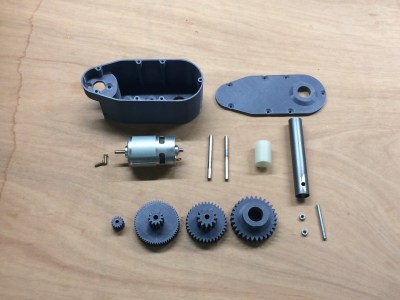
The image up top is from [Tlalexander]’s Rover image gallery, which contains a ton of fantastic pictures of the work that went into the gearboxes, a major part of the Rover’s design that we’ve seen in the past.

Spin Me Right Round, Baby: Generator Building Experiments For Mere Mortals

How many of you plan to build a wind-powered generator in the next year? Okay, both of you can put your hands down. Even if you don’t want to wind your coils manually, learning about the principles in an electric generator might spark your interest. There is a lot of math to engineering a commercial model, but if we approach a simple version by looking at the components one at a time, it’s much easier to understand.

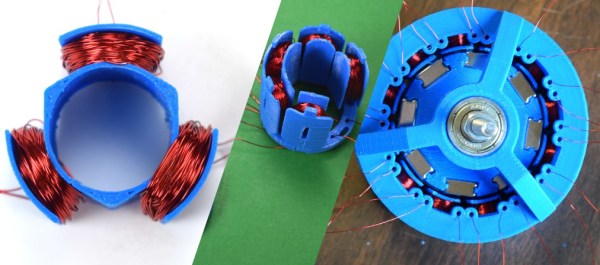
For this adventure, [K&J Magnetics] start by dissect a commercial generator. They picked a simple version that might serve a campsite well, so there is no transmission or blade angle apparatus to complicate things. It’s the parts you’d expect, a rotor and a stator, one with permanent magnets and the other with coils of wire.

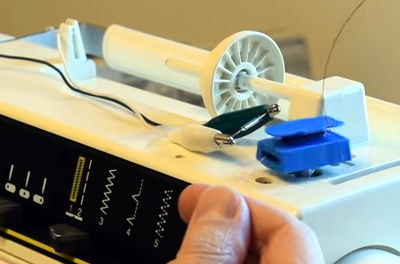
The fun of this project is copying the components found in the commercial hardware and varying the windings and coil count to see how it affects performance. If you have ever wound magnet wire around a nail to make an electromagnet, you know it is tedious work so check out their 3D printed coil holder with an embedded magnet to trigger a winding count and a socket to fit on a sewing machine bobbin winder. If you are going to make a bunch of coils, this is going to save headaches and wrist tendons.
They use an iterative process to demonstrate the effect of multiple coils on a generator. The first test run uses just three coils but doesn’t generate much power at all, even when spun by an electric drill. Six windings do better, but a dozen finally does the trick, even when turning the generator by hand. We don’t know about their use of cheap silicone diodes though, that seems like unintentional hobbling, but we digress.

Making turbine blades doesn’t have to be a sore chore either, and PVC may be the ticket there, you may also consider the vertical axis wind turbine which is safer at patio level. Now, you folks building generators, remember to tip us off!

Continue reading “Spin Me Right Round, Baby: Generator Building Experiments For Mere Mortals”

Deducing Stepper Motor Wiring

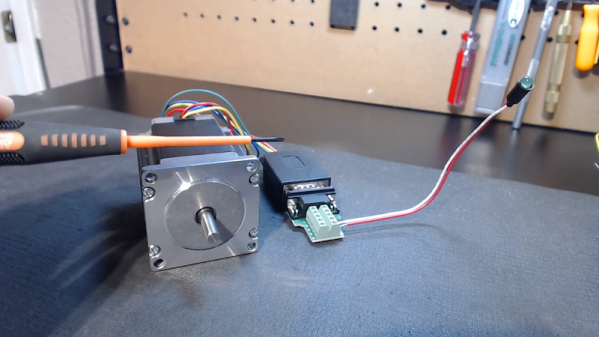
There are a lot of fun projects you can do with stepper motors salvaged from old printers or disk drives. However, it isn’t always clear how to connect to some strange motor with no markings or schematics. [Corvetteguy50] has a video showing his trick for working out the connections easily, and you can see it below.

The basic idea is simple. Using a special jig, he connects an LED across two random pins and spins the motor. If the LED lights, you’ve found a coil. You just don’t know which coil, yet. You can also short two wires and note when you feel resistance when you spin the shaft.

Continue reading “Deducing Stepper Motor Wiring”

Minivac 601 Replica Gets A Custom Motorized Rotary Switch

One of the joys of electronics as a hobby is how easy it is to get parts. Literally millions of parts are available from thousands of suppliers and hundreds of distributors, and everyone competes with each other to make it as easy as possible to put together an order from a BoM. If you need it, somebody probably has it.

But what do you do when you need a part that doesn’t exist anymore, and even when it did was only produced in small numbers? Easy – you create it yourself. That’s just what [Mike Gardi] did with this unique motorized rotary switch he needed to complete his replica of a 1960s computer trainer. We covered his build of the Minivac 601, a trainer from the early computer age that let experimenters learn the ropes of basic digital logic. It used mostly relays, lamps, and switches connected by jumpers, but it had one critical component – a rotary control that was used for input and, with the help of a motor, as an output indicator.

[Mike]’s version of the switch is as faithful to the original as possible, at least in terms of looks. The parts are mostly 3D-printed, with 16 reed switches embedded in the walls and magnets placed in the rotor. The motor to operate the rotor is a simple gear motor mounted to a hinged bracket; when the rotor needs to move, a solenoid pulls the motor’s friction drive wheel up against the rotor.

The unique control slots right into the Minivac replica and really completes the look and feel. Hats off to [Mike] for a delightful replica of a lost bit of computer history and the dedication to see it through to completion.

Continue reading “Minivac 601 Replica Gets A Custom Motorized Rotary Switch”

Turn A Ceiling Fan Into A Wind Turbine… Almost

It’s not uncommon to drive around the neighborhood on trash day and see one or two ceiling fans haphazardly strewn onto a pile of garbage bags, ready to be carted off to the town dump. It’s a shame to see something like this go to waste, and [Giesbert Nijhuis] decided he would see what he could do with one. After some painstaking work, he was able to turn a ceiling fan into a wind turbine (of sorts).

While it’s true that some generators and motors can be used interchangeably by reversing the flow of electricity (motors can be used as generators and vice-versa) this isn’t true of ceiling fans. These motors are a type called induction motors which, as a cost saving measure, have no permanent magnets and therefore can’t simply be used as a generator. If you make some modifications to them, though, like rewiring some of the windings and adding permanent magnets around them, you can get around this downside of induction motors.

[Giesbert] does note that this project isn’t a great way to build a generator. Even after making all of the changes needed to get it working, the motor just isn’t as efficient as one that was built with its own set of magnets. For all the work that went into it, it’s not that great of a time investment for a low-quality generator. However, it’s interesting to see the theory behind something like this work at all, even if the end result wasn’t a complete wind turbine. Perhaps if you have an old ceiling fan lying around, you can put it to better use.

Continue reading “Turn A Ceiling Fan Into A Wind Turbine… Almost”

Trick Shot Bot Flings Balls Into Wine Glass Every Time

We’ve heard of beer pong, but we’re not sure we’ve heard of wine pong. And certainly never wine pong automated with a ping pong ball throwing robot like this one.

There’s not a huge amount of detail available in the video below, and no build log per se. But [Electron Dust] has a few shots in the video that explain what’s going on, as well as a brief description in a reddit thread about the device. The idea is to spin a ball up to a steady speed and release it the same way every time. The rig itself is made of wood and spun by plain brushed DC motors – [Electron Dust] explains that he chose them over PWM servos to simplify things and eliminate uncertainty in the release point. The ball is retained by a pair of arms, each controlled by a pair of hobby servos. An Arduino spins along with everything else and counts 50 revolutions before triggering the servos to retract and release the ball. A glass positioned at the landing spot captures the ball perfectly once everything is dialed in.

Here’s hoping that build details end up on his blog soon, as they did for this audio-feedback juggling machine. And while we certainly like this project, it might be cool if it could aim the ball into the glass. Or it could always reposition the target on the fly.

Continue reading “Trick Shot Bot Flings Balls Into Wine Glass Every Time”