Weaving With Light: An OLED Fibre Fabric Display

If you think of wearable electronic projects, in many cases what may come to mind are the use of addressable LEDs, perhaps on strips or on sewable PCBs like the Neopixel and similar products. They make an attractive twinkling fashion show, but there remains a feeling that in many cases once you have seen one project, you have seen them all.

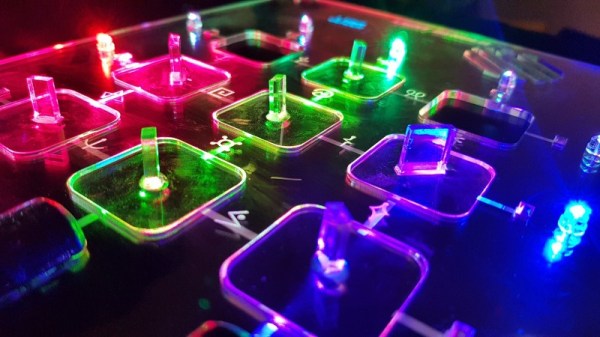
So if you are tiring of static sewable LED projects and would like to look forward to something altogether more exciting, take a look at some bleeding-edge research from a team at KAIST, the Korean Advanced Institute of Science & Technology. They have created OLED fibres and woven them into fabric in a way that appears such that they can be lit at individual points to create addressable pixels. In this way there is potential for fabrics that incorporate entire LED displays within their construction rather than in which they serve as a substrate.

The especially interesting feature of the OLED fibres from the KAIST team is that their process does not require any high temperatures, meaning that a whole range of everyday textile fibres can be used as substrates for OLEDs. The results are durable and do not lose OLED performance under tension, meaning that there is the possibility of their becoming practical fabrics for use in garments.

While this technology is a little way away from a piece of clothing you might buy from a store, the fact that it does not rely on special processes during weaving means that when the fibres become commercially available we are likely to see their speedy adoption. Meanwhile you can buy conductive fabric, but you might have to take a multimeter to the store to find it.

Via EENewsLED, and thank you [Carl] for the tip.

Tricked-out Barbecue Will Make You Do A Spit Take

[Strn] and his friends love to barbecue no matter what it’s like outside. But something always seems to interrupt the fun: either it’s time to get up and turn the meat, or the music stops because somebody’s phone ran out of juice, or darkness falls and there aren’t enough flashlights or charged-up phones. He had the idea to build the Swiss Army knife of barbecues, a portable powerhouse that solves all of these problems and more (translated).

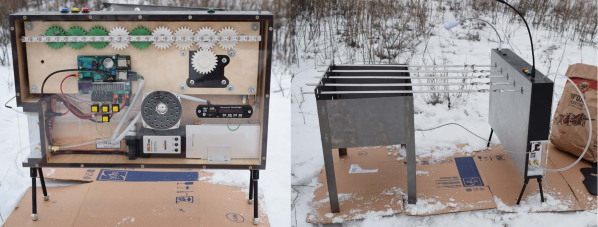
Most importantly, the E-Mangal rotates the skewers for even cooking. It does this with a 3D-printed worm gear system driven by the heater flap actuator from a car. After 25 minutes of slow rotation, a voice announces that it’s time to eat. [Strn] and friends will never hurt for music options between the pre-loaded tracks, Bluetooth audio, FM antenna, USB, and SD options running through a 3W amp. Two USB lights illuminate nighttime barbecuing, and the 10 Ah battery can do it all and keep everyone’s phone charged. For safety’s sake, [Strn] included a half-liter water tank to extinguish the coals via jet stream. Everything is run by a PIC18F, and it can be controlled at the box or through a simple web interface.

We love the look of this barbecue controller almost as much as the functionality. The sturdy stance of those short, angled legs give it a mid-century appliance feel, and seeing all the guts on display is always a plus. Grab a turkey leg and take the tour after the break.

The E-Mangal has a thermocouple in the coal box to measure the temperature, but there’s no direct control. If you’re more interested in temperature options than entertainment, here’s a project that micromanages everything on the grill.

Continue reading “Tricked-out Barbecue Will Make You Do A Spit Take”

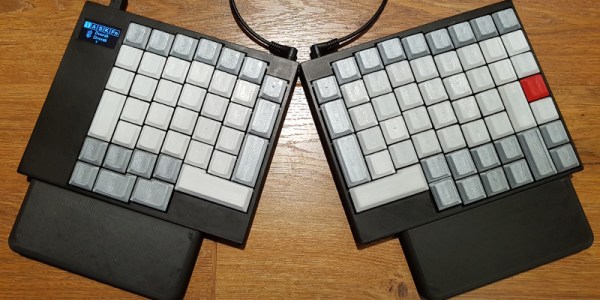
Ergonomic Keyboard Designed From The Ground Up

In 2011, [Fabio] had been working behind a keyboard for about a decade when he started noticing wrist pain. This is a common long-term injury for people at desk jobs, but rather than buy an ergonomic keyboard he decided that none of the commercial offerings had all of the features he needed. Instead, he set out on a five-year journey to build the perfect ergonomic keyboard.

Part of the problem with other solutions was that no keyboards could be left in Dvorak (a keyboard layout [Fabio] finds improves his typing speed) after rebooting the computer, and Arduino-based solutions would not make themselves available to the computer’s BIOS. Luckily he found the LUFA keyboard library, and then was able to salvage a PCB from another keyboard. From there, he programmed everything on a Teensy microcontroller, added an OLED screen, and soldered it all together (including a set of Cherry MX switches).

Of course, the build wasn’t truly complete until recently, when a custom two-part case was 3D printed. The build quality and attention to detail in this project is impressive, and if you want to roll out your own [Fabio] has made all of the CAD files and software available. Should you wish to incorporate some of his designs into other types of specialized keyboards, there are some ideas floating around that will surely improve your typing or workflow.

Dumb Coffee Grinder Gets Smarter With Time

[Forklift] has a Rancilio Rocky, a prosumer-level coffee grinder that’s been a popular mainstay for the last few decades. It’s a simple machine with a direct-drive motor. Rocky has one job, and it will do that job in one of 55 slightly different ways as long as someone is pushing the grind button. What Rocky doesn’t have is any kind of metering technology. There’s no way to govern the grind length, so repeatable results rely on visual estimates and/or an external clock. Well, there wasn’t until [Forklift] designed a programmable timer from the ground up.

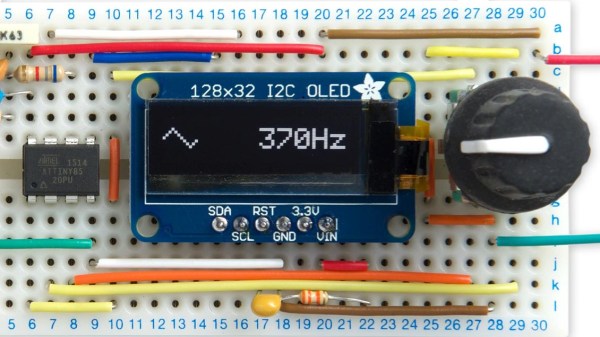
The timer interface is simple—there’s a D-pad of buttons for navigation through the OLED screen, and one button to start the grind. The left and right buttons move through four programmable presets that get stored in the EEPROM of the timer’s bare ATMega328P brain. Grind duration can be adjusted with the up/down buttons.

We like that [Forklift] chose to power it by piggybacking on the 240VAC going to the grinder. The cord through the existing grommet and connects with spade terminals, so there are no permanent modifications to the grinder. Everything about this project is open source, including the files for the 7-segment font [Forklift] designed.

Tea aficionados may argue that creating their potion is the more time sensitive endeavor. We’ve got you covered there. Only question is, one button or two?

Snail Is Actually Cleverly Strange Geocaching Waypoint

Basic geocaching consists of following GPS coordinates to a location, then finding a container which is concealed somewhere nearby. Like any activity, people tend to add their own twists to keep things interesting. [Jangeox] recently posted a video of the OLED Snail 2.0 to show off his most recent work. (This is a refinement of an earlier version, which he describes in a blog post.)

Another of [Jangeox]’s Electronic Waypoints
[Jangeox] spices up geocaching by creating electronic waypoints, and the OLED Snail is one of these. Instead of GPS coordinates sending someone directly to a goal, a person instead finds a waypoint that reveals another set of coordinates and these waypoints are followed like a trail of breadcrumbs.

A typical waypoint is an ATTINY85 microcontroller programmed to display an animated message on the OLED, and the message reveals the coordinates to the next waypoint. The waypoint is always cleverly hidden, and in the case of the OLED Snail 2.0 the enclosure is the shell of a large snail containing the electronics encased in resin. This means that the devices have a finite lifespan — the battery sealed inside is all the power the device gets. Fortunately, with the help of a tilt switch the electronics can remain dormant until someone picks it up to start the show. Other waypoints have included a fake plant, and the fake bolt shown here. Video of the OLED Snail 2.0 is embedded below.

Continue reading “Snail Is Actually Cleverly Strange Geocaching Waypoint”

An Awesome Open Mechanical Keyboard

Who doesn’t want a little added functionality to their  lives? Feeling a few shortcut keys would make working in Eagle a bit smoother, [dekuNukem] built his own programmable mechanical keypad: kbord.

It sports vibrant RGB LED backlight effects with different animations, 15 keys that execute scripts — anything from ctrl+c to backdoors — or simple keystrokes, up to 32 profiles, and a small OLED screen to keep track of which key does what!

kbord is using a STM32F072C8T6 microcontroller for its cost, speed, pins, and peripherals, Gateron RGB mechanical keys — but any clear key and keycaps with an opening for the kbord’s LEDs will do — on a light-diffusing switch plate, and SK6812 LEDs for a slick aesthetic.

Check out the timelapse video tour of his build process after the break! (Slightly NSFW, adolescent humor for a few seconds of the otherwise very cool video. Such is life.)

Continue reading “An Awesome Open Mechanical Keyboard”

Quick And Easy NTP Clock

[Danman] got an ESP32 with built-in OLED display, and in the process of getting a clock up and running and trying to get a couple of NodeMCU binaries installed on it, thought he’d try rolling his own.

[Danman] used PlatformIO to write the code to his ESP. PlatformIO allowed [Danman] to browse for a NTP library and load it into his project. After finding the NTP library, [Danman] wrote a bit of code and was able to upload it to the ESP. When that was uploaded [Danman] noticed that nothing was being displayed on the OLED, but that was just a simple matter of tracking down the right address to use when setting up the library for his OLED. Lastly, [Danman] created a large font to display the time with and his mini-clock was done!

It’s always nice to see someone be able to go from buying a board to having a demo put together, and it’s getting easier and easier. Check out this OLED watch, and this pocket watch doesn’t use OLEDs, but it still looks pretty cool.