Radiation Detector Eschews Tubes, Uses Photodiode

When the topic is radiation detection, thoughts turn naturally to the venerable Geiger-Müller tube. It’s been around for ages, Russian surplus tubes are available for next to nothing, and it’s easy to use. But as a vacuum tube it can be somewhat delicate, and the high voltages needed to run it can be a little on the risky side.

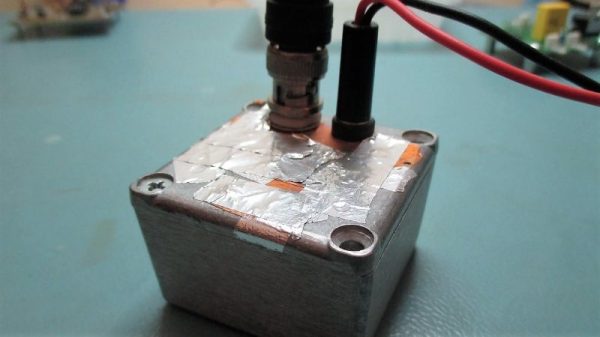
Luckily, there are other ways to see what’s going on in the radioactive world, like this semiconductor radiation detector. [Robert Gawron] built it as a proof-of-concept after having built a few G-M tube detectors before. His solid-state design relies on a reverse-biased photodiode conducting when ionizing radiation hits the P-N junction. The tiny signal is amplified by a pair of low-noise op-amps and output to a BNC connector. The sensor’s analog output is sent to an oscilloscope whose trigger out is connected to a Nucleo board for data acquisition. The Nucleo is in turn connected to a Raspberry Pi for totalizing and logging. It’s a complicated chain, but the sensor appears to work, even detecting alpha emissions from thoriated TIG electrodes, a feat we haven’t been able to replicate with our G-M tube counter.

[Robert]’s solid-state detector might not be optimal, but it has promise. And we have seen PIN diodes used as radiation detectors before, too.

[via Dangerous Prototypes]

Color Sensor Demystified

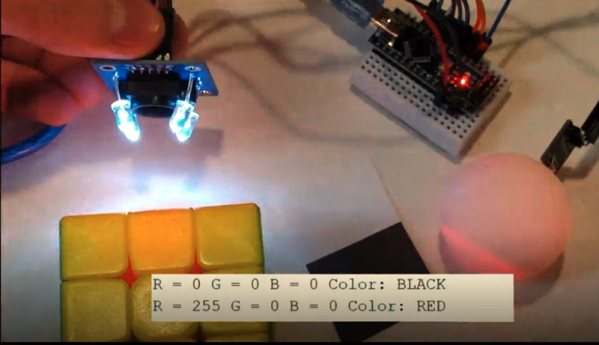
When [millerman4487] bought a TCS230-based color sensor, he was expecting a bit more documentation. Since he didn’t get it, he did a little research and some experimentation and wrote it up to help the rest of us.

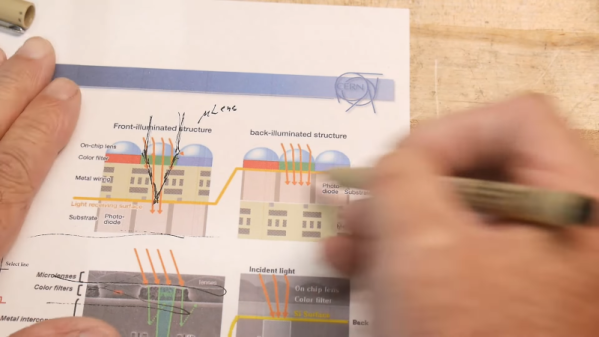
The TCS3200 uses an 8×8 array of photodiodes. The 64 diodes come in four groups of 16. One group has a blue filter, one has green and the other has a red filter. The final set of diodes has no filter at all. You can select which group of diodes is active at any given time.

Continue reading “Color Sensor Demystified”

[Ben Krasnow] Builds A One-Component Interferometer

When we think of physics experiments, we tend to envision cavernous rooms filled with things like optical benches, huge coils in vacuum chambers, and rack after rack of amplifiers and data acquisition hardware. But it doesn’t have to be that way – you can actually perform laser interferometry with a single component and measure sub-micron displacements and more.

The astute viewer of [Ben Krasnow]’s video below will note that in order to use the one component, a laser diode, as an interferometer, he needed a whole bunch of support gear, like power supplies, a signal generator, and a really, really nice mixed-signal oscilloscope. But the principle of the experiment is the important bit, which uses a laser diode with a built-in monitoring photodiode. Brought out to a third lead, older laser diodes often used these photodiodes to control the light emitted by the laser junction. But they also respond to light reflected back into the laser diode, and thanks to constructive and destructive interference, can actually generate a signal that corresponds to very slight displacements of a reflector. [Ben] used it to measure the vibrations of a small speaker, the rotation of a motor shaft, and with a slight change in setup, to measure the range to a fixed target with sub-micron precision. It’s fascinating stuff, and the fact you can extract so much information from a single component is pretty cool.

We really like [Ben]’s style of presentation, and the interesting little nooks and crannies of physics that he finds a way to explore. He recently looked at how helium can kill a MEMS sensor, an equally fascinating topic.

Continue reading “[Ben Krasnow] Builds A One-Component Interferometer”

Energy Harvesting Design Doesn’t Need Sleep

Every scrap of power is precious when it comes to power harvesting, and working with such designs usually means getting cozy with a microcontroller’s low-power tricks and sleep modes. But in the case of the Ultra Low Power Energy Harvester design by [bobricius], the attached microcontroller doesn’t need to worry about managing power at all — as long as it can finish its job fast enough.

The idea is to use solar energy to fill a capacitor, then turn on the microcontroller and let it run normally until the power runs out. As a result, a microcontroller may only have a runtime in the range of dozens of microseconds, but that’s just fine if it’s enough time to, for example, read a sensor and transmit a packet. In early tests, [bobricius] was able to reliably transmit a 16-bit value wirelessly every 30 minutes using a small array of photodiodes as the power supply. That’s the other interesting thing; [bobricius] uses an array of BPW34 photodiodes to gather solar power. The datasheet describes them as silicon photodiodes, but they can be effectively used as tiny plastic-enclosed solar cells. They are readily available and can be arranged in a variety of configurations, while also being fairly durable.

Charging a capacitor then running a load for a short amount of time is one of the simplest ways to manage solar energy, and it requires no unusual components or fancy charge controllers. As long as the load doesn’t mind a short runtime, it can be an effective way to turn even indoor light into a figuratively free power source.

Is It On Yet? Sensing The World Around Us, Starting With Light

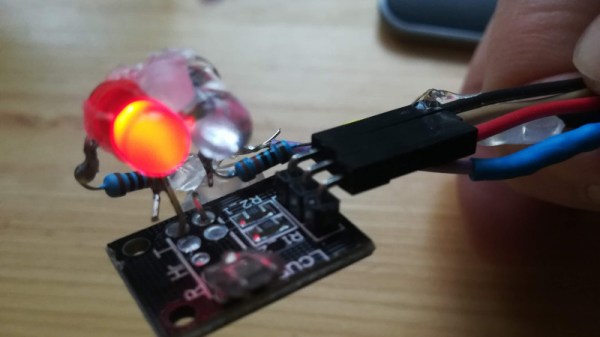
Arduino 101 is getting an LED to flash. From there you have a world of options for control, from MOSFETs to relays, solenoids and motors, all kinds of outputs. Here, we’re going to take a quick look at some inputs. While working on a recent project, I realized the variety of options in sensing something as simple as whether a light is on or off. This is a fundamental task for any system that reacts to the world; maybe a sensor that detects when the washer has finished and sends a text message, or an automated chicken coop that opens and closes with the sun, or a beam break that notifies when a sister has entered your sacred space. These are some of the tools you might use to sense light around you.

Continue reading “Is It On Yet? Sensing The World Around Us, Starting With Light”

Optical Tach Addresses The Need For Spindle Speed Control

With CNC machines, getting the best results depends on knowing how fast your tool is moving relative to the workpiece. But entry-level CNC routers don’t often include a spindle tachometer, forcing the operator to basically guess at the speed. This DIY optical spindle tach aims to fix that, and has a few nice construction tips to boot.

The CNC router in question is the popular Sienci, and the 3D-printed brackets for the photodiode and LED are somewhat specific for that machine. But [tmbarbour] has included STL files in his exhaustively detailed write-up, so modifying them to fit another machine should be easy. The sensor hangs down just far enough to watch a reflector on one of the flats of the collet nut; we’d worry about the reflector surviving tool changes, but it’s just a piece of shiny tape that’s easily replaced.  The sensor feeds into a DIO pin on a Nano, and a small OLED display shows a digital readout along with an analog gauge. The display update speed is decent — not too laggy. Impressive build overall, and we like the idea of using a piece of PLA filament as a rivet to hold the diodes into the sensor arm.

Want to measure machine speed but don’t have a 3D printer? No worries — a 2D-printed color-shifting tach can work too.

Continue reading “Optical Tach Addresses The Need For Spindle Speed Control”

Photodiode Amplifier Circuit Spies On Your Phone

In order to help his friend prepare for a talk at DEFCON this weekend, [Craig] built an IR photodiode amplifier circuit. The circuit extended the detection range of the hack from a few inches to a few feet. We’re suckers for some well-designed analog circuitry, and if you are too, be sure to check out the video embedded below.

Continue reading “Photodiode Amplifier Circuit Spies On Your Phone”