Image Sensor From Discrete Parts Delivers Glorious 1-Kilopixel Images

Chances are pretty good that you have at least one digital image sensor somewhere close to you at this moment, likely within arm’s reach. The ubiquity of digital cameras is due to how cheap these sensors have become, and how easy they are to integrate into all sorts of devices. So why in the world would someone want to build an image sensor from discrete parts that’s 12,000 times worse than the average smartphone camera? Because, why not?

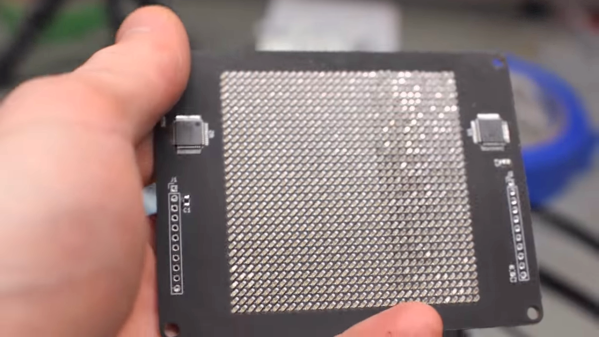
[Sean Hodgins] originally started this project as a digital pinhole camera, which is why it was called “digiObscura.” The idea was to build a 32×32 array of photosensors and focus light on it using only a pinhole, but that proved optically difficult as the small aperture greatly reduced the amount of light striking the array. The sensor, though, is where the interesting stuff is. [Sean] soldered 1,024 ALS-PT19 surface-mount phototransistors to the custom PCB along with two 32-bit analog multiplexers. The multiplexers are driven by a microcontroller to select each pixel in turn, one row and one column at a time. It takes a full five seconds to scan the array, so taking a picture hearkens back to the long exposures common in the early days of photography. And sure, it’s only a 1-kilopixel image, but it works.

[Sean] has had this project cooking for a while – in fact, the multiplexers he used for the camera came up as a separate project back in 2018. We’re glad to see that he got the rest built, even with the recycled lens he used. One wonders how a 3D-printed lens would work in front of that sensor.

Continue reading “Image Sensor From Discrete Parts Delivers Glorious 1-Kilopixel Images”

Build A DSLR Photo Booth The Easy Way

It’s a well-known fact in capitalist societies that any product or service, if being used in a wedding, instantly triples in cost. Wanting to avoid shelling out big money for a simple photo booth for a friend’s big day, [Lewis] decided to build his own.

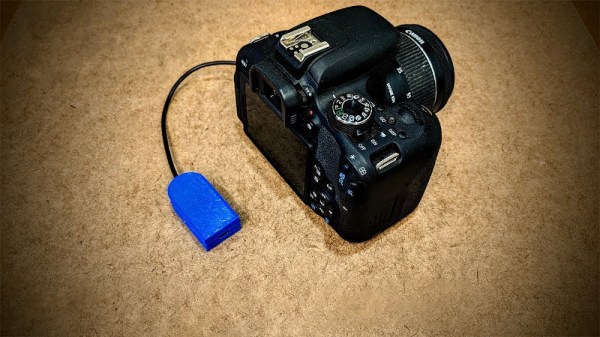
Wanting a quality photo output, a Canon DSLR was selected to perform photographic duties. An Arduino Nano is then pressed into service to run the show. It’s hooked up to a MAX7219 LED matrix which feeds instructions to the willing participants, who activate the system with a giant glowing arcade button. When pressed, the Nano waits ten seconds and triggers the camera shutter, doing so three times. Images are displayed on a screen hooked up to the camera’s USB HDMI port.

It’s a build that keeps things simple. No single-board PCs needed, just a camera, an Arduino, and a monitor for the display. We’re sure the wedding-goers had a great time, and we look forward to seeing what [Lewis] comes up with next. We’ve seen a few of his hacks around here before, too.

Continue reading “Build A DSLR Photo Booth The Easy Way”

Use Blueprint Process To Print On Fabric With Lasers

[Shih Wei Chieh] has built a laser cyanotype printer for fabrics. You know, for art!

How do you get an inkjet head on a shoe or a couch? Most printing processes require a flat surface to print. But hearkening back to the days when a blueprint was a blueprint, a mixture of an iron salt and an acid are mixed and applied to a surface an interesting reaction occurs when the surface is exposed to UV light. The chemicals react to form, of all things, prussian blue. After the reaction occurs simply washing away the remaining chemicals leaves a stable print behind.

[Shih Wei Chieh] uses two galvanometers and a laser to cure the fabric. He uses a slightly newer process which reduces the exposure time required. This lets him print very large pictures, but also on uneven surfaces. As you can see in the video, viewable after the break, the effect is very pretty. There’s a new way to have the coolest pen plotter on the block.

Continue reading “Use Blueprint Process To Print On Fabric With Lasers”

Building A 3D Scanner With A 3D Printer

Using a 3D printer to make high quality parts is a great way to improve the look and appeal of any project. If you want to replicate something exactly, though, you’ll need either a very good set of calipers and a lot of time or a 3D scanner. Using the 3D scanner and the 3D printer go along very well together, especially if you use your 3D printer to build your 3D scanner too.

This project comes to us from [Vojislav] who spent the past two years perfecting this 3D scanner. Using a vast array of 3D printed parts, this build looks professional on every level. It also boasts a Raspberry Pi Zero and a fleet of camera modules, not to mention its own LED lighting. [Vojislav] has provided the printer files and the software needed to run it on the project page. It all runs through command line and python code, but that shouldn’t be a big hurdle.

While there is no video of it in action, it seems like all the parts are there for a solid 3D scanner, provided you have access to a 3D printer that can churn out the parts you’ll need. If you need something larger, there are some other options available as well that really take your photogrammetry skills to the next level.

Alternative Photography Hack Chat

Join us on Wednesday, October 2 at noon Pacific for the Alternative Photography Hack Chat with Pierre-Loup Martin!

It seems like the physics of silicon long ago replaced the chemistry of silver as the primary means of creating photographs, to the point where few of us even have film cameras anymore, and home darkrooms are a relic of the deep past. Nobody doubts that the ability to snap a quick photo or even to create a work of photographic genius with a tiny device that fits in your pocket is a wonder of the world, but still, digital photographs can lack some of the soul of film photography.

Recapturing the look of old school photography is a passion for a relatively small group of dedicated photographers, who ply their craft with equipment and chemistries that haven’t been in widespread use for a hundred years. The tools of this specialty trade are hard to come by commercially, so practitioners of alternate photographic processes are by definition hackers, making current equipment bend to the old ways. Pierre-Loup is one such artist, working with collodion plateshacked large-format cameras, pinholes camera, and chemicals and processes galore –  anything that lets him capture a unique image. His photographs are eerie, with analog imperfections that Photoshop would have a hard time creating.

Join us as Pierre-Loup takes us on a tour through the world of alternative photography. We’ll look at the different chemistries used in alternative photography, the reasons why anyone would want to try it, and the equipment needed to pull it off. Photography was always a hack, until it wasn’t; Pierre-Loup will show us how he’s trying to put some soul back into it.

join-hack-chatOur Hack Chats are live community events in the Hackaday.io Hack Chat group messaging. This week we’ll be sitting down on Wednesday, October 2 at 12:00 PM Pacific time. If time zones have got you down, we have a handy time zone converter.

Click that speech bubble to the right, and you’ll be taken directly to the Hack Chat group on Hackaday.io. You don’t have to wait until Wednesday; join whenever you want and you can see what the community is talking about.

A Teeny Tiny 3D Printed Macro Extension Tube

When you hear the term “extension tube”, you probably think of something fairly long, right? But when [Loudifier] needed an extension tube to do extreme close-ups with a wide-angle lens on a Canon EF-M camera, it needed to be small…really small. The final 3D printed extension provides an adjustable length between 0 and 10 millimeters.

But it’s not just an extension tube, that would be too easy. According to [Loudifier], the ideal extension distance would be somewhere around 3 mm, but unfortunately the mounting bayonet for an EF-M lens is a little over 5 mm. To get around this, the extension tube also adapts to an EF/EF-S lens, which has a shorter mount and allows bringing it in closer than would be physically possible under otherwise.

[Loudifier] says the addition of electrical connections between the camera and the lens (for functions like auto focus) would be ideal, but the logistics of pulling that off are a bit daunting. For now, the most reasonable upgrades on the horizon are the addition of some colored dots on the outside to help align the camera, adapter, and lens. As the STLs and Fusion design file are released under the Creative Commons, perhaps the community will even take on the challenge of adapting it to other lens types.

For the polar opposite of this project, check out the 300 mm long 3D printed extension tube we covered a few weeks back that inspired [Loudifier] to send this project our way.

The Gorgeous Hardware We Can’t Take Our Eyes Away From

High resolution digital cameras are built into half of the devices we own (whether we want them or not), so why is it still so hard to find good pictures of all the incredible projects our readers are working on? In the recently concluded Beautiful Hardware Contest, we challenged you to take your project photography to the next level. Rather than being an afterthought, this time the pictures would take center stage. Ranging from creative images of personal projects to new ways of looking at existing pieces of hardware, the 100+ entries we received for this contest proved that there’s more beauty in a hacker’s parts bin than most of them probably realize.

As always, it was a struggle to narrow down all the fantastic entries to just a handful of winners. But without further adieu, let’s take a look at the photos that we think truly blurred the line between workbench and work of art:

Continue reading “The Gorgeous Hardware We Can’t Take Our Eyes Away From”