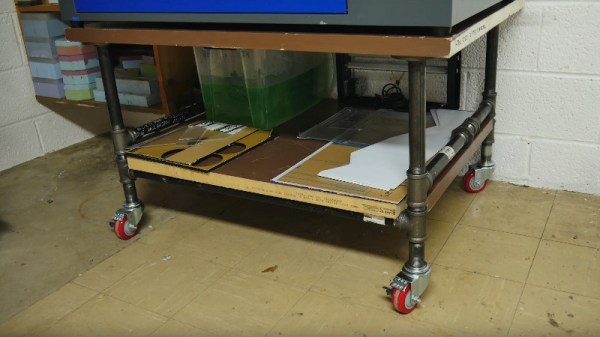
It’s a frequently encountered problem in any workshop; how do you make a bench? And once you’ve made a bench, how do you put it on wheels to move it about? [Eric Strebel] needed a cart for his laser cutter, so he designed his own in an unexpected material: malleable iron pipe.
The attraction of iron pipe is its ready availability and ease of assembly. [Eric] created a sturdy table complete with a worktop made from a solid door in a very short time. T pieces and joiners were used, along with a hefty set of flanges for the tabletop itself. The casters are the expanding stem variety, with a compressed rubber insert expanding to hold them securely in place.
The result as can be seen in the video below is a really neat trolley for the cutter, followed quickly by another workbench. It would be interesting to know more about this material, parameters such as its wall thickness and lateral strength, because in a table without any cross-bracing it becomes important to avoid an untimely collapse.
The most common material for benches seems still to be wood, indicating that for such a technophile community we can be surprisingly conservative in our choices. Sometimes though, benches are made from the most surprising things.
One of the best things about working at the Linux (or similar OS) command line is the use of pipes. In simple terms, a pipe takes the output of one command and sends it to the input of another command. You can do a lot with a pipe, but sometimes it is hard to work out the right order for a set of pipes. A common trick is to attack it incrementally. That is, do one command and get it working with the right options and inputs. Then add another command until that works. Keep adding commands and tweaking until you get the final results.
Pipes can do a lot. They match in with the original Unix philosophy of making each tool do one thing really well. Pipe is really good at allowing Linux commands to talk to each other. If you want to learn all about pipes, have a look at the Linux Info project’s guide. They even talk about why MSDOS pipes were not really pipes at all. (One thing that write up doesn’t touch on is the named pipe. Do a “man fifo” if you want to learn more for now and perhaps that will be the subject of a future Linux Fu.)
This program — called up — continuously runs and reruns your pipeline as you make changes to the pipe. This way, every change you make is instantly reflected in the output. Here’s the video, here’s a quick video which shows off the interactive nature of up.
Installing
The GitHub page assumes you know how to install a go program. I tried doing a build but I didn’t have a few dependencies. Turns out the easy way to do it was to run this line:
go get -u github.com/akavel/up
This put the executable in ~/go/bin — which isn’t on my path. You can, of course, copy or link it to some directory that’s on your path or add that directory to your path. You could also set an alias, for example. Or, like I did in the video, just specify it every time.
Perfect?
This seems like a neat simple tool. What could be better? Well, I was a little sad that you can’t use emacs or vi edit keys on the pipeline, at least not as far as I could tell. This is exactly the kind of thing where you want to back up into the middle and change something. You can use the arrow keys, though, so that’s something. I also wished the scrollable window had a search feature like less.
Otherwise, though, there’s not much to dislike about the little tool. If writing a pipeline is like using a C compiler, up makes it more like writing an interactive Basic program.
It’s depressingly easy to make bad videos, but it only takes a little care to turn that around. After ample lighting and decent audio — and not shooting in portrait — perhaps the biggest improvements come from stabilizing the camera while it’s moving. Giving your viewers motion sickness is bad form, after all, and to smooth out those beauty shots, a camera slider can be a big help.
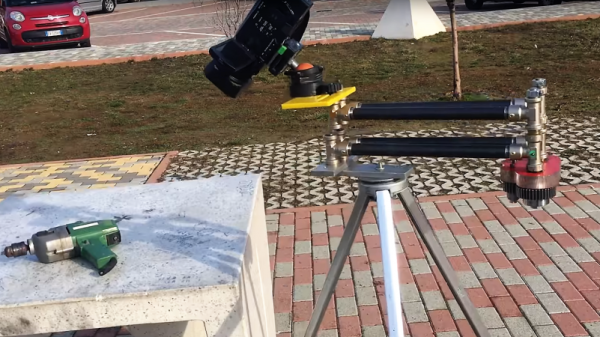
Not all camera sliders are built alike, though, and we must admit to being baffled while first watching [Rulof Maker]’s build of a smooth, synchronized pan and slide camera rig. We just couldn’t figure out how those gears were going to be put to use, but as the video below progresses, it becomes clear that this is an adjustable pantograph rig, and that [Rulof]’s eBay gears are intended to link the two sets of pantograph arms together. The arms are formed from threaded pipe and tee fittings with bearings pressed into them, which is a pretty clever construction technique that seems highly dependent on having the good fortune to find bearings with an interference fit into the threads. But still, [Rulof] makes it work, and with a little epoxy and a fair amount of finagling, he ends up with a complex linkage that yields the desired effects. And bonus points for being able to configure the motion with small adjustments to the camera bracket pivot points.
We saw a similar pantograph slider a few months back. That one was 3D-printed and linked with timing belts, but the principles are the same and the shots from both look great.
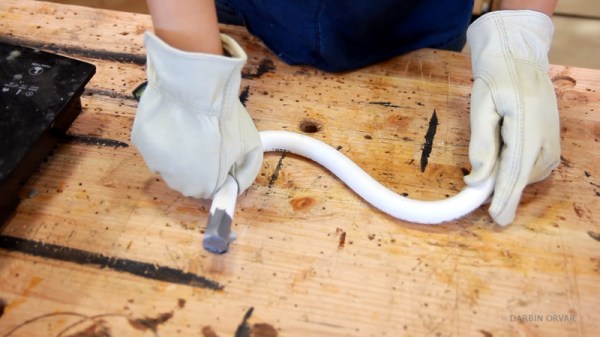
PVC pipe is a valuable material to the backyard hacker. It’s cheap, readily available, and comes in a range of different sizes. However, what do you do if you need to bend it? The typical approach would be to grab a heat gun or blowtorch, warm it up, and go from there. These methods can get messy however, with kinks and melted surfaces spoiling the final result. Now [Linn] has released a video with a method that delivers impressively neat results.
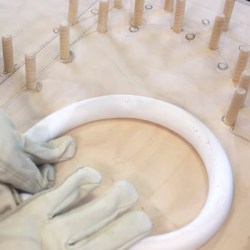
The method is simple, using that classic hacker staple — duct tape. The end of the pipe is taped off, and the pipe filled with sand. With the correct amount measured out, the sand is heated on a cooktop, then poured back into the pipe. After giving the heat some time to soften the plastic, the pipe can then be manipulated into the desired shape.
[Linn] does a great job of explaining the process in a clear and concise manner, and shares tips on how to use a bending jig to guide the final shape. Results are best with smaller pipes that are easier to heat through, but larger sections can be manipulated with patience.
It may be [MakeItExtreme]’s most ambitious build to date. There are a lot of moving parts to this plasma cutter tubing notcher, but it ought to make a fine addition to the shop and open up a lot of fabrication possibilities.
We have to admit to a certain initial bafflement when watching the video below for the first time. We can usually see where [MakeItExtreme]’s builds are going right from the first pieces of stock that get cut, but the large tube with the pressed-in bearing had us scratching our heads. The plan soon became clear — a motorized horizontal rotary table with a hollow quill for the plasma torch leads. There’s a jig for holding the torch itself that can move in and out relative to the table. Cams made of tube sections can be bolted to a fixed platen; a cam follower rides on the cams and moves the torch in and out as the table rotates. This makes the cuts needed to properly fit tubes together — known as fish mouth cuts or saddle cuts. The cams can be removed for straight cuts, and the custom pipe vise can be adjusted to make miter cuts.
All in all a sturdy and versatile build that ought to enable tons of new projects, especially when teamed up with [MakeIt Extreme]’s recent roll bender.
Suspicious drones hovering about your property? Burglars or other ne’er-do-well test subjects giving you trouble? Need to catch a dog that keeps meandering through your workshop? [William Osman] suggests you build yourself a pneumatic net gun that can shoot 20-30 feet to catch them all.
The net gun is built largely out of PVC pipe; the air tank — filled via a tire valve — uses adapter fittings to shrink it down to a 1″ sprinkler valve, with an air gun to act as a trigger. The net launcher is made of four lengths of pipe bent with the use of a heat gun — an Occam’s Razor solution compared to his first attempt — and is coupled to the end, while the net loads in using wooden dowels with washers as weights. It won’t trap any large game, but it will certainly net you some fun.
There are a lot of unusual listings on eBay. If you’re wondering why someone would have a need for shredded cash, or a switchblade comb, or some “unicorn meat” (whatever that is), we’re honestly wondering the same thing. Sometimes, though, a listing that most people would consider bizarre finds its way to the workbench of someone with a little imagination. That was the case when [tinkartank] found three pipe organ pipes on eBay, bought them, and then built his own drivers.
The pipes have pitches of C, D, and F# (which make, as far we can tell, a C add9 flat5 no3 chord). [tinkartank] started by firing up the CNC machine and creating an enclosure to mount the pipes to. He added a church-like embellishment to the front window, and then started working on the controls for the pipes. Each pipe has its own fan, each salvaged from a hot air gun. The three are controlled with an Arduino. [tinkartank] notes that the fan noise is audible over the pipes, but there does seem to be an adequate amount of air going to each pipe.
This project is a good start towards a fully functional organ, provided [tinkartank] gets lucky enough to find the rest of the pipes from the organ. He’s already dreaming about building a full-sized organ of sorts, but in the meantime it might be interesting to use his existing pipes to build something from Myst.