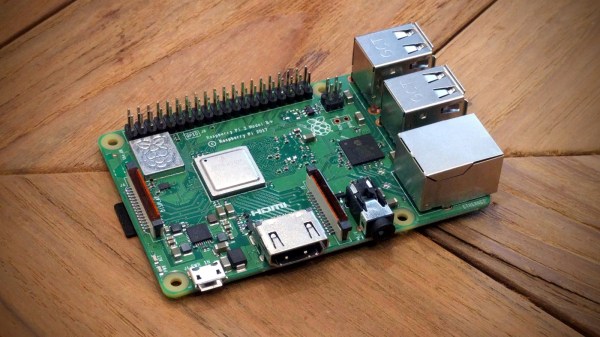
This is an interesting development for media users and machine learning hackers: [doe300] has implemented OpenCL on the Raspberry Pi 3 Model B+called VCFCL That’s big news because the Pi 3+ has a Graphics Processing Unit (GPU) built into the processor that has been generally underutilized. The VideoCore IV GPU is built into the Broadcom BCM2837B0 and is surprisingly capable for a low-power chip. Although this GPU is well documented, it hasn’t been used that widely because you have to code specifically for this class of GPU. Adding in support for a high-level framework like OpenCL will make it much easier to run and adapt existing packages.
raspberry pi1709 Articles
Raspberry Pi Jukebox Hits All The Right Notes
We (and by extension, you) have seen the Raspberry Pi crammed into nearly every piece of gear imaginable. Putting one inside a game console is so popular it’s bordering on a meme, and putting them into old stereos and other pieces of consumer electronics isn’t far behind. It’s always interesting to see how hackers graft the modern Raspberry Pi into the original hardware, but we’ll admit it can get a bit repetitive. So how about somebody scratch building an enclosure for their jukebox project?
 [ComfortablyNumb] took the road less traveled when he created this very nice wooden Raspberry Pi enclosure in the shape of an eighth note. Stained and varnished and with a nice big touch screen in the middle to handle the controls, it’s an attractive and functional piece of home audio gear that we imagine most people would be happy to hang on their wall.
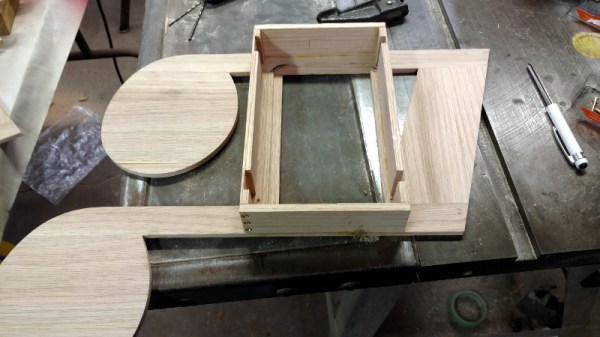
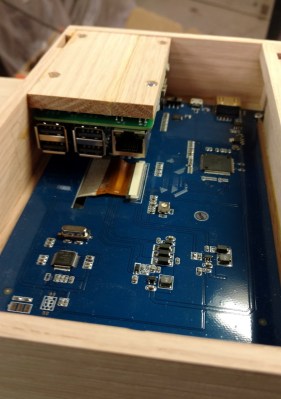
The process starts by printing out the desired shape on a piece of paper to use as guide, and then gluing together strips of wood to create the rough outline. Then the surface was thoroughly sanded to bring all of the strips of wood to the same level, and the final design was cut out. On the back of the note, [ComfortablyNumb] boxed out an area to hold the Waveshare seven-inch touch screen panel and the Raspberry Pi itself.
Having seen so many projects where the Pi is rather unceremoniously shoehorned into another device, it’s refreshing to see the results of a purpose-built enclosure. Since [ComfortablyNumb] was able to build the electronics compartment to his exact dimensions, the final result looks exceptionally clean and professional. Not a drop of hot glue to be seen. It also helps that this build only required the Pi and the display; as the device is meant to be plugged into an existing audio setup, there’s no onboard amplifier. The audiophiles out there might recoil in horror, but adding a dedicated digital to analog converter (DAC) would be easy enough to add if the stock audio on the Pi isn’t good enough for you.
The project is finished off with stain and several coats of varnish to get that deep and rich color. We don’t often find ourselves working with dead trees around these parts, but we’ve got to admit that the final product does look quite handsome. Certainly beats the LEGO cases many of our Pi projects live in.
If you’re looking for more wooden-encased Pi jukeboxes, you might enjoy this somewhat abstract magstripe-based take on the concept. Of course, we’ve also seen our fair share of actual jukeboxes receive a Raspberry infusion over the years.
[via /r/raspberry_pi]
Sly Guy Nabs Pi Spy
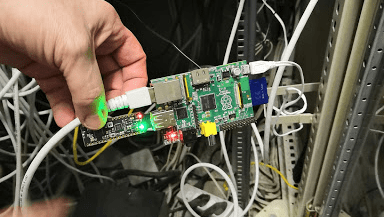
When one of [Christian Haschek’s] co-workers found this Raspberry Pi tucked into their network closet, he figured it was another employee’s experiment – you know how that goes. But, of course, they did the safe thing and unplugged it from the network right away. The ensuing investigation into what it was doing there is a tour de force in digital forensics and a profile of a bungling adversary.
A quick check of everyone with access to that area turned up nothing, so [Christian] shifted focus to the device itself. There were three components: a Raspberry Pi model B, a 16GB SD card, and an odd USB dongle that turned out to be an nRF52832-MDK. The powerful SoC on-board combines a Cortex M4 processor with the RF hardware for BLE, ANT, and other 2.4 GHz communications. In this case, it may have been used for sniffing WiFi or bluetooth packets.
The next step was investigating an image of the SD card, which turned out to be a resin install (now called balena). This is an IoT web service that allows you to collect data from your devices remotely via a secure VPN. Digging deeper, [Christian] found a JSON config file containing a resin username. A little googling provided the address of a nearby person with the same name – but this could just be coincidence. More investigation revealed a copyright notice on some mysterious proprietary software installed on the Pi. The copyright holder? A company part-owned by the same person. Finally, [Christian] looked into a file called resin-wifi-01 and found the SSID that was used to set up the device. Searching this SSID on wigle.net turned up – you guessed it – the same home address found from the username.
But, how did this device get there in the first place? Checking DNS and Radius logs, [Christian] found evidence that an ex-employee with a key may have been in the building when the Pi was first seen on the network. With this evidence in hand, [Christian] turned the issue over to legal, who will now have plenty of ammunition to pursue the case.
If you find the opportunity to do some Linux forensics yourself, or are simply interested in learning more about it, this intro by [Bryan Cockfield] will get you started.
DIY Clapper Is 1980s Style With Raspberry Pi Twist
Home automation isn’t all that new. It is just more evolved. Many years ago, a TV product appeared called the Clapper. If you haven’t heard of it, it was basically a sound-operated AC switch. You plug, say, a lamp into the device and the clapper into the wall and you can then turn the lamp on or off by clapping. If you somehow missed these — and you can still get them, apparently — have a look at the 1984 commercial in the video below. [Ash] decided to forego ordering one on Amazon and instead built her own using a Raspberry Pi.
[Ash’s] prototype uses an LED and could — in theory — drive anything. If you wanted to make a real Clapper replacement you’d need a relay or some other kind of AC switch suitable for the load. The actual clap detection software is from [nikhiljohn10] and simply waits for two loud noises. No fancy machine learning to differentiate between a clap and a cat knocking over a vase. Just a threshold and some timing.
Continue reading “DIY Clapper Is 1980s Style With Raspberry Pi Twist”
Visual Airplane Tracker Runs On Pi
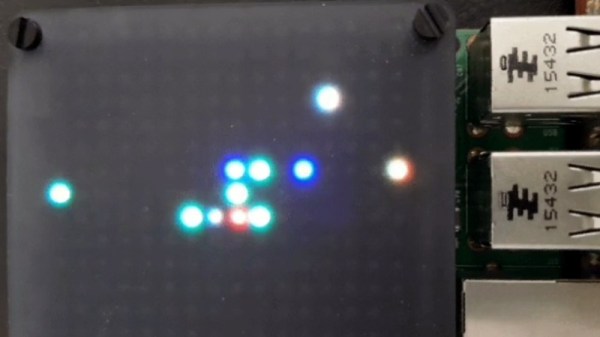
As no doubt is the case with many readers, there is a Raspberry Pi running in the yard near where this is being written that tracks airplanes, listening into the ADS-B radio broadcasts that they send and uploading the data to a sharing service. This device lacks the blinky LEDs that hacking custom states it should have, though. This project from [xy72y5e] would be a great way to deal with that problem: they used a Unicorn hat to create a simple map of local airplanes. This shows the location and track of aircraft in the area on the 8 by 8 RGB LED matrix of the Unicorn Hat.
While the device here maps local planes from their radio fixes, the code that [xy72y5e] published works with the api of ADSBExchange, a site that shares flight data. This means that the map can be easily set to show air traffic at a different location to the device itself. And it wouldn’t be that difficult to alter this to show the locally detected planes, as [xy72y5e] has published the full Python code that creates the map. This would also go well with some of the other airplane tracking hacks that we’ve seen recently, such as the planespotter destination tracker or tracking airplanes by radar reflections…
[Via Reddit]
Is Baking A Raspberry Pi The Recipe For Magic Smoke?
No, Hackaday hasn’t become a baking blog. We’re just here to give you a bit of advice: if [MickMake] ever offers you one of his fresh-baked Pis, proceed with caution. While we have no doubt that there will be some interesting smells wafting out of his kitchen, these aren’t the tasty pies you’re looking for. There’s no delicious home-baked treat when that timer dings, just a handful of Raspberry Pis that have had an exceptionally hard day.
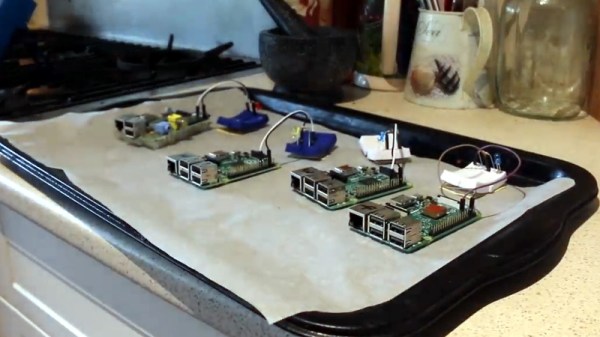
 To properly explain the odd sight of some Raspberry Pis laid out on a cookie sheet, we need to take a step back. [MickMake] originally set out to see how everyone’s favorite Linux SBC would handle the harsh Australian heat, and thought that setting them up on his car’s dashboard would be a suitable torture test. But as luck would have it, a storm rolled in while he was making the video which brought temperatures down to a “cool” 30 C (86 F); basically jacket weather at the bottom of the world. So naturally, he decided to put them in his oven instead.
Placed on an insulating sheet and with a thermocouple between them to get an accurate idea of the temperature they were experiencing, an original Pi, a Pi 2, and a pair of Pi 3s were sent on the ride of their lives. In addition to monitoring them over the network, he also added a “heartbeat” LED to each Pi so he’d be able to tell at a glance if any of them had given up the ghost. As if these poor little Pis didn’t have it bad enough already, [MickMake] decided to take things a step farther and run sysbench on them while they took their trip through Hades.
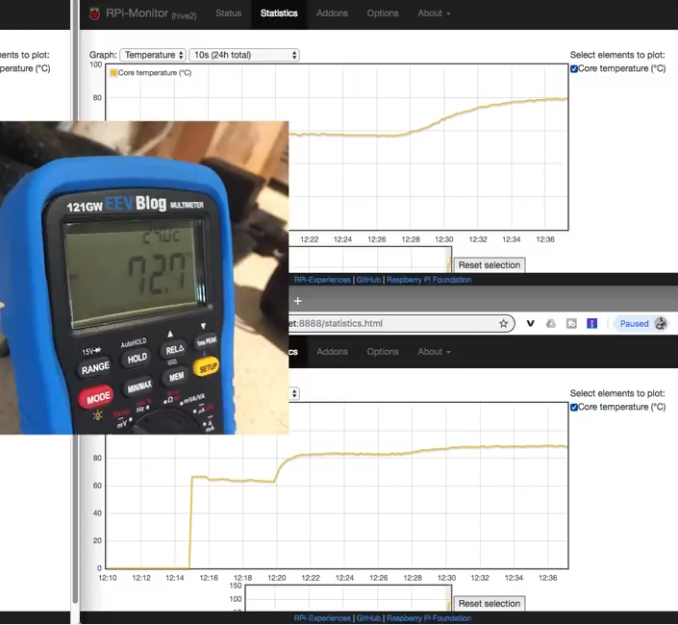
The Pis are actually rated for temperatures up to 85C, and all the participants of the experiment hit that point without any issues. At 87.3 C (~190 F) the original Pi dropped off the network, but its LED was seen bravely blinking on. At 105.7 C (~222 F) it finally breathed its last, followed by the pair of Pi 3s tapping out at 112 C (233 F). The Pi 2 fought on, but it fell right at the 119 C (246 F) mark.
But what about when they cooled off? Somewhat surprisingly, [MickMake] successfully powered all four back up and was unable to find any damage to the Pis, either physically or operationally. Even the SD cards survived, and the Pis popped right back onto the network and were ready for another round of Silicon Chef. Not bad considering they were subjected to temperatures three times higher than the official limit.
Testing electronics in your home oven might seem a bit suspect, and admittedly we’d probably turn down a slice of the next few frozen pizza’s [MickMake] runs through it, but it’s not really so far removed from how proper reliability testing is performed.
Continue reading “Is Baking A Raspberry Pi The Recipe For Magic Smoke?”
2600-Inspired Handheld Brings The Faux Woodgrain
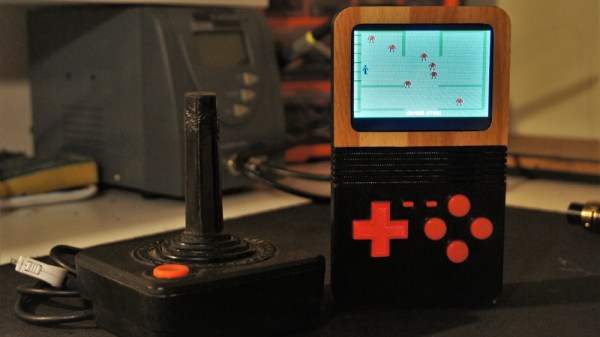
The Atari 2600 is a console from a very different time, when home appliances, furniture, and even automobiles were all covered in fake vinyl woodgrain veneer. Somehow it was the in thing for a decade, and then immediately became tacky overnight. Regardless, if you want to evoke the era, that’s what you do – and that’s exactly what [Christian] did with this handheld RetroPie build.
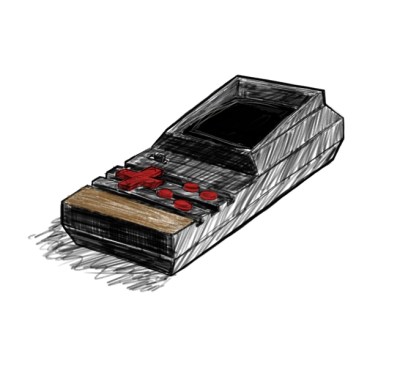
The files to print your own are available on Thingiverse, and [Christian] has provided a basic guide to sourcing similar parts. It’s all common stuff, readily available on eBay or elsewhere.
We love seeing retro throwbacks like this – the tiny Macintosh Plus from the 2017 Superconference is a particular highlight.

