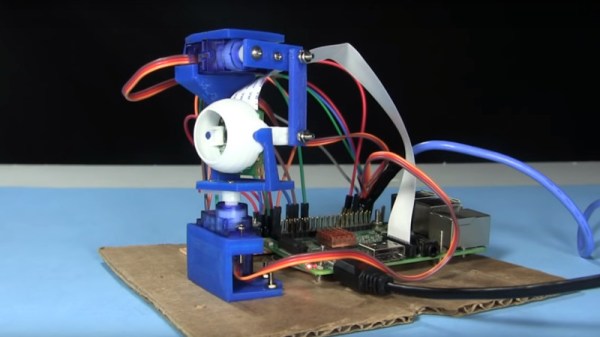
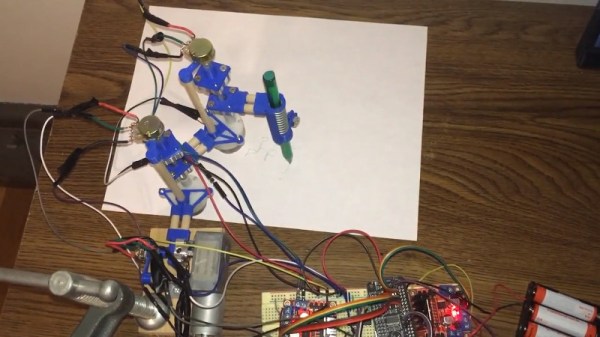
Counting Bees With A Raspberry Pi

Even if keeping bees sounds about as wise to you as keeping velociraptors (we all know how that movie went), we have to acknowledge that they are a worthwhile thing to have around. We don’t personally want them around us of course, but we respect those who are willing to keep a hive on their property for the good of the environment. But as it turns out, there are more challenges to keeping bees than not getting stung: you’ve got to keep track of the things too.

Keeping an accurate record of how many bees are coming and going, and when, is a rather tricky problem. Apparently bees don’t like electromagnetic fields, and will flee if they detect them. So putting electronic measuring devices inside of the hive can be an issue. [Mat Kelcey] decided to try counting his bees with computer vision, and so far the results are very promising.

After some training, a Raspberry Pi with a camera can count how many bees are in a given image to within a few percent of the actual number. Getting an accurate count of his bees allows [Mat] to generate fascinating visualizations about his hive’s activity and health. With real-world threats such as colony collapse disorder, this type of hard data can be crucial.

This is a perfect example of a hack which might not pertain to many of us as-is, but still contains a wealth of information which could be applicable to other projects. [Mat] goes into a fantastic amount of detail about the different approaches he tried, what worked, what didn’t, and where he goes from here. So far the only problem he’s having is with the Raspberry Pi: it’s only able to run at one frame per second due to the computational requirements of identifying the bees. But he’s got some ideas to improve the situation.

As it so happens, we’ve covered a few other methods of counting bees in the past, though this is the first one to be entirely vision based. Interestingly, this method is similar to the project to track squirrels in the garden. Albeit without the automatic gun turret part.

Boozer Tells The Internet How Much You Drink (If You Want It To)

Over the past few years, Reddit user [callingyougoulet] has created Boozer, a DIY beer dispenser that keeps track of how much of your brew you have left in your kegs. Installed in a Keezer (a freezer that contains beer kegs and faucets) [callingyougoulet]’s dispenser uses a Raspberry Pi to keep track of things. A series of flow sensors determine how much liquid has passed through them and, when the drink is poured, can calculate how much you poured and how much you have left.

Starting with a chest freezer, [callingyougoulet] built a nice wooden surround as well as installed a tower on top to hold the faucets. The top of the freezer has nice granite tiles covering it, and some LED accent lighting adds to the end product. However, taking the granite off in order to get at the kegs inside takes some time (about 20 minutes.)

Inside the freezer is the Raspberry Pi and four flow sensors, each one connected to a GPIO port on the Pi. After some calibration, the Python code running on the Pi can calculate a pretty close estimate of the amount of liquid poured. There’s also a temperature sensor in the freezer, so that you can tell how cool your beer is.

If the build had stopped there, it would have been a great project as-is, but [callingyougoulet] added twitter, Slack and MQTT outputs as options, so that a home automation system (or the entire internet) can tell how much and when you’ve been drinking and, more importantly, you can know how much is left in your kegs! There are some very cool keg cooling builds on the site, such as, a kegerator built from the ground up, and a very elegant kegerator built on the cheap check them out for ideas!

Via Reddit.

Magic Mirror Tirelessly Indulges Children’s Curiousity

[pepelepoisson]’s Miroir Magique (“Magic Mirror”) is an interesting take on the smart mirror concept; it’s intended to be a playful, interactive learning tool for kids who are at an age where language and interactivity are deeply interesting to them, but whose ceaseless demands for examples of spelling and writing can be equally exhausting. Inspiration came from his own five-year-old, who can neither read nor write but nevertheless has a bottomless fascination with the writing and spelling of words, phrases, and numbers.

Magic Mirror is listening

The magic is all in the simple interface. Magic Mirror waits for activation (a simple pass of the hand over a sensor) then shows that it is listening. Anything it hears, it then displays on the screen and reads back to the user. From an application perspective it’s fairly simple, but what’s interesting is the use of speech-to-text and text-to-speech functions not as a means to an end, but as an end in themselves. A mirror in more ways than one, it listens and repeats back, while writing out what it hears at the same time. For its intended audience of curious children fascinated by the written and spoken aspects of language, it’s part interactive toy and part learning tool.

Like most smart mirror projects the technological elements are all hidden; the screen is behind a one-way mirror, speakers are out of sight, and the only inputs are a gesture sensor and a microphone embedded into the frame. Thus equipped, the mirror can tirelessly humor even the most demanding of curious children.

[pepelepoisson] explains some of the technical aspects on the project page (English translation link here) and all the code and build details are available (in French) on the project’s GitHub repository. Embedded below is a demonstration of the Magic Mirror, first in French then switching to English.

Continue reading “Magic Mirror Tirelessly Indulges Children’s Curiousity”

This Robot Barfs Comics!

If there’s one thing that’s more fun than a comic, it’s a randomly generated comic. Well, perhaps that’s not true, but Reddit user [cadinb] wrote some software to generate a random comic strip and then built a robot case for it. Push a button on the robot and you’re presented with a randomly generated comic strip from the robot’s mouth.

The software that [cadinb] wrote is in Processing, an open source programming language and “sketchbook” for learning to code if you’re coming from a visual arts background. The Processing code determines how the images are cropped and placed and what kind of background they get. Each image is hand drawn by [cadinb] and has information associated with it so the code knows what the main focus of the image is. Once the panels are created, the final image is passed on to a thermal printer for printing. Everything is controlled from a Python script running on a Raspberry Pi and the code, strip artwork, and case is all available online to check out.

Now that the comic can print, a case is needed for the printer and controls. [cadinb] designed a case in Illustrator after creating a prototype out of foam core. The design was laser cut and then coloured – the main body with fabric dye and the arms stained with coffee!

Now [cadinb] has a robot that can sit on his table at conventions and a fan can press a button and have a randomly generated comic strip printed out before their eyes! We have a neat article about printing a comic on a strand of hair, and one about bringing the Banana Jr. 6000 to life!

Continue reading “This Robot Barfs Comics!”

Raspberry Pi Keeps Cool

In general, heat is the enemy of electronics. [Christopher Barnatt] is serious about defeating that enemy and did some experiments with different cooling solutions for the Raspberry Pi 3. You can see the results in the video below.

A simple test script generated seven temperature readings for each configuration. [Barnatt] used a bare Pi, a cheap stick-on heatsink, and then two different fans over the heatsink. He also rigged up a large heatsink using a copper spacer and combined it with the larger of the two fans.

Continue reading “Raspberry Pi Keeps Cool”

Internet Of Laundry — Let The ESP8266 Watch Your Dirty Drawers Get Clean

When you think of world-changing devices, you usually don’t think of the washing machine. However, making laundry manageable changed not only how we dress but how much time people spent getting their clothes clean. So complaining about how laborious our laundry is today would make someone from the 1800s laugh. Still, we all hate the laundry and [Andrew Dupont], in particular, hates having to check on the machine to see if it is done. So he made Laundry Spy.

How do you sense when the machine — either a washer or a dryer — is done? [Andrew] thought about sensing current but didn’t want to mess with house current. His machines don’t have LED indicators, so using a light sensor wasn’t going to work either. However, an accelerometer can detect vibrations in the machine and most washers and dryers vibrate plenty while they are running.

The four-part build log shows how he took an ESP8266 and made it sense when the washer and dryer were done so it could text his cell phone. He’d already done a similar project with an Adafruit HUZZAH. But he wanted to build in some new ideas and currently likes working with NodeMCU. While he was at it he upgraded the motion sensor to an LIS3DH which was cheaper than the original sensor.

[Andrew] already runs Node – RED on a Raspberry Pi, so incorporating this project with his system was a snap. Of course, you could adapt the approach to lots of other things, as well. The device produces MQTT messages and Node – RED subscribes to them. The Pushover handles the text messaging. Node – RED has a graphical workflow that makes integrating all the pieces very intuitive. Here’s the high-level workflow:

You might wonder why he didn’t just have the ESP8266 talk directly to Pushover. That is possible, of course, but in part 2, [Andrew] enumerates some good reasons for his design. He wants to decouple components in the system for easier future upgrades. And MQTT is simple to publish on the sensor side of things compared to API calls which are handled by the Raspberry Pi for now.

Laundry monitoring isn’t a unique idea and everyone has a slightly different take on it, even some Hackaday authors. If phone notification is too subtle for you, you can always go bigger.

Five Steps To TensorFlow On The Raspberry Pi

If you have about 10 hours to kill, you can use [Edje Electronics’s] instructions to install TensorFlow on a Raspberry Pi 3. In all fairness, the amount of time you’ll have to babysit is about an hour. The rest of the time is spent building things and you don’t need to watch it going. You can see a video on the steps required below.

You need the Pi with at least a 16 GB SD card and a USB drive with at least 1 GB of free space. This not only holds the software, but allows you to create a swap file so the Pi will have enough virtual memory to build everything required.

Continue reading “Five Steps To TensorFlow On The Raspberry Pi”