Rolling Old School With Copy Protection From The 1980s

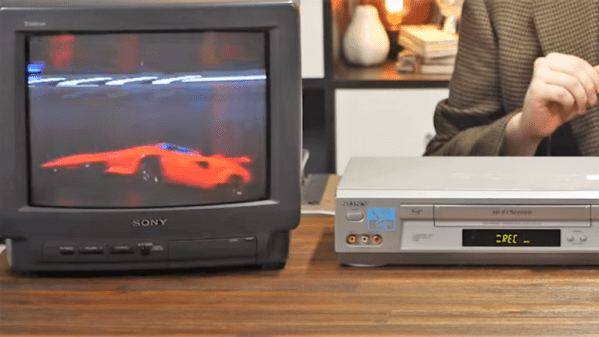
Oh, for the old days when sailing the seas of piracy was as simple as hooking a couple of VCRs together with a dubbing cable. Sure, the video quality degraded with each generation, but it was so bad to start out with that not paying $25 for a copy of “Ghostbusters” was a value proposition. But then came The Man with all his “rules” and “laws” about not stealing, and suddenly tapes weren’t so easy to copy.

If you’ve ever wondered how copy protection worked in pre-digital media, wonder no more. [Technology Connections] has done a nice primer on one of the main copy protection scheme from the VHS days. It was dubbed “Analog Protection System” or “Analog Copy Protection” by Macrovision, the company that developed it. Ironically, Macrovision the company later morphed into the TiVo Corporation.

The idea for Macrovision copy protection was to leverage the difference between what a TV would accept as a valid analog signal and what the VCR could handle. It used the vertical blanking interval (VBI) in the analog signal, the time during which the electron beam returns to the top of the frame. Normally the VBI has signals that the VCR uses to set its recording levels, but Macrovision figured out that sending extra signals in the VBI fooled the VCR’s automatic gain controls into varying the brightness of the recorded scenes. They also messed with the vertical synchronization, and the effect was to make dubbed tapes unwatchable, even by 1985 standards.

Copy protection was pretty effective, and pretty clever given the constraints. With Digital Rights Management, it’s easier to put limits on almost anything — coffee makers, arcade games, and even kitty litter all sport copy protection these days. It almost makes us nostalgic for the 80s.

Continue reading “Rolling Old School With Copy Protection From The 1980s”

Magic Mirror Tirelessly Indulges Children’s Curiousity

[pepelepoisson]’s Miroir Magique (“Magic Mirror”) is an interesting take on the smart mirror concept; it’s intended to be a playful, interactive learning tool for kids who are at an age where language and interactivity are deeply interesting to them, but whose ceaseless demands for examples of spelling and writing can be equally exhausting. Inspiration came from his own five-year-old, who can neither read nor write but nevertheless has a bottomless fascination with the writing and spelling of words, phrases, and numbers.

Magic Mirror is listening

The magic is all in the simple interface. Magic Mirror waits for activation (a simple pass of the hand over a sensor) then shows that it is listening. Anything it hears, it then displays on the screen and reads back to the user. From an application perspective it’s fairly simple, but what’s interesting is the use of speech-to-text and text-to-speech functions not as a means to an end, but as an end in themselves. A mirror in more ways than one, it listens and repeats back, while writing out what it hears at the same time. For its intended audience of curious children fascinated by the written and spoken aspects of language, it’s part interactive toy and part learning tool.

Like most smart mirror projects the technological elements are all hidden; the screen is behind a one-way mirror, speakers are out of sight, and the only inputs are a gesture sensor and a microphone embedded into the frame. Thus equipped, the mirror can tirelessly humor even the most demanding of curious children.

[pepelepoisson] explains some of the technical aspects on the project page (English translation link here) and all the code and build details are available (in French) on the project’s GitHub repository. Embedded below is a demonstration of the Magic Mirror, first in French then switching to English.

Continue reading “Magic Mirror Tirelessly Indulges Children’s Curiousity”

Vintage Organ Donates Parts For Two New Instruments

It’s often hard to know what to do with a classic bit of electronics that’s taking up far too much of the living room for its own good. But when the thing in question is an electronic organ from the 1970s, the answer couldn’t be clearer: dissect it for its good parts and create two new instruments with them.

Judging by [Charlie Williams]’ blog posts on his Viscount Project, he’s been at this since at least 2014. The offending organ, from which the project gets its name, is a Viscount Bahia from the 1970s that had seen better days, apparently none of which included a good dusting. With careful disassembly and documentation, [Charlie] took the organ to bits. The first instrument to come from this was based on the foot pedals. A Teensy and a custom wood case turned it into a custom MIDI controller; hear it in action below. The beats controller from the organ’s keyboard was used for the second instrument. This one appears far more complex, not only for the beautiful, hand-held wooden case he built for it, but because he reused most of the original circuitry. A modern tube amp was added to produce a little distortion and stereo output from the original mono source, with the tip of the tube just peeking above the surface of the instrument. We wish there were a demo video of this one, but we’ll settle for gazing at the craftsmanship.

In a strange bit of timing, [Elliot Williams] (no relation, we assume) just posted an Ask Hackaday piece looking for help with a replacement top-octave generator for another 1970s organ. It’s got a good description of how these organs worked, if you’re in the mood to learn a little more.

Continue reading “Vintage Organ Donates Parts For Two New Instruments”

Atltvhead - wearable interactive TV

RCA TV Gets New Life As Interactive Atltvhead

TVs are usually something you sit and passively watch. Not so for [Nate Damen’s] interactive, wearable TV head project, aka Atltvhead. If you’re walking around Atlanta, Georgia and you see him walking around with a TV where his head should be, introduce yourself! Or sign into Twitch chat and take control of what’s being displayed on the LEDs which he’s attached to the screen. Besides being wearable technology, it’s also meant to be an interactive art piece.

For this, his third version, the TV is a 1960’s RCA Victor Portable Television. You can see some of the TVs he found for previous versions on his hackaday.io page. They’re all truly vintage. He gutted this latest one and attached WS2812 LED strips in a serpentine pattern inside the screen. The LEDs are controlled by his code and the FastLED library running on an ESP8266. Power comes from four NiMH AA-format batteries, giving him 5 V, which he regulates down to 3.3 V. His phone serves as a WiFi hotspot.

[Nate] limits the commands so that only positive things can be displayed, a heart for example. Or you can tweak what’s being displayed by changing the brightness or make the LEDs twinkle. Judging by the crowds we see him attracting in the first video below, we’d say his project was a huge success. In the second video, Nate does a code walkthrough and talks about some of his design decisions.

Continue reading “RCA TV Gets New Life As Interactive Atltvhead”

A Nicely Crafted POV Lightsaber

We need to have a talk. As tough a pill as it is to swallow, we have to face that fact that some of the technology promised to us by Hollywood writers and prop makers just isn’t going to come true. We’re never going to have a flux capacitor, actual hoverboards aren’t a real thing, and nobody is going to have sword fights with laser beams.

But just because we can’t have real versions of these devices doesn’t mean we can’t make our own prop versions with a few value-added features, like this cool persistence-of-vision lightsaber. [Luni], better known around these parts as [Bitluni] and for his eponymous YouTube channel where he performs wizardry like turning an ESP32 into a software-defined television station, shows he’s no slouch at more mechanical builds either. The hardware is standard POV fare, with a gyro to sense the position of the lightsaber hilt and an ESP32 to run the long Neopixel strip in the blade. There’s also a LiPo pack and a biggish DC-DC converter; the latter contributes mightily to the look of the prop, with its large heatsinks that stick out from the end of the aluminum tubing hilt. There’s also a small speaker and amp for the requisite sound effects on startup and shutdown, and the position-sensitive thrumming is a nice touch too. Check out the POV action in the video below.

What’s that you say? You recall seeing a real lightsaber here before? Well, sort of, but that’s pushing things a bit. Or perhaps you’ve got this more destructive version in mind.

Continue reading “A Nicely Crafted POV Lightsaber”

“Watch Dogs” Inspired Hacking Drone Takes Flight

They say that life imitates art, which in modern parlance basically means if you see something cool in a video game, movie or TV show, you might be inclined to try and build your own version. Naturally, such things generally come in the form of simple props, perhaps with the occasional embedded LED or noise making circuit. It’s not as if you can really build a phaser from Star Trek or a phone booth that’s bigger on the inside.

But after seeing the hacking quadcopter featured in the video game Watch Dogs 2, [Glytch] was inspired to start work on a real-world version. It doesn’t look much like the drone from the game, but that was never the point. The idea was to see how practical a small flying penetration testing platform is with current technology, and judging by the final build, we’d say he got his answer.

All the flight electronics are off the shelf quadcopter gear. It’s running on a Betaflight OMNIBUS F4 Pro V2 Flight controller with an M8N GPS mounted in the front and controlling the 2006 2400KV motors with a DYS F20A ESC. Interestingly [Glytch] is experimenting with using LG HG2 lithium-ion cells to power the quad rather than the more traditional lithium-polymer pack, though he does mention there are some issues with the voltage curve between the two battery technologies.

But the real star of the show is the payload: a Hak5 Pineapple Nano. As the Pineapple provides a turn-key penetration testing platform on its own, [Glytch] just needed a way to safely carry it and keep it powered. The custom frame keeps it snug, and the 5 Volt Battery Eliminator Circuit (BEC) on the DYS F20A ESC combined with a female USB port allows powering the Pineapple without having to make any hardware modifications.

We’ve seen quadcopters with digital weaponry before, though not nearly as many as you might think. But as even the toy grade quadcopters become increasingly capable, we imagine the airborne hacking revolution isn’t far away.

Continue reading ““Watch Dogs” Inspired Hacking Drone Takes Flight”

A Li-Ion Booster Pack, Done Right

We’re all used to battery booster packs containing a Li-ion or Li-poly cell and a little inverter circuit, they are a standard part of 21st century daily survival for those moments when smartphone battery lives don’t perform as advertised. But how many of us have considered what goes into them, and further how many of us have sought to produce the best one possible rather than a unit built at the lowest price?

It’s a course [Peter6960] has followed, producing a PCB that sits on the back of an 18650 cell holder. It follows the work of [GreatScott] in particular in its use of the TP4056 charger, MT3608 boost converter, and FS312F protection ICs. Many commercial modules omit any protection circuit, and the FS312F is of particular interest because it has a low 2.9V cut-off voltage that should lengthen the life of the cell. Files for the PCB can be found in a zip file hosted on Google Drive.

You might think that there was nothing new that could be learned about a Li-ion battery booster, but it’s always worth a look at a well-executed piece of work. We noticed he refers to Li-poly cells while using what appears to be a Li-ion 18650 cell. Most likely this is merely an oversight.

There is a lot to know about the characteristics and safety of the lithium-chemistry rechargeables, you may find [Sean Boyce]’s article on the subject to be an interesting read.