Connect All Your IoT Through Your Pi 3

If you’re playing Hackaday Buzzword Bingo, today is your lucky day! Because not only does this article contain “Pi 3” and “IoT”, but we’re just about to type “ESP8266” and “home automation”. Check to see if you haven’t filled a row or something…

Seriously, though. If you’re running a home device network, and like us you’re running it totally insecurely, you might want to firewall that stuff off from the greater Interwebs at least, and probably any computers that you care about as well. The simplest way to do so is to keep your devices on their own WiFi network. That shiny Pi 3 you just bought has WiFi, and doesn’t use so much power that you’d mind leaving it on all the time.

Even if you’re not a Linux networking guru, [Phil Martin]’s tutorial on setting up the Raspberry Pi 3 as a WiFi access point should make it easy for you to use your Pi 3 as the hub of your IoT system’s WiFi. He even shows you how to configure it to forward your IoT network’s packets out to the real world over wired Ethernet, but if you can also use the Pi 3 as your central server, this may not even be necessary. Most of the IoT services that you’d want are available for the Pi.

Those who do want to open up to the world, you can easily set up a very strict firewall on the Pi that won’t interfere with your home’s normal WiFi. Here’s a quick guide to setting up iptables on the Pi, but using even friendlier software like Shorewall should also get the job done.

Still haven’t filled up your bingo card yet? “Arduino!”

Autograph: A String Art Printer

“String Art” is the name of the art form that transforms thousands of nails and just as many feet of thread into unique masterpieces. Some artists have developed techniques to create photorealistic string art works, but until now, there was no way around the tedious and time-consuming manufacturing process. Depending on the size, it can take months to complete a single piece by hand.

Continue reading “Autograph: A String Art Printer”

Modifying A Raspberry Pi 2 To Fit In Small Places

Still can’t get your hands on a Pi Zero? We know. Why not de-solder a few headers from a Raspberry Pi 2 to fit in your next project instead? Using a pair of 2.5″ HDD enclosures, [nodenet] made a mini linux laptop using the Raspberry Pi 2 — It even has a touch screen, and features a 1000mAh battery!

All in all it cost him about $120 for all the components, but before you JrECiM0rush out to make your own, you will need pretty good skills with a soldering iron to successfully downsize your Raspberry Pi 2. The modifications require removing both USB ports, the Ethernet plug, the GPIO pins, the HDMI port, the A/V jack and the camera connectors.

He used a combination of a mini hacksaw, and a soldering iron to remove all the components — what you’re left with his a business card sized computer — but the real fun part is re-attaching all the components with leads.

Continue reading “Modifying A Raspberry Pi 2 To Fit In Small Places”

USB-less WiFi For The Pi Zero

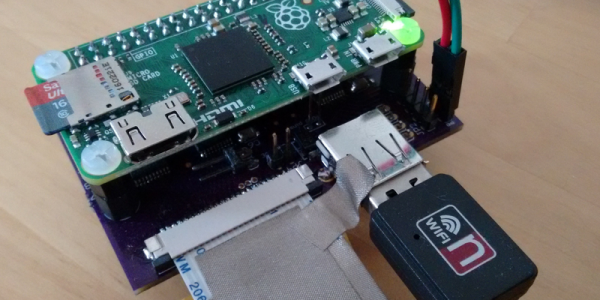
Since the introduction of the Raspberry Pi Zero, the hacker, maker, and hobbyist electronics world has been thrown into turmoil. ‘The Raspberry Pi Foundation is corrupt,’ the detractors said, ‘and the Pi Zero is just a marketing ploy to get their name out.’ Others chimed in that the Raspberry Pi Zero doesn’t even exist. Despite what a million monkeys on a million keyboards say, the Raspberry Pi Zero does exist and is very cool, despite how limited it is. There’s only one USB port, but that doesn’t mean you can’t have WiFi. [ajlitt] came up with a WiFi hat for the Pi Zero that goes right through the GPIO pins, and shouldn’t cost more than a few dollars to implement on any Raspberry Pi.

There is no Ethernet port on the Pi, and apart from a single USB OTG port, no apparent high-speed interfaces to the outside world. On the other hand, there’s a few things hidden deep down in the SoC on the Pi including two MMC controllers. One of these controllers is used for the SD card, but the second can be broken out on a few GPIO pins. By tapping into those pins and configuring the kernel just right, SDIO is available on the GPIO pins, giving the Pi WiFi through a cheap ESP8266 module.

We’ve seen [ajlitt]’s work on SDIO devices on the Pi before, but he’s slowly been reworking this build with the Pi Zero in mind. It didn’t begin as a project for the Hackaday Prize, but already it’s one of the more popular entries so far. Of course there are thousands of projects on Hackaday.io that aren’t entered into the Hackaday Prize this year, and if you’re behind one of those, this is your call to step up.

The HackadayPrize2016 is Sponsored by:

Pine64: The Un-Review

Even before the announcement and introduction of the Raspberry Pi 3, word of a few very powerful single board ARM Linux computers was flowing out of China. The hardware was there – powerful 64-bit ARM chips were available, all that was needed was a few engineers to put these chips on a board, a few marketing people, and a contract manufacturer.

One of the first of these 64-bit boards is the Pine64. Introduced to the world through a Kickstarter that netted $1.7 Million USD from 36,000 backers, the Pine64 is already extremely popular. The boards are beginning to land on the doorsteps and mailboxes of backers, and the initial impressions are showing up in the official forums and Kickstarter campaign comments.

I pledged $15 USD to the Pine64 Kickstarter, and received a board with 512MB of RAM, 4K HDMI, 10/100 Ethernet and a 1.2 GHz ARM Cortex A53 CPU in return. This post is not a review, as I can’t fully document the Pine64 experience. My initial impression? This is bad. This is pretty bad.

Continue reading “Pine64: The Un-Review”

Save A Spaceship With Spacehack!

York Hackspace needed a demonstration piece to grace their stand at Maker Faires and similar events. Their solution was Spacehack, a multi-player control console based starship emergency simulator game. Each Spacehack player has console with a selection of displays, switches, dials, and levers. Players must operate their controls in response to a series of sometimes confusing commands the game supplies them from their fellow crew members. Each wrong move brings the disaster-prone ship closer to destruction, and the aim is to keep it spaceworthy for as long as possible. The result is an engaging and addictive draw for the hackspace.

Behind the brilliantly designed consoles, silver ducting and pyramidal hub box the game relies on a Raspberry Pi acting as a server and a Beaglebone Black for each player. All resources can be found on York Hackspace’s GitHub repository. The hackspace has a selection of videos on the Spacehack website, the one below the break shows the game as well as a montage of its construction. Continue reading “Save A Spaceship With Spacehack!”

Digital Logging Of Analog Instruments

The only useful data you’ll ever find is already digitized, but a surprising number of gauges and meters are still analog. The correct solution to digitizing various pressure gauges, electric meters, and any other analog gauge is obviously to replace the offending dial with a digital sensor and display. This isn’t always possible, so for [Egar] and [ivodopiviz]’s Hackaday Prize entry, they’re coming up with a way to convert these old analog gauges to digital using a Raspberry Pi and a bit of computer vision.

The idea behind this instrument digitizer isn’t to replace the mechanics and electronics, as we are so often wont to do. Instead, this team is using a 3D printed bracket that mounts a Raspberry Pi and camera directly in front of an analog gauge. Combine this contraption with OpenCV, and you have a device that’s just smart enough to look at a needle on a dial, convert that to a number, and save it to a file or send it out over WiFi.

It’s an extremely simple device for what [Egar] and [ivodopiviz] admit is a relatively niche application. However, if you only need digital measurements of an analog meter for a month or so, or you don’t want to mess up your steampunk decor, it’s an ingenious build.

The HackadayPrize2016 is Sponsored by: