CV Based Barking Dog Keeps Home Secure, Doesn’t Need Walking

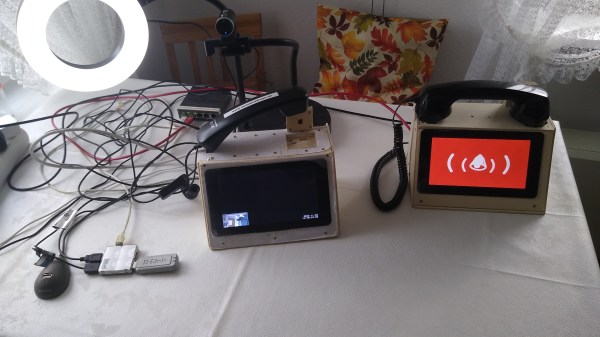
Meet [Tanner]. [Tanner] is a hacker who also appreciates the security of their home while they’re out of town. After doing some research about home security, they found that it doesn’t take much to keep a house from being broken into. It’s true that truly determined burglars might be more difficult to avoid. But, for the opportunistic types who don’t like having their appendages treated like a chew toy or their face on the local news, the steaks are lowered.  All it might take is a security camera or two, or a big barking dog to send them on their way. Rather than running to the local animal shelter, [Tanner] used parts that were already sitting around to create a solution to the problem: A computer vision triggered virtual dog.

Continue reading “CV Based Barking Dog Keeps Home Secure, Doesn’t Need Walking”

Custom Raspberry Pi Case Shows The Whole Workflow

If you are a process junkie and love seeing the end-to-end of how a thing is made and with what tools, then watch [Michael Klements] show off his Raspberry Pi case design. His case has quite a few cool-looking elements to it, and incorporates 3D printing as well as laser-cut and clear bent acrylic for a gorgeous three-quarter view.

[Michael]’s write-up (and accompanying video, embedded below) are partly a review of his Creality 3D printer, and partly a showcase of his Raspberry Pi case design (for which he sells the design files for a small fee on his Etsy store.) But the great part is seeing the creation of every piece that goes into the end product. Not everyone is familiar with the way these tools work, or what they can create, so it’s nice to see attention paid to that side of things.

Both the blog post and the video nicely show off what goes into every part. The video opens with unpacking and setting up the 3D printer (skip ahead to 4:58 if you aren’t interested), followed by printing the parts, laser-cutting the acrylic on a K40 laser cutter, bending the acrylic using a small hand tool, and finally, assembling everything. For the curious, there are also links to the exact parts and equipment he uses.

Like we said, it’s part 3D printer review and part showcase of a design he sells, but it’s great to see each of the parts get created, watch the tools get used, and see the results come together in the final product. And should you wish to go in the opposite direction? A one-piece minimalist case for your Raspberry Pi is only a 3D printer away.

Continue reading “Custom Raspberry Pi Case Shows The Whole Workflow”

Digital “Toy” Camera, Made For Tilt-Shift And Other Analog-Like Experimenting

Like many others, [volzo] loves playing with photography in a playful and experimental way. Oddball lenses, vintage elements, and building from kits is what that world looks like. But that kind of stuff is really the domain of film cameras, or at least it was until [volzo] created his Digital Toy Camera design. The result? A self-built, lomography-friendly digital camera that allows for all kinds of weird and wonderful attachments and photo shenanigans.

3D-printed mounts and magnetic attachment makes swapping parts a breeze.

To make a DIY digital camera that allowed that kind of play, the first problem [volzo] had to solve was deciding on an image sensor. It turns out that sourcing image sensors as an individual is a pretty cumbersome process, and even if successful, one still needs to write a driver and create things from the ground up. So, the guts of [volzo]’s creations use the Raspberry Pi and camera sensor ecosystem and M12 lenses, a decision that allows him to focus on the rest of the camera.

3D printing, a bit of CNC machining, and some clever design yields a “toy” camera: simple, inexpensive, and enabling one to take a playful and experimental approach to photography. The design files are available on GitHub, and there are some neat elements to the design. Magnetic mounts allow for easy swapping of lens assemblies, and a M12 x 0.75 tap cuts perfect threads into 3D-printed pieces for M12 lenses.

Heat-set inserts also provide robust fastening that can hold up to disassembly and re-assembly (and don’t miss that our own [Joshua Vasquez] has shared how best to design for and use heat-set inserts.)

[volzo] has a fantastic video to accompany his project; give it a watch (embedded below, under the page break) and see if you don’t come away with some inspiration of your own.

Continue reading “Digital “Toy” Camera, Made For Tilt-Shift And Other Analog-Like Experimenting”

A Mostly Fair Deal For All With A Raspberry Pi

To be a professional card dealer takes considerable skill, something that not everybody might even have the dexterity to acquire. Fortunately even for the most ham-fisted of dealers there’s a solution, in the form of the Dave-O-matic, [David Stern]’s automated card dealer using a Raspberry Pi 4 with a camera and pattern recognition.

It takes the form of a servo-controlled arm with a sucker on the end, which is able to pick up the cards and present them to the camera. They can then be recognized by value, and pre-determined hands can be dealt or alternatively a random hand. It seems that the predetermined hands aren’t an aid in poker cheating, but a part of the bridge player’s art. You can see it in action in the video below the break.

We like the project, but sadly at this point we must take [Dave] to task, because while tantalizing us with enough detail to get us interested he’s slammed the door in our faces by failing to show us the code. it would be nice to think that the clamor from disaffected Hackaday readers might spur him into throwing us a crumb or two.

It probably won’t surprise you to find that this isn’t the first Raspberry Pi to find itself dealing cards.

Continue reading “A Mostly Fair Deal For All With A Raspberry Pi”

Hackaday Prize 2022: MasterPi Is A Capable Robot With Fancy Wheels

When it comes to building a mobile robot, often maneuverability is more important than outright speed. The MasterPi robot demonstrates this well, using fancy wheels to help it slide and skate in any direction needed.

Four DC gear-motors are fitted to a metal chassis, each one driving a mecanum wheel. These are special wheels with rollers fitted around their circumference at an angle that allows the robot to move in all directions and rotate in various ways depending on how each wheel is driven.

On top of this highly maneuverable chassis is placed a 5-degree-of-freedom robotic arm. The robot also gets a ultrasonic sensor for avoiding objects, as well as a camera for line-following duties. The camera also allows the robot to pick up blocks and identify their color, and it can then sort them into boxes. It’s all powered by a Raspberry Pi, running a bunch of Python code to make everything happen.

It’s a neat project that shows off just how capable a robot can be with some smart design choices and modern computing hardware on board. We’ve seen some other smart block sorters before, too. Continue reading “Hackaday Prize 2022: MasterPi Is A Capable Robot With Fancy Wheels”

PlayStation 2 Gets A Seamless Media Center Makeover

We often see Raspberry Pi boards of various flavors stuck inside vintage computers and the like. [El Gato Guiri] has instead installed one inside a PlayStation 2 Slim, and rather artfully at that. The result is a tidy little media center device.

Pretty tidy, right? All those ports work! Okay, not the memory card slots. But everything else!

The PlayStation 2 was gutted, with a Raspberry Pi 3B installed inside. The original ports on the back, including the USB and Ethernet port, were then wired up to the Pi to make them fully functional. A slot was then cut into the back to allow the HDMI port to be hooked up. The front USB ports work, too, and the optical drive was removed to make way for a 2 TB Toshiba external drive. Adapters are used to make the controller ports work, as well. Finally, a Noctua fan was installed atop the Pi to make sure it never gets too hot.

Whether it’s for watching movies or playing emulated games with the PS2 controllers, the little media center build is sure to do well.

We’ve seen Raspberry Pis stuck in everything from laptops to monitors, as well as plenty of retro hardware too. When a piece of hardware is dead and gone, a Raspberry Pi can be a great way to breathe new life into an attractive old case!

Raspberry Pi Pico W Adds Wireless

News just in from the folks at Raspberry Pi: the newest version of their Pico has WiFi and is called, obviously, the Pico W. We were going to get our hands on a sample unit and kick its tires, but it’s stuck in customs. Boo! So until it shows up, here’s what we can glean from the press releases and documentation.

The Pico is, of course, the Raspberry Pi microcontroller dev board based on their RP2040 microcontroller. This in turn has two Cortex M0+ cores and a good chunk of onboard RAM, which has made it a popular target for MicroPython. They had some extra real estate on the PCB, so they’ve added an Infineon CYW43439 WiFi chip, and voila: Pico W.

As of now, the WiFi is supported in both the C SDK and the pre-baked MicroPython image. It looks trivially easy to get it working, and it’s based on the time-tested lwIP stack, a classic in the embedded world. The CYW43439 is also Bluetooth capable, but there’s no firmware support for that yet, but we wouldn’t be surprised if it showed up soon.

The price? $6 for the whole shooting match. You can view this two ways: a small $2 premium over the old Pico, or a price increase of 50%. How you see things probably depends on your order quantity. Either way, it’s firmly in the ESP32 module price range, so you’ve got some comparison shopping to do if your project needs a microcontroller and WiFi. And in these days of silicon shortages, it’s nice to have a couple of options.