Remote Control Of Clocks Is Easy As Pi

[Fatjedi007] recently acquired three programmable boxing gym-type clocks to help his developmentally disabled clients manage their time. The plan was to have timers of varying lengths fire at preset times throughout the day, with the large displays providing a view from anywhere. Unfortunately, the clocks were not nearly as programmable as he needed them to be.

Since he’d spent enough money already, [Fatjedi007] turned to the power of Raspberry Pi to devise an affordable solution. Each clock gets a Pi Zero W and a simple IR transmit/receive circuit that operates using LIRC. The clocks came with remote controls, so it was just a matter of re-programming them. From LIRC, he wrote some scripts with SEND_ONCE and schedules the timers with a cron job. No need to get out the ladder—he can program all of them from his chair over VNC.

He does have one problem, though, and that’s getting the Zeros to set themselves over NTP with static IPs. Do you have any suggestions? Put ’em in the comments and help a Jedi out.

LIRC is pretty handy for anything you want to control remotely, like a stereo system.

This Is How The Fonz Would Play MP3s

Here at Hackaday, we love to see old hardware treated with respect. A lovingly restored radio or TV that’s part of our electronic heritage is a joy to behold, and while we understand the desire to stream media from a funky retro case, it really grates when someone throws away the original guts to make room for new electronics.

Luckily, this Seeburg jukebox wall remote repurposing is not one of those projects. [Scott M. Baker] seems to have an appreciation for the finer things, and when he scored this classic piece of Mid-Century Americana, he knew just what to do. These remotes were situated around diners and other hangouts in the 50s and 60s and allowed patrons to cue up some music without ever leaving their seats. They were real money makers back in the day, and companies put a lot of effort into making them robust and reliable.

[Scott]’s first video below shows the teardown of this unit; you can practically smell the old transformer and motor windings. His goal in the second video was to use the remote to control his Raspberry Pi jukebox; he wisely decided to leave everything intact and use the original electromechanically generated pulses to make selections. His analysis led to a nicely executed shield for his Pi which conditions the pulses and imitates coin drops; happily, the coin mechanism still works too, so you can still drop a quarter for a tune.

The remote is working well now, but [Scott] still needs to finish up a few odds and ends to bring this one home. But we love the look and the respect for tradition here, as we did when this juke got a Raspberry Pi upgrade to imitate a missing wall remote.

Continue reading “This Is How The Fonz Would Play MP3s”

Taking Halloween To The Next Level With JARVIS

As an avid “Haunt Hacker”, [Steve Koci] knows a thing or two about bringing high-tech to Halloween. Wanting to build a mobile robot that could accompany him to conventions as a demonstration of the sort of animatronic mechanisms and controls he uses, he came up with the idea of JARVIS. The original plan was to make a more traditional robot, but with the addition of an animated skull and some Steampunk-style embellishments, JARVIS is definitely the kind of thing you don’t want to run into on an October night.

Construction of JARVIS started in 2016, after [Steve] saw the Agent 390 tracked robot chassis from ServoCity. With the addition of extra wheels and a custom track, he converted the Agent 390 into a triangular track arrangement which he said he’s had his eye on since “Johnny 5” sported them back in Short Circuit.

There’s a dizzying array of electronics required to make JARVIS move and talk, not least of which is the “Banshee” prop controller. This device is made to simplify the construction of animatronic heads and provides not only organic-looking randomized movement but automatic jaw synchronization. Using a wireless audio connection, [Steve] is able to talk through a speaker mounted on the chest of the robot, while the skull automatically matches its mouth to his speech in real time. Combined with the GoPro in a two-axis gimbal, this allows JARVIS to function as a fairly robust telepresence platform. Much to the delight/horror of those it’s used on.

Getting JARVIS to move requires not only the two beefy motors and a dedicated controller supplied by the Agent 390 platform, but no less than thirteen servos for the head, arms, and grippers. There’s even a linear actuator used to tilt the skull up and down, presumably for terrifying people of various heights and ages. JARVIS even has a pair of Adafruit’s electronic eyes mounted in the skull, as if you thought you would be spared the horror of seeing glowing eyes following you in the dark.

To control all this hardware, [Steve] uses two RC transmitters in conjunction with a smartphone displaying the video feed coming from the GoPro. It takes some serious finger-gymnastics to get JARVIS doing its thing, which [Steve] says he’s still trying to master.

As many projects that have graced these pages can attest to, hackers seem to delight in coming up with new and exciting ways to terrify the young and old alike. Sometimes they can’t even wait until Halloween.

Continue reading “Taking Halloween To The Next Level With JARVIS”

Control A Swarm Of RC Vehicles With ESP8266

Over at RCgroups, user [Cesco] has shared a very interesting project which uses the ever-popular ESP8266 as both a transmitter and receiver for RC vehicles. Interestingly, this code makes use of the ESP-Now protocol, which allows devices to create a mesh network without the overhead of full-blown WiFi. According to the Espressif documentation, this mode is akin to the low-power 2.4GHz communication used in wireless mice and keyboards, and is designed specifically for persistent, peer-to-peer connectivity.

Switching an ESP8266 between being a transmitter or receiver is as easy as commenting out a line in the source code and reflashing the firmware. One transmitter (referred to as the server in the source code) can command eight receiving ESP8266s simultaneously. [Cesco] specifically uses the example of long-range aircraft flying in formation; only coming out of the mesh network when it’s time to manually land each one.

[Cesco] has done experiments using both land and air vehicles. He shows off a very hefty looking tracked rover, as well as a quickly knocked together quadcopter. He warns the quadcopter flies like “a wet sponge”, but it does indeed fly with the ESP’s handling all the over the air communication.

To be clear, you still need a traditional PPM-compatible RC receiver and transmitter pair to use his code. The ESPs are simply handling the over-the-air communication. They aren’t directly responsible for taking user input or running the speed controls, for example.

This isn’t the first time we’ve seen an ESP8266 take the co-pilot’s seat in a quadcopter, but the maniacal excitement we feel when considering the possibility of having our very own swarm of flying robots gives this particular project an interesting twist.

Single Motor, Single Piece 3D Printed Hovercraft

RC hovercrafts offer all sorts of design options which make them interesting projects to explore. There are dual-motor ones where one motor provides lift while the other does the thrust. For steering, the thrust motor can swivel or you can place a rudder behind it. And there are single-motor ones where one motor does all the work. In that case, the airflow from the motor blades has to be redirected to under the hovercraft somehow, while also being vectored out the back and steered.

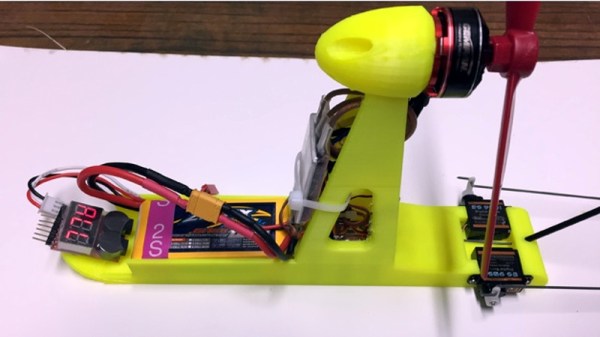
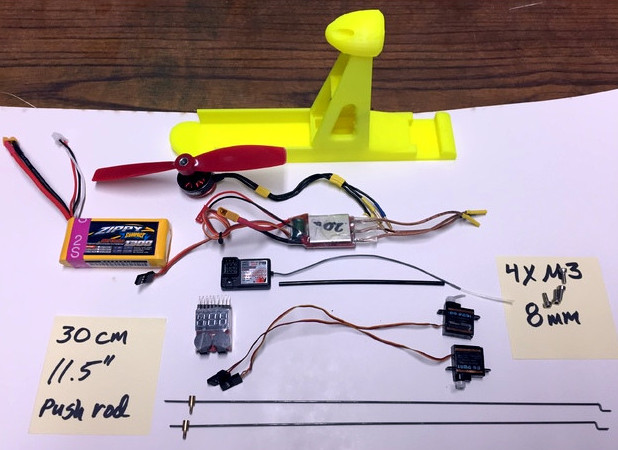
[Tom Stanton] decided to make a single-motor hovercraft using only a single 3D printed piece for the main structure. His goals were to keep it as simple as possible, lightweight, and inexpensive. Some of the air from the blades is directed via ducting printed into the structure to the underside while the remainder flows backward past a steering rudder. He even managed to share a bolt between the rudder’s servo and the motor mount. Another goal was to need no support structure for the printing, though he did get some stringing which he cleaned up easily by blasting them with a heat gun.

From initial testing, he found that it didn’t steer well. He suspected the rudder wasn’t redirecting the air to enough of a sideways angle. The solution he came up with was pretty ingenious, switching to a wedge-shaped rudder. In the video below he gives a the side-by-side comparison of the two rudders which shows a huge difference in the angle at which the air should be redirected, and further testing proved that it now steered great.

Another issue he attacks in the video below was a tendency for the hovercraft to dip to one side. He solves this with some iterative changes to the skirt, but we’ll leave it to you to watch the video for the details. The ease of assembly and the figure-eight drift course he demonstrates at the end shows that he succeeded wonderfully with his design goals.

Continue reading “Single Motor, Single Piece 3D Printed Hovercraft”

TrackRobot Sports Welded Steel, Not Plastic

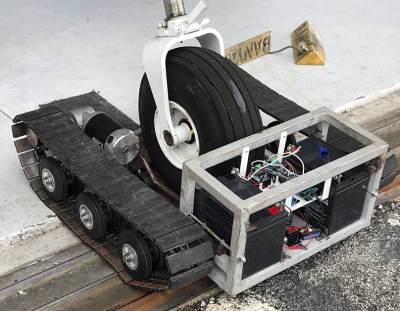
Don’t let the knee-high size of [Hrastovc]’s creation fool you. TrackRobot weighs in at a monstrous 60 kg (130 lbs) of steel, motors, and battery. It sports two 48V motors in a body and frame made from pieces of finger-jointed sheet steel, and can reach speeds of up to four meters per second with a runtime of up to an hour. The project’s link has more pictures as well as DXF files of the pieces used for the body.

Currently TrackRobot is remote-controlled, but one goal is to turn it into a semi-autonomous snow plow. You can see TrackRobot going through its first steps as well as testing out a plow prototype in the videos embedded below.

Continue reading “TrackRobot Sports Welded Steel, Not Plastic”

How To Control The Lights With A TV Remote

In this day and age of the Internet of Things and controlling appliances over the internet, the idea of using an old-fashioned television remote to do anything feels distinctly 2005. That doesn’t mean it’s not a valid way to control the lights at home, and [Atakan] is here to show us how it’s done.

To the experienced electronics maker, this is yesterday’s jam, but [Atakan] goes to great lengths to hash out the whole process from start to finish, from building the circuitry to switch the lights through to the code necessary to make a PIC do your bidding. It’s rare to see such a project done with a non-Arduino platform, but rest assured, such things do exist. There’s even some SPICE simulation thrown in for good measure, if you really want to get down to the nitty-gritty.

Perhaps the only thing missing from the writeup is a primer on how to execute the project safely, given that it’s used with a direct connection to live mains wiring. We’d love to hear in the comments about any changes or modifications that would be necessary to ensure this project doesn’t hurt anyone or burn an apartment complex down. Sometimes you can switch lights without a direct connection to the mains, however – like this project that interfaces mechanically with a standard light switch.