Over on his YouTube channel [Electronic Wizard] has released a video that explains how infrared (IR) remote controllers work: IR Remote Controllers protocol: 101 to advanced.
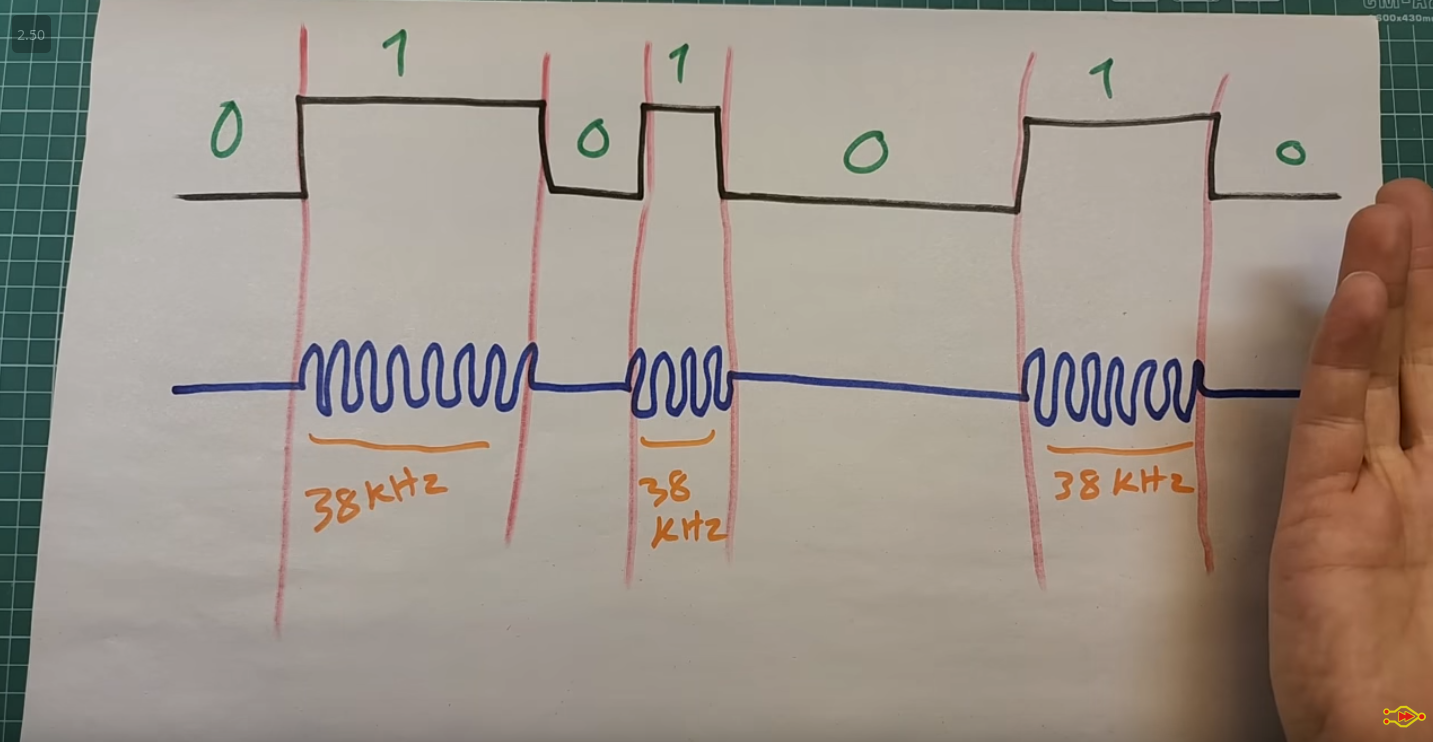 This video covers the NEC family of protocols, which are widely used in typical consumer IR remote control devices, and explains how the 38 kHz carrier wave is used to encode a binary signal. [Electronic Wizard] uses his Rigol DS1102 oscilloscope and a breadboard jig to sniff the signal from an example IR controller.
There is also an honorable mention of the HS0038 integrated-circuit which can interpret the light waves and output a digital signal. Of course if you’re a tough guy you don’t need no stinkin’ integrated-circuit IR receiver implementation because you can build your own!
Before the video concludes there is a brief discussion about how to interpret the binary signal using a combination of long and short pulses. If this looks similar to Morse Code to you that’s because it is similar to Morse Code! But not entirely the same, as you will learn if you watch the video!