Basic geocaching consists of following GPS coordinates to a location, then finding a container which is concealed somewhere nearby. Like any activity, people tend to add their own twists to keep things interesting. [Jangeox] recently posted a video of the OLED Snail 2.0 to show off his most recent work. (This is a refinement of an earlier version, which he describes in a blog post.)
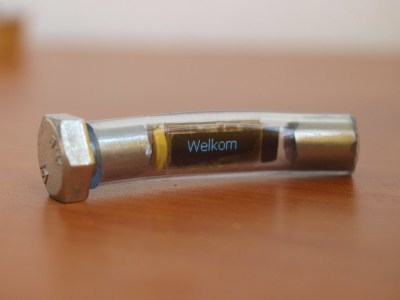
A typical waypoint is an ATTINY85 microcontroller programmed to display an animated message on the OLED, and the message reveals the coordinates to the next waypoint. The waypoint is always cleverly hidden, and in the case of the OLED Snail 2.0 the enclosure is the shell of a large snail containing the electronics encased in resin. This means that the devices have a finite lifespan — the battery sealed inside is all the power the device gets. Fortunately, with the help of a tilt switch the electronics can remain dormant until someone picks it up to start the show. Other waypoints have included a fake plant, and the fake bolt shown here. Video of the OLED Snail 2.0 is embedded below.
Continue reading “Snail Is Actually Cleverly Strange Geocaching Waypoint”


 Some of us have looked at clear resin jewelry casting kits online and started to get ideas. Hackaday’s own [Nava Whiteford] decided to