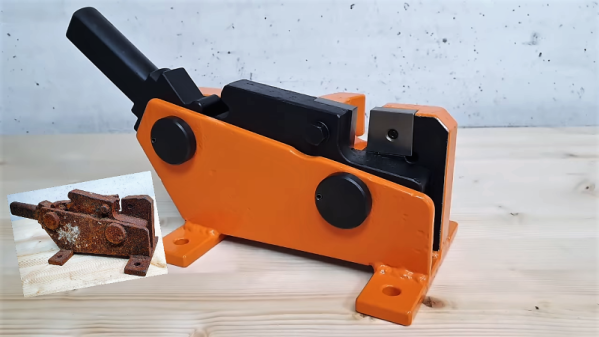
We’ve all probably come across hunks of junk that used to be tools, long-neglected and chemically welded into a useless mass of solid rust. Such items are available for a pittance at the local flea market, or more likely found in an old barn or rotting on a junk pile. They appear to be far beyond salvage, but with the proper application of elbow grease and penetrating lubricants, even a nasty old seized-up rebar cutter can live again.
We honestly almost passed up on the video below when it came across our feed. After all, a rebar cutter is a dead-simple device, and half the fun of restoration videos like those made by [my mechanics] is seeing all the parts removed, restored, and replaced. But it ended up being far more interesting than we expected, and far more challenging too.
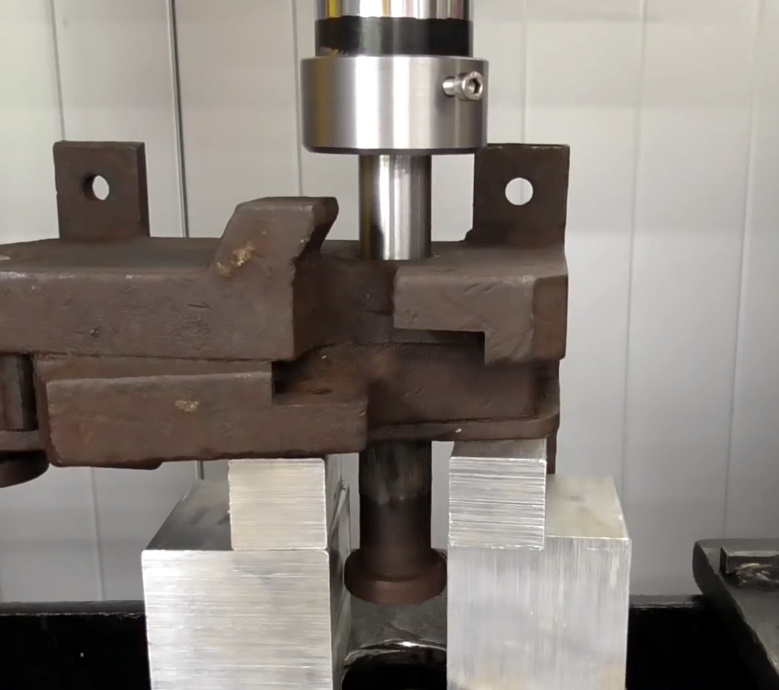 The cutter was missing its original handle and looked for all the world like it had been cast from a solid piece of iron oxide. [my mechanics] was able to get the main pivot bolts free with a combination of leverage, liberal application of penetrating oil, drilling, and the gentle persuasion of a hydraulic press.
These efforts proved destructive to both bolts, so new ones were made on the lathe, as were a number of other parts beyond saving. New cutters were fabricated from tool steel and a new handle was built; before anyone comments on anyone’s welding skills, please read [Jenny]’s recent article on the subject.
The finished product is strikingly dissimilar to the starting lump of oxidized junk, so there’s going to to be some debate in calling this a “restoration” in the classical sense. The end result of a [my mechanics] video is invariably a tool or piece of gear that looks far better than it did the day it was made, and any one of them would get a place of honor on our shelf. That said, he’d probably be swiftly shown the door if he worked at the Smithsonian.
Whatever you want to call these sort of videos, there are tons of them out there. We’ve featured a few examples of the genre, from the loving rehabilitation of classic Matchbox cars to rebuilding an antique saw set. They’re enough to make us start trolling garage sales. Or scrap yards.