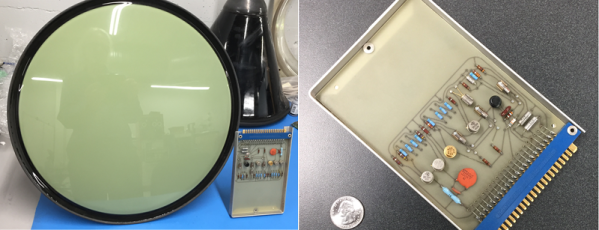
Restoring A 1930s Oscilloscope – Without Supplying Power

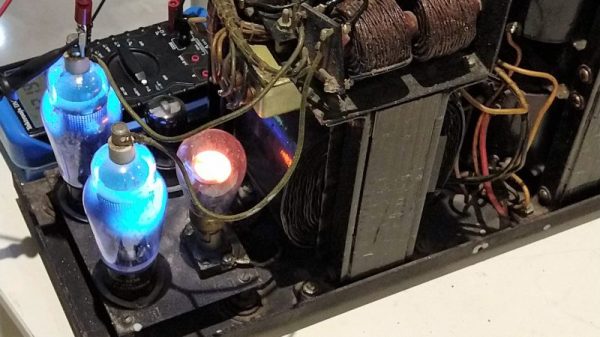
We’ve all done it: after happening across a vintage piece of equipment and bounding to the test bench, eager to see if it works, it gets plugged in, the power switch flipped, but… nothing. [Mr Carlson] explains why this is such a bad idea, and accompanies it with more key knowledge for a successful restoration – this time revitalising a tiny oscilloscope from the 1930s.

Resisting the temptation to immediately power on old equipment is often essential to any hope of seeing it work again. [Mr Carlson] explains why you should ensure any degraded components are fixed or replaced before flipping the switch, knowing that a shorted/leaking capacitor is more than likely to damage other components if power is applied.

The oscilloscope he is restoring is a beautiful find. Originally used by radio operators to monitor the audio they were transmitting, it features a one inch CRT and tube rectification, in a tight form factor.

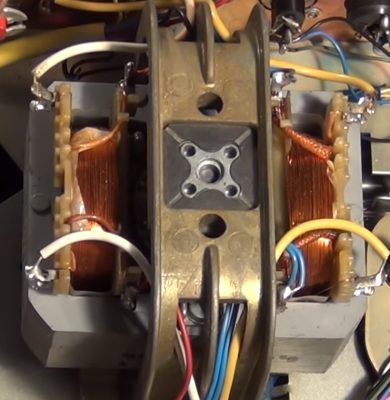
[Mr Carlson] uses his capacitor leakage tester to determine if the main filter capacitor needs replacing – it does, no surprises there – as well as confirming the presence of capacitors potted into the power transformer itself. These have the potential to not only derail the restoration, but also cause a safety hazard through leakage to the chassis.

After replacing and rewiring everything that’s relevant, the scope is hooked up to an isolation transformer, and it works first time – showing the value of a full investigation before power-up. [Mr Carlson] quips, “It really doesn’t have a choice; when it’s on this bench, it’s going to work again”, a quote which will no doubt resonate with Hackaday readers.

[Mr Carlson] promises to integrate the scope into a new piece of test equipment in the near future, but in the meantime you can read about his soldering station VFD mod, or his walk-in AM radio transmitter.

Continue reading “Restoring A 1930s Oscilloscope – Without Supplying Power”

Arduino Revives Junkyard Laser Cutter

Some people have all the luck. [MakerMan] writes in to gloat tell us about a recent trip to the junkyard where he scored a rather serious looking laser cutter. This is no desktop-sized K40 we’re talking about here; it weighs in at just under 800 pounds (350 Kg), and took a crane to deliver the beast to his house. But his luck only took him so far, as closer inspection of the machine revealed it was missing nearly all of its internal components. Still, he had the frame, working motors, and laser optics, which is a lot more than we’ve ever found in the garbage.

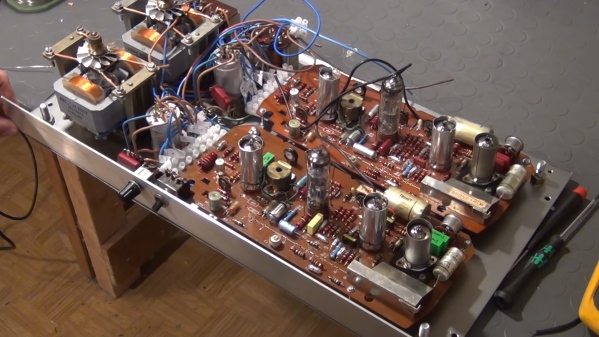
After a whirlwind session with his wire cutters, [MakerMan] stripped away most of the existing wiring and the original control board inside the electronics bay. Replacing the original controller is an Arduino Nano running Grbl, likely giving this revived laser cutter better compatibility with popular open source tools than it had originally. Even though the laser cutter was missing a significant amount of hardware, he did luck out that both the motor drivers were still there (and working) as well as the dual power supplies to run everything.

After a successful motion test, [MakerMan] then goes on to install a new 90W laser tube. Supporting the tube is a rigged up water cooling system using a plastic jug and a cheap bilge pump. He also added an air assist system, complete with side mounted compressor. This pushes air over the laser aperture, helping to keep smoke and debris away from the beam. Finally, a blower was installed in the bottom of the machine with flexible ducting leading outside to vent out the smoke and fumes that are produced when the laser is in operation.

This machine is a considerable upgrade from the previous laser [MakerMan] built, and as impressive as this rebuild is so far, we’re interested in seeing where it goes from here. If you ask us, this thing is begging for an embedded LaserWeb server.

Continue reading “Arduino Revives Junkyard Laser Cutter”

Restoring A Piece Of Musical History

Every restoration project involves various levels of grit, determination, gumption and doggedness. But [Darren Glen]’s restoration of a Jupiter-8 is an absolute labor of love. The Jupiter-8,  launched by Roland in 1981, was their flagship “polyphonic analog subtractive” synthesizer and was used by many legendary acts of the ’80’s. The synthesizer was rugged — built to withstand the rigors of travelling everywhere that the bands took it. More importantly, it could produce a wide range of sounds that came from dedicated and independent controllers. These, plus a host of other desirable features, makes the synth highly coveted even today and the rare ones that surface for sale can be quite expensive.

The back story of how he came in possession of this coveted, albeit non-functioning, piece of history is a good read. But the part that makes us all interested is the meticulous restoration that he is carrying out. There is a lot of useful information that he shares which could be handy if you are planning any restoration project of your own.

When he first turned it on, all he got was an “8” on the display — which seemed like an error code. From then onward, he has been carefully stripping away each part and slowly bringing it back to life. All of the linear slide potentiometers and slide switches were de-soldered, dis-assembled, cleaned of rust and the carbon tracks and contacts cleaned with special spray — making them almost as good as new. The transformer and its mounting brackets received a similar treatment of rust cleaning and fresh paint. All of the other internal metal parts, such as the chassis, were restored in a similar fashion.

White plastic buttons and knobs which were faded, were brightened up by spraying them with a generous dose of hydrogen peroxide hair spray, putting them in Ziploc bags and letting them bake in sunlight for a day. [Darren] was satisfied enough with this process and gave the same treatment to all the other colored buttons too, with good results. The other set of plastic parts – the keyboard keys, were cleaned and polished with a scratch and blemish polish cream, and replacements were ordered out from a specialist supplier for the few that were damaged beyond repair.

But by far the greatest challenge for [Darren] has been resurrecting the top metal cover. It was badly rusted and had to be completely stripped of all paint. Repainting it the right shade was relatively easy, but applying the legend and decals took him to every screen printer in town, none of whom could manage the job. He lucked out by locating a screen printer who specialized in custom automotive work and managed to do a pretty good job with the decal work.

The Z80 microprocessor had lost all its magic smoke, so [Darren] has ordered an original Zilog replacement which will hopefully clear the error he noticed when it was first turned on. He’s slowly working his way through all the issues, and it is still work in progress, but we look forward to when it’s all done and dusted. A fully functional, restored Roland Jupiter-8 — one of the first 500 that were built back in 1981 — resurrected with a lot of TLC.

A big shout out to [Tim Trzepacz] for bringing this project to our notice.

Refinishing A Vintage KitchenAid Mixer

If you know anyone who is serious about baking, there’s a good chance you’ve seen one of these classic KitchenAid mixers. Built to last, they are often handed down generation to generation (or at least, when a newer model comes out), which is how [Kaitlin Flannery] received hers. While it didn’t look too bad considering its long life and the fact it’s been through a motor replacement already, she decided to spruce it up a bit by stripping it down and repainting the whole machine.

Sanding between coats of paint.

These KitchenAid mixers are solidly built and look highly serviceable, it’s refreshing to see a teardown that doesn’t involve any finicky plastic clips or glue. A standard philips screwdriver gets you inside the case, and a couple more screws allow the trim pieces to be removed.

Most of the work [Kaitlin] does is not completely unlike what you might have to do if you wanted to respray the fender of your car. You take off as much extra hardware as your patience allows, put painters tape over everything you want to keep over-spray off of, and then go to town.

To get the smooth metallic finish that you’d expect on a kitchen appliance, [Kaitlin] sands with 220 paper between the coats of hardware store Rust-Oleum. Generally we’d advise switching over to wet sanding at a higher grit once a few coats of paint have been laid down, but we can’t argue with the final results [Kailtin] got. The last coat is followed up with a clear enamel, which will help protect the finish from scratches; very important for a kitchen appliance.

[Kaitlin] does mention that she mistakenly taped off a bit more than she should have, and there’s still some of the original color visible on the rear of the machine. But beyond that, the finish looks fantastic, and with the new motor installed it looks like this machine is going to stick around long enough to get handed down a second time at least.

Hackaday has regrettably made few inroads into the kitchen as of late, one might get the impression that there isn’t a whole lot of overlap between the workbench and the counter-top. If you’ve got something you’ve made or remade sitting in your kitchen as you read this, by all means let us know.

Yellowing: The Plastic Equivalent Of A Sunburn

Your fancy white electronic brick of consumer electronics started off white, but after some time it yellowed and became brittle. This shouldn’t have happened; plastic is supposed to last forever. It turns out that plastic enclosures are vulnerable to the same things as skin, and the effects are similar. When they are stared at by the sun, the damage is done even though it might not be visible to you for quite some time.

Continue reading “Yellowing: The Plastic Equivalent Of A Sunburn”

Restoring A Tonka Truck With Science

The yellow Tonka Truck. Instantly recognizable by any child of decades past, that big metal beast would always make you popular around the sandbox. There were no blinking lights to dazzle, no noises to be heard (unless you count the hard plastic wheels rolling on concrete), even the dumping action is completely manual. But back then, it was a possession to be treasured indeed.

So it’s perhaps no surprise that there is a certain following for these classic trucks today, though like with most other collectibles, a specimen in good condition can be prohibitively expensive. The truck that [PoppaFixIt] found in the trash was certainly not one of those specimens, but with some patience and knowledge of basic chemistry, he was able to bring this vintage toy back to the present.

The first step was to disassemble the truck. Before they switched over to Chinese mass production, these trucks were built with actual rivets. After drilling them out and unfolding the little metal tabs that toy makers loved back in the day, he was able to separate the metal body of the truck from the plastic detail bits. The plastic parts just needed a fresh coat of paint, but the rusted metal body would need a bit more attention.

Remembering a tip he read online, [PoppaFixIt] decided to attempt electrolytic rust removal to get the metal parts back into serviceable condition. A big plastic bin, some washing soda, and old steel window weights for his sacrificial anodes was all the equipment he needed for the electrolysis tank. To power the chemical reaction he used a standard 12 volt car battery and charger wired in parallel; this step is important, as he notes most newer chargers are smart enough not to work unless they see a real battery connected.

After running the setup overnight, the collected rust and junk on the window weights was proof enough the process worked. From there, it was just a fresh coat of yellow paint, a new sticker kit from eBay, and his Tonka truck was ready to face another 30+ years of service.

If you’re looking to restore things larger than a child’s toy, you may be interested in the much larger electrolytic setup we’ve covered previously. Of course if you’re really pressed for time, you could try blasting the rust away with a laser.

Rescuing An Antique Saw Set

Who doesn’t like old tools? Even if they aren’t practical to use for production, plenty of old tools still have a life to offer the hobbyist or home worker.  Some tools might seem a bit too far gone – due to age, rust, or practicality, to use. That’s where [Hand Tool Rescue] comes in. [HTR] finds rusty, dirty old tools, and brings them back to life. Sometimes they’re practical tools, other times, they’re a bit out there. In a recent video, he restored a BeMaCo automatic saw set from the 1940’s. Saw sets are tools which bend each tooth of a saw blade slightly. Typically they are pliers-like devices.

The slight bend of each tooth on the blade widens the saw’s kerf and prevents binding. Typically these tools are pliers-like devices. The BeMaCo set is something else — it pulls the blade through tooth by tooth, while a spring-loaded head pecks away, bending each tooth. It’s something Rube Goldberg would have loved.

[HTR’s] filming style borrows a lot from [Jimmy DiResta], who we’ve covered here before. There are no words, and most of the video is sped up. Even with the fast video, [HTR] probably has many hours of footage to pare down to a 20-minute video.

The restoration begins with tearing the saw set apart. Every nut and bolt is removed. All the parts are cleaned, chemically de-rusted, and wire-wheeled. Even the motor is torn down, cleaned, and wired up. Then come the re-assembly. [HTR] gets every piece back in its proper place. We’re wondering how many times he had to refer to the teardown video to get everything right. Finally, the saw set is complete — ready for another 70 years of work.