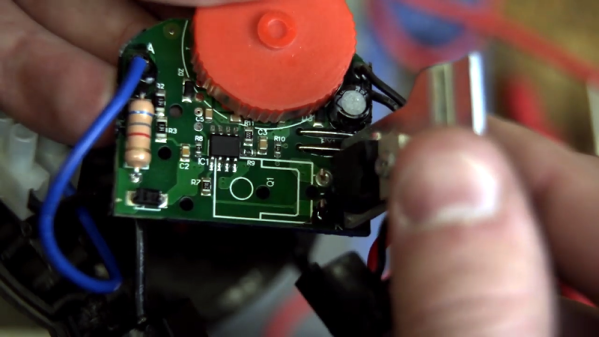
On the face of it, you’d think a small router would be pretty simple. After all, what is it other than a spinning motor? However, that motor has to handle some pretty serious torque depending on what you are routing. [Baki1] had his Carbide3D router die in the middle of a project, so he did what any of us would do. He tore it open.
In addition to showing off its insides, he also tried to figure out what was wrong with it. It looks like a blown triac was the culprit, and we assume that part 2 will be the repair and how that actually worked out.
Coming straight to you from the “Department of Redundant Redundancies” comes this clever hack that turns a Switch into a switch. More specifically, a network switch. Not even a half bad one either, judging by the speed tests [Cynthia Revström] performed after setting it all up. We wouldn’t advise you dump your existing network gear in favor of a repurposed game system, but perhaps in a pinch…
Despite what you might be thinking, there’s no hardware modifications at work here. This is a fully functional Nintendo Switch that’s just had two USB to Ethernet adapters plugged into it. The secret ingredient is the addition of some Penguin Power, up and running on Nintendo’s latest and greatest thanks to a project called switchroot.
With Linux running on the system, all [Cynthia] had to do was make sure that the USB to Ethernet adapters were supported, and fiddle around with the brctl and ip commands to configure a bridge between the interfaces to get the packets moving. Putting the Switch between the main network and a test computer showed it had a throughput of just over 90 Mbps, which is about all that could be expected from the USB-connected network interfaces.
From here it wouldn’t have taken much more effort to get the system working as a wireless router and providing services like DHCP and NAT to clients. But since Nintendo didn’t see fit to call it the Router, that would’ve offered minimal meme value. There’s always next generation.
It’s one of the rituals of our age, rebooting the family router when the bandwidth falters. Flip the power, and after half a minute or so your YouTube video starts up again. Consumer-grade router hardware is not the most reliable computing equipment you will own, as [Nick Sayer] found out when the router at his vacation home wasn’t reliable enough to support his remote monitoring equipment. His solution is an auto-reboot device, that power-cycles the offending device on command.
An obvious method might be to switch the mains supply, but instead he’s taken the simpler option of switching the DC from the router’s wall wart power supply with a cunning arrangement of three MOSFETs to keep the router defaulting to on under all conditions except when it is commanded to power down by the ATtiny microcontroller overseeing it. This chip provides extra fail-safe and debouncing functions to ensure no accidental rebooting.
Driving the circuit is a Raspberry Pi that handles the house monitoring, on which a Python script checks for Internet access and asks for a reboot if there is none. For extra safety it requires access to be down for a sustained period before doing so in case of a router firmware upgrade.
This isn’t the first router rebooter, for a mains-switching ESP8266 take a look at this one.
The TP-Link TL-WR841N isn’t a particularly impressive piece of hardware, but since it works decently well and sells for under $20 USD, it’s one of the most popular consumer routers on Amazon. Now, thanks to [TrendyTofu] of the Zero Day Initiative, we now have a concise step-by-step guide on how to hack your way into the newer versions of the hardware and take full control over this bargain WiFi device. This work was initially done to help test out reported vulnerabilities in the router’s firmware, but we’re sure the readers of Hackaday can come up with all sorts of potential uses for this information.
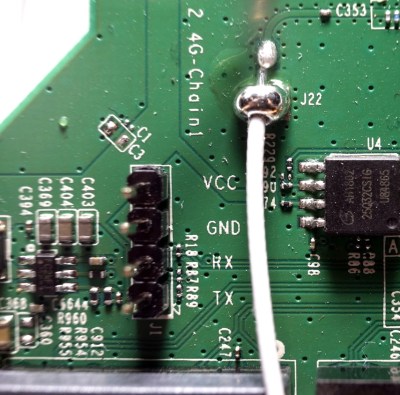
TP-Link helpfully labeled the UART pins
The story starts, as so many before it have, with a serial port. Finding the UART pads on the PCB and wiring up a level shifter was no problem, but [TrendyTofu] found it was only working one-way. Some troubleshooting and an oscilloscope later, the culprit was found to be a 1kΩ pull down resistor connected to the RX line that was keeping the voltage from peaking high enough to be recognized.
Once two-way communication was established, proper poking around inside the router’s Linux operating system could begin. It wasn’t a huge surprise to find the kernel was ancient (version 2.6.36, from 2010) and that the system utilities had been stripped to the absolute bare minimum to save space. Replacing the firmware entirely would of course be ideal, but unfortunately OpenWRT has dropped support for the newer hardware revisions of the TL-WR841N.
To teach this barebones build of Linux some new tricks, [TrendyTofu] used the mount command to find a partition on the system that actually had write-access, and used that to stash a pre-compiled build of BusyBox for MIPS. With a more complete set of tools, the real fun could begin: using GDB to debug TP-Link’s binaries and look for chinks in the armor. But feel free to insert your own brand of mayhem here.
Large machine tools are often built to last a very long time, so it is not uncommon to find a lathe made in the 19th century still providing faithful service. The fundamental job of a lathe has not changed significantly in the intervening years, even though a modern lathe will have more features than its hundred-year-old equivalent.
This is not the case for CNC machine tools. When computer numerical control was wedded with old iron machine tools, the control hardware was doomed to quickly become antique or vintage. From the user interfaces to the control circuitry, in the world of electronics new features quickly become obsolete. [Evan] has a ShopBot CNC wood router from the mid 1990s that he describes as an antique, and his tale of its restoration is both a fascinating look at the changes in small-scale CNC control over two decades as well as something of a primer for anyone considering a similar upgrade.
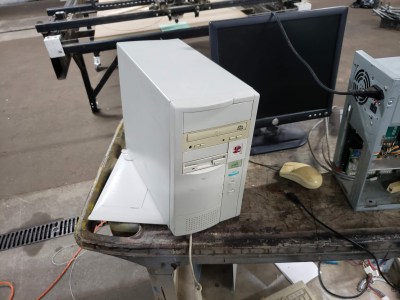
The controller is a pair of beige-box PC cases that scream “I love the 90’s!”. One contains a socket-7 PC running Windows 95, and the other houses the ShopBot controller; an 80c32 dev board with ShopBot firmware, coupled to a set of motor controller boards, which unlike today’s controllers expect raw quadrature inputs. His aim was to replace the vintage hardware with a modern alternative. An Arduino Mega running grbl to talks to the ShopBot controllers by way of a small piece of electronics to condition quadrature data from the step and direction lines it provided. The result may not be as good as a router from 2019, but it did save this aging tool from retirement.
Whether it’s wood, metal, plastic, or otherwise, when it comes to obtaining materials for your builds, you have two choices: buy new stock, or scrounge what you can. Fresh virgin materials are often easier to work with, but it’s satisfying to get useful stock from unexpected sources.
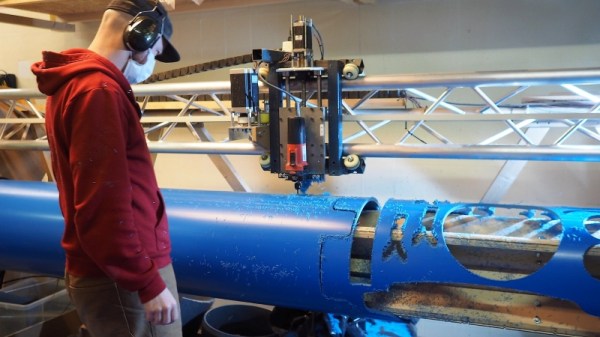
This CNC router for PVC pipe is a great example of harvesting materials from an unusual source. [Christophe Machet] undertook his “Pipeline Project” specifically to explore what can be made from large-diameter PVC pipe, of the type commonly used for sewers and other drains. It’s basically a standard – albeit large-format – three-axis CNC router with one axis wrapped into a cylinder. The pipe is slipped around a sacrificial mandrel and loaded into the machine, where it rotates under what looks like a piece of truss from an antenna tower. The spindle seems a bit small, but it obviously gets the job done; luckily the truss has the strength and stiffness to carry a much bigger spindle if that becomes necessary in the future.
The video below shows the machine carving up parts for some lovely chairs. [Christophe] tells us that some manual post-forming with a heat gun is required for features like the arms of the chairs, but we could see automating that step too. We like the look of the pieces that come off this machine, and how [Christophe] saw a way to adapt one axis for cylindrical work. He submitted this project for the 2019 Hackaday Prize; have you submitted your entry yet?
We’ve seen plenty of plywood 3D printers before; after all, many early hobbyist machines were made from laser-cut plywood. But this plywood 3D-printer isn’t made from plywood – it prints plywood. Well, sort of.
Yes, we know – that’s not plywood the printer is using, but rather particleboard, the same material that fills the flatpack warehouse of every IKEA store. And calling it a printer is a bit of a stretch, too. This creation, by [Shane Whigton] and his Formlabs Hackathon team, is more of a hybrid additive-subtractive CNC machine. A gantry-mounted router carves each layer of the print from a fresh square of material – which could just as easily be plywood as particleboard. Once a layer is cut, the gantry applies glue to it, puts a fresh sheet of material on top, and clamps it down tight. The router then carves the next layer, and so on up the stack. The layer height is limited to the thickness of the material – a nominal 3/4″ (19 mm) in this case – and there’s a remarkable amount of waste, but that’s not really the point. Check out the printer in action and the resulting giant Benchy in the video below.